Step 2. Access Composer Configuration
Access your Composer authentication keys from your weltpixel.com account. Log in to weltpixel.com, navigate to
My Account > Downloadable Products, and copy your Composer User
Name and Composer Access Key.
Step 3. Configure Repository
Add the WeltPixel repository to your Composer configuration. Replace your-id and
your-token with your actual Composer User Name and Access Key:
composer config repos.weltpixel composer https://repo.weltpixel.com/
composer config http-basic.repo.weltpixel your-id your-token
Step 4. Install via Composer
Run the following command in your Magento root directory to install the Pearl Theme. Choose the edition
that matches your license:
For Professional Edition:
composer require weltpixel/m2-theme-frontend-weltpixel
For Essential Edition:
composer require weltpixel/m2-theme-frontend-weltpixel-essential
Custom Pearl Theme (required for both editions):
Note: If you're migrating from Manual SSH Installation and have customizations added
to this Child Theme, skip this step.
composer require weltpixel/m2-theme-frontend-weltpixel-custom
Step 5. Complete Installation
Run the following commands to complete the setup:
php bin/magento setup:upgrade
php bin/magento setup:di:compile
php bin/magento setup:static-content:deploy -f
php bin/magento cache:flush
Step 6. Add Sample Pictures (optional)
If Pearl Theme sample data installation is required, download the Pearl
Sample Images from GitHub. Unzip and upload the content to your Magento root installation. The
file structure "pub/media/wysiwyg" and "pub/media/weltpixel" is
already created - just copy and paste the 'pub' directory to your Magento root.
Note: Make sure to merge the files with the 'pub' folder and not overwrite it.
Step 7. Theme Layout Pre-Configuration via SSH
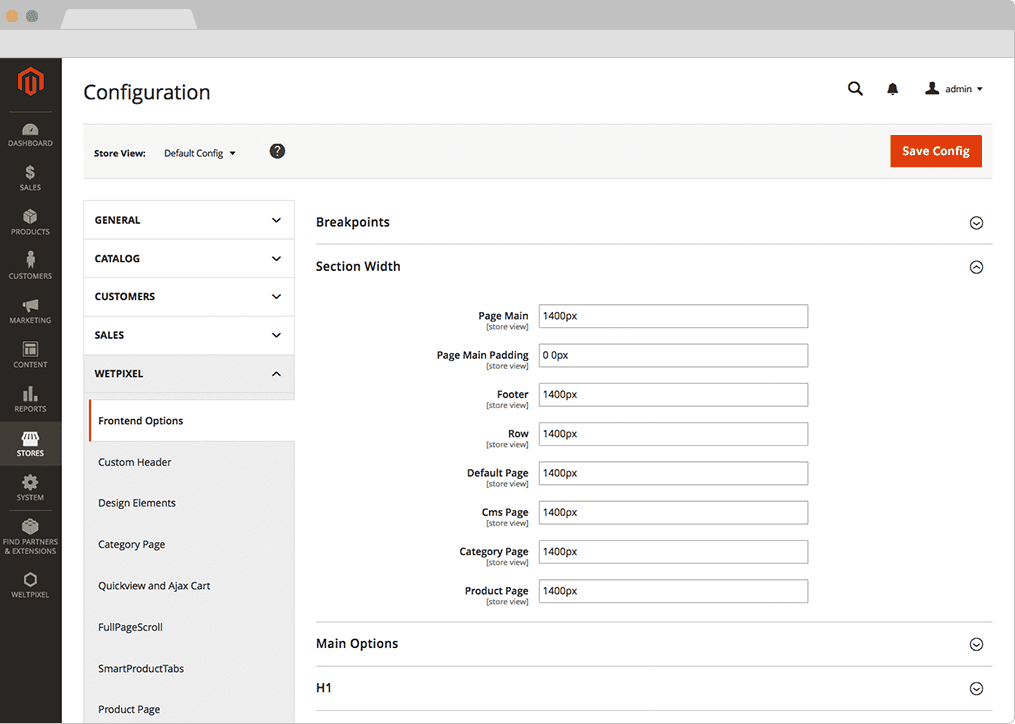
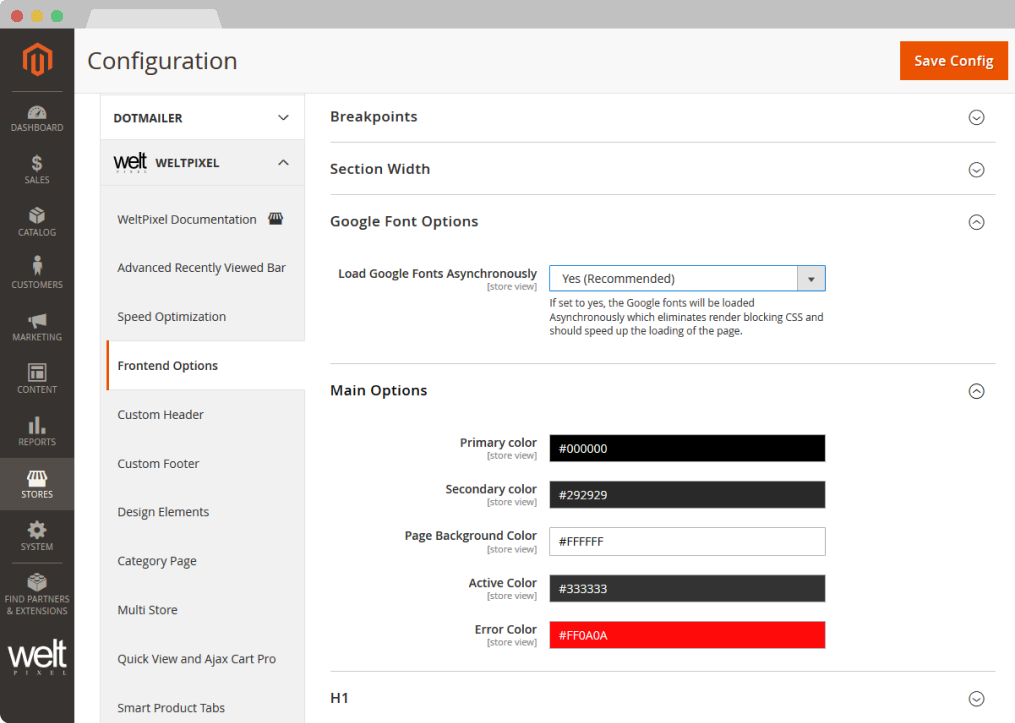
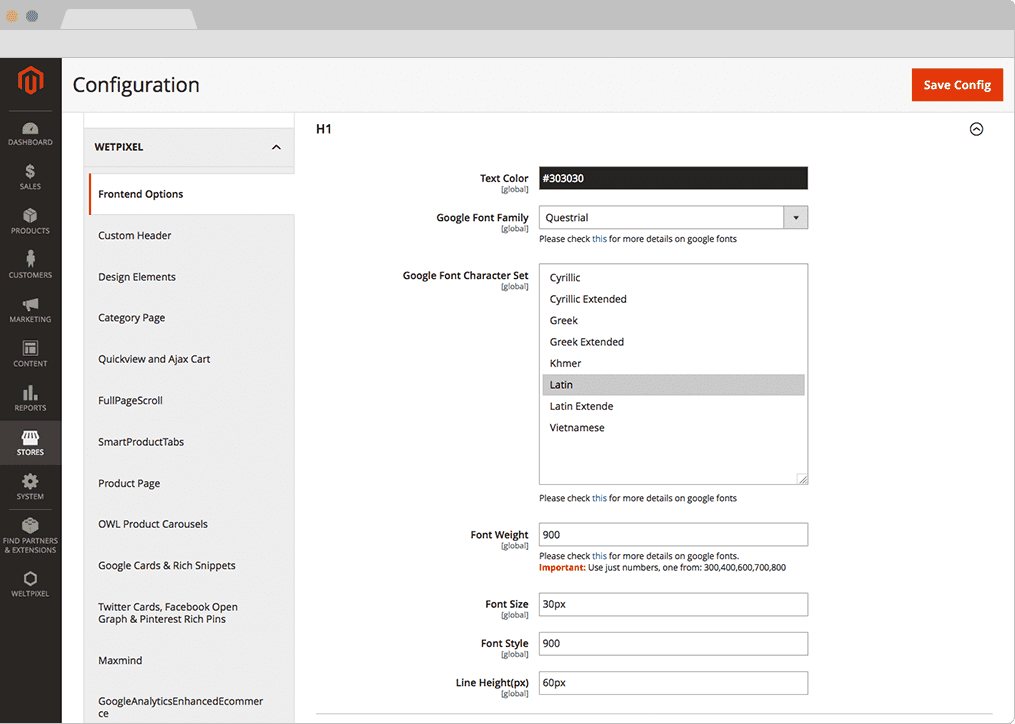
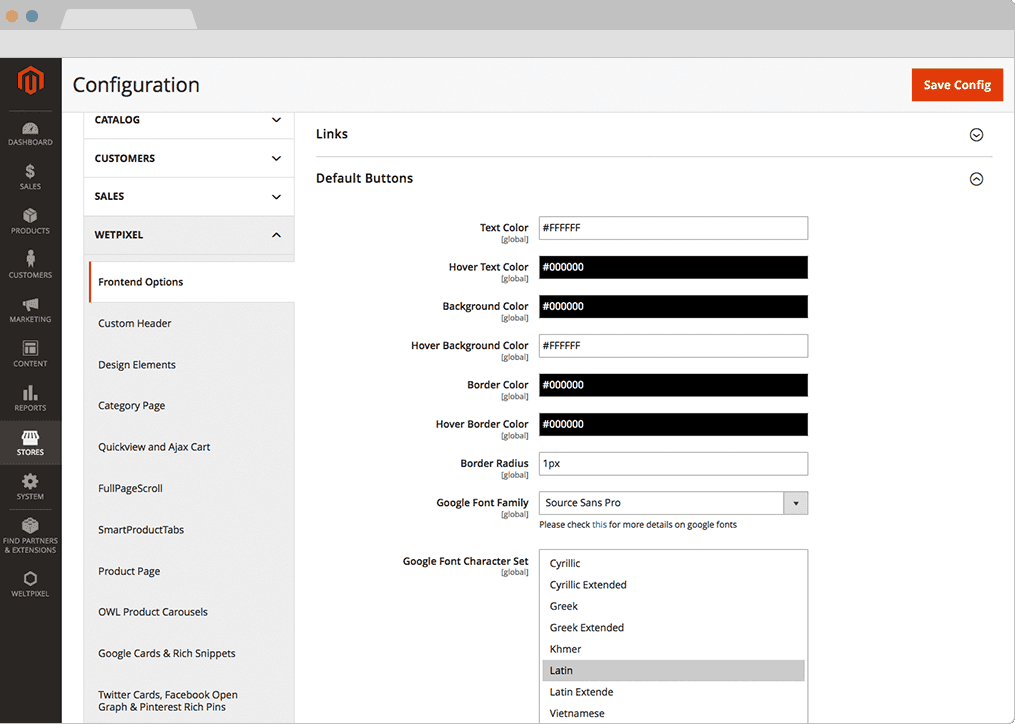
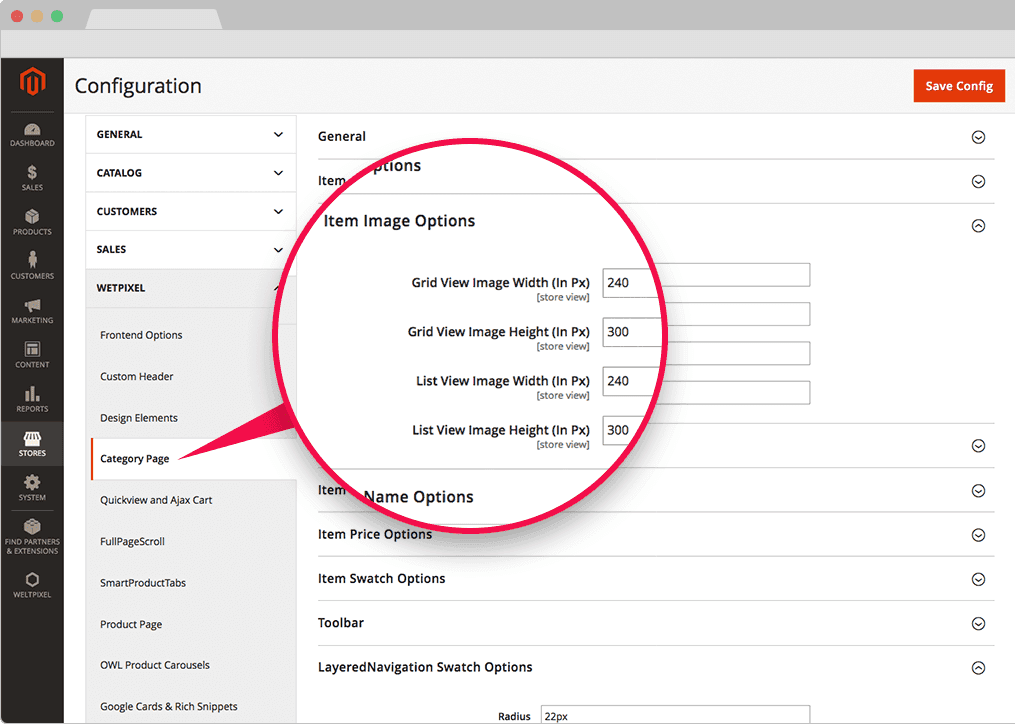
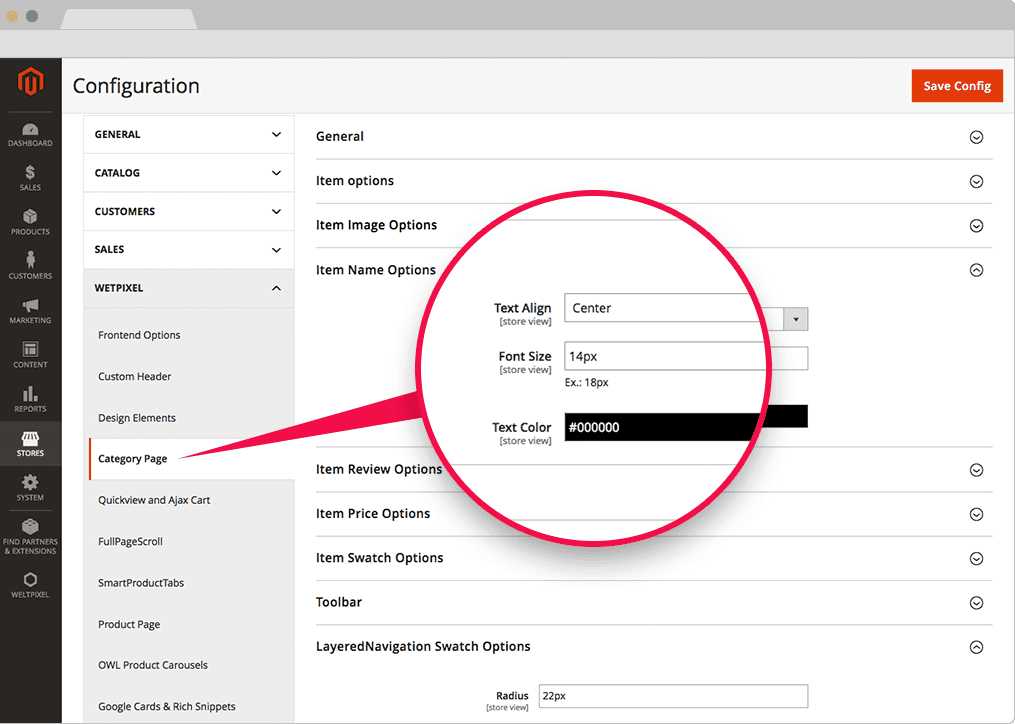
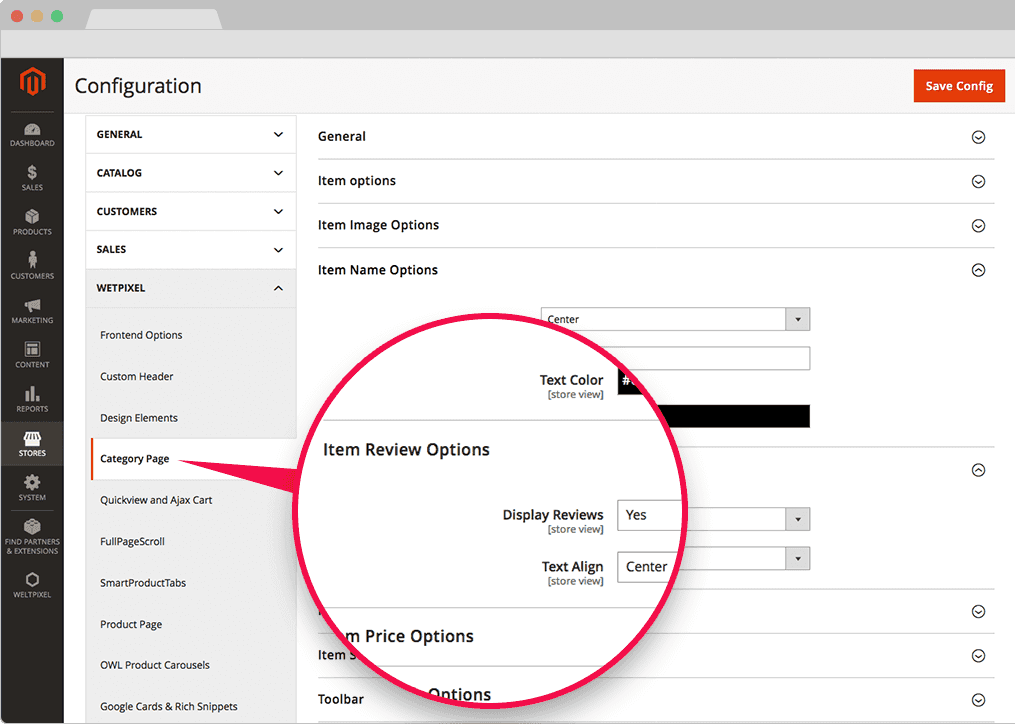
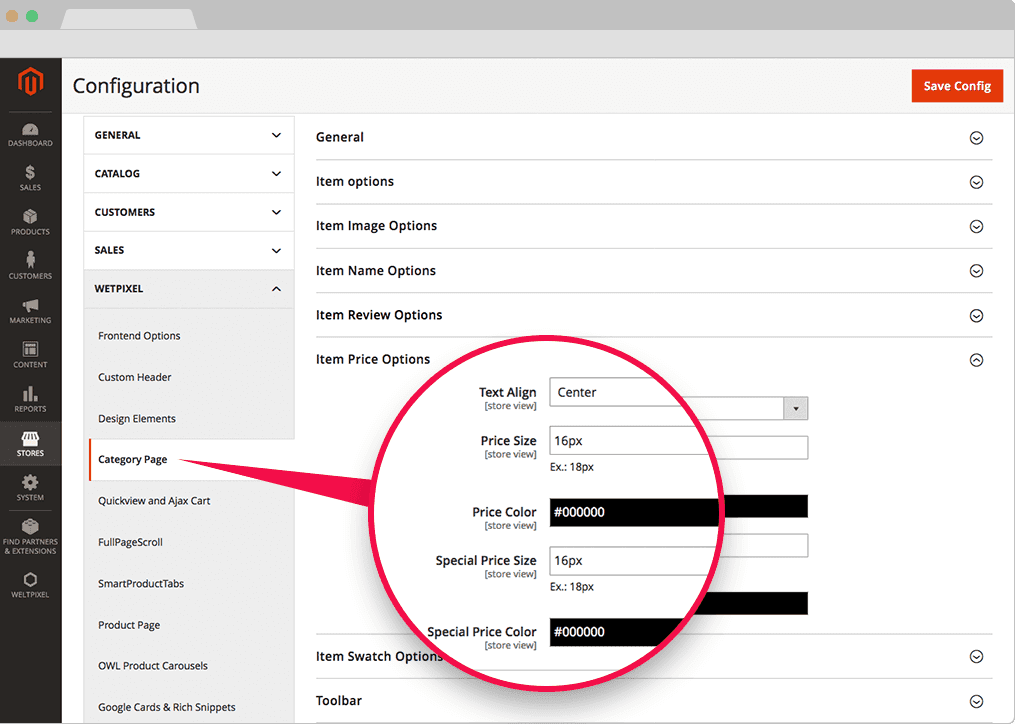
Page layout configuration can also be done from Magento Admin. If you want to customize the
theme using Pearl Theme admin options, skip to Step 8.
Some users may prefer using SSH import settings to pre-configure pages layout. Visit Pearl Demo Store and choose the layout you like
for each page type. Available options:
- [--homePage[="..."]] = v1, v2, v3, v4, v5, v6, v7, v8, v9, v10, v11, v12, v14, v15
- [--header[="..."]] = v1, v2, v3, v4
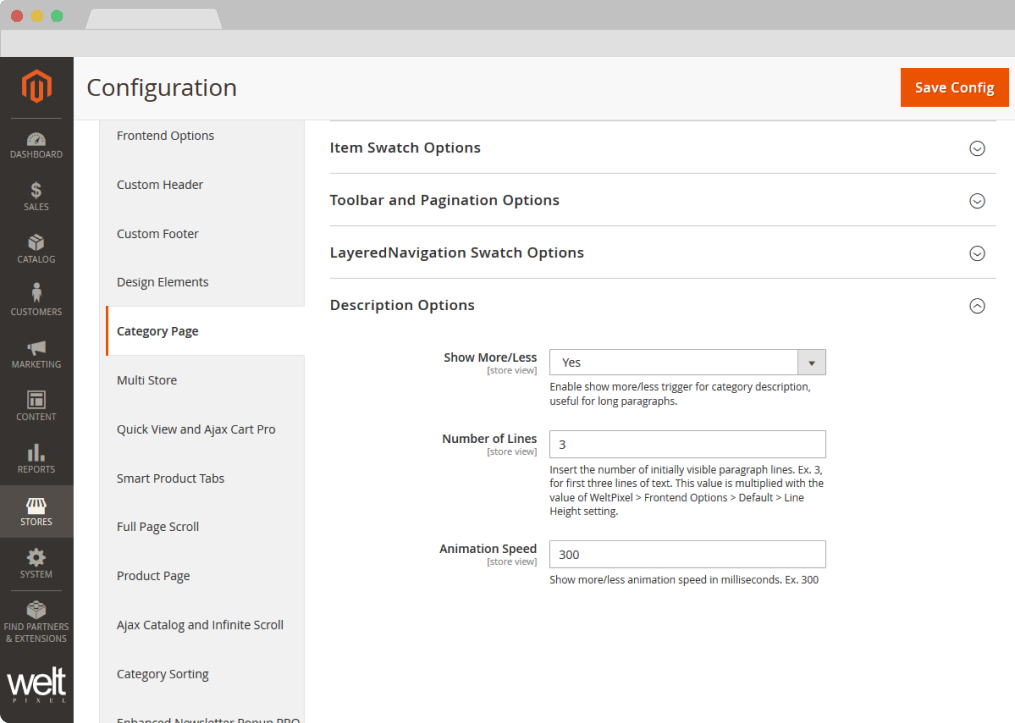
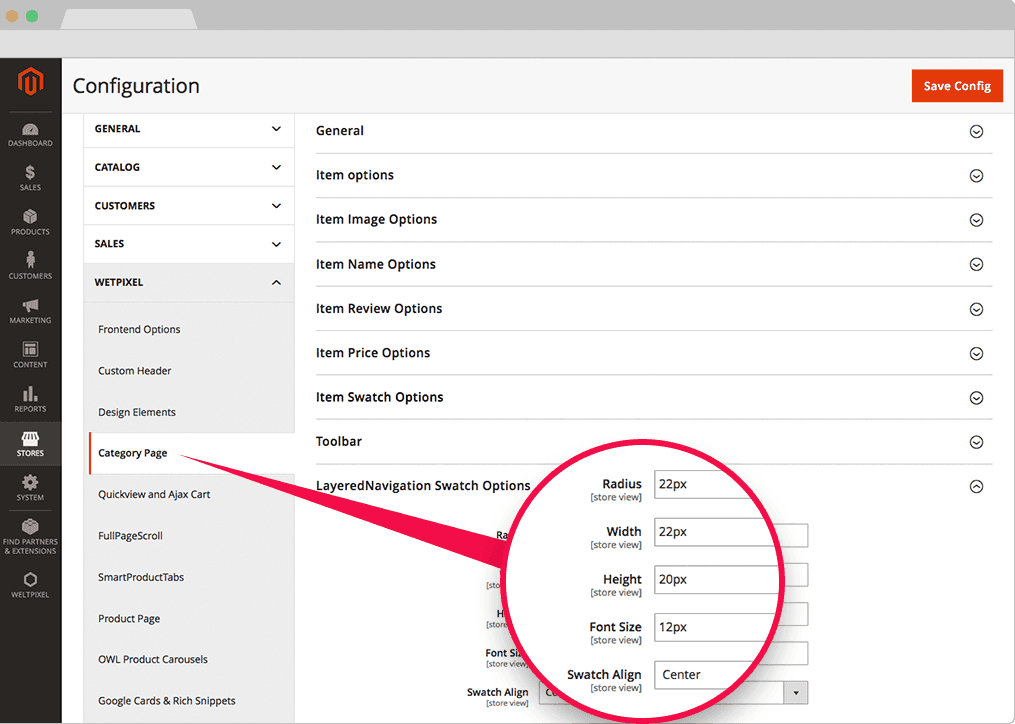
- [--categoryPage[="..."]] = 2columns, 3columns, 4columns, 5columns
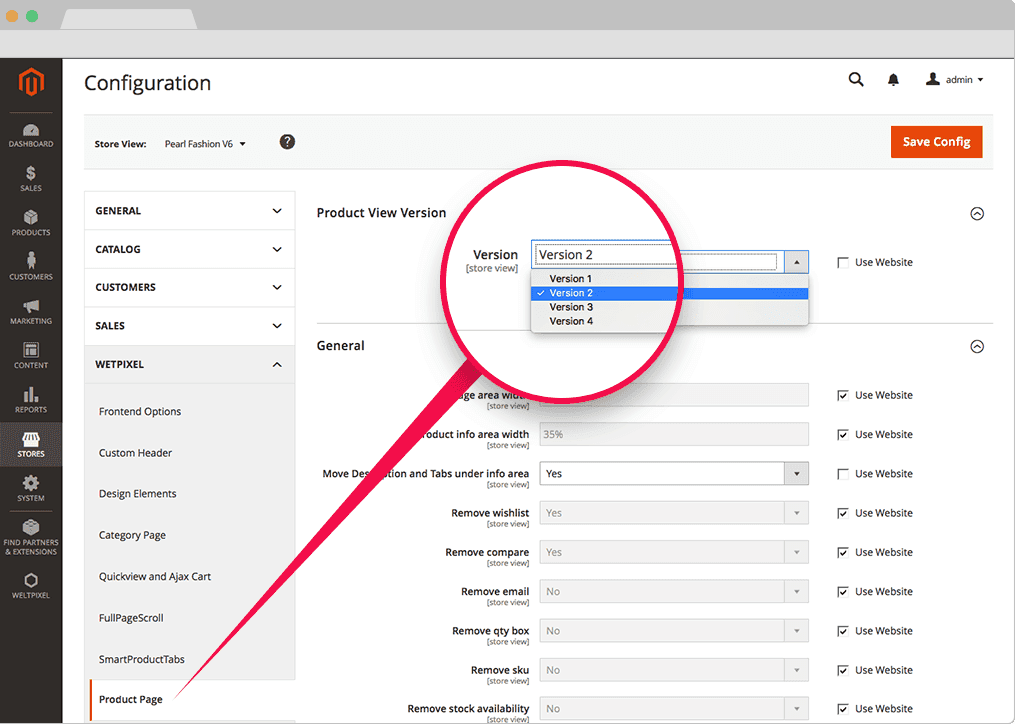
- [--productPage[="..."]] = v1, v2, v3, v4
- [--footer[="..."]] = v1, v2, v3, v4
- [--store="..."] = default, GLOBAL
- [--demoVersion] = v1, v2, v3, v4, v5, v6, v7, v8, v9, v10, v11, v12, v14, v15
Run the following commands to import demo settings (example for Homepage V1):
php bin/magento weltpixel:import:demo --store=GLOBAL --demoVersion=v1
php bin/magento weltpixel:theme:configurator --store=GLOBAL --homePage=v1 --header=v1 --categoryPage=3columns --productPage=v1 --footer=v3
php bin/magento weltpixel:cleanup
php bin/magento weltpixel:less:generate
php bin/magento cache:clean
Example for Homepage V8:
php bin/magento weltpixel:import:demo --store=GLOBAL --demoVersion=v8
php bin/magento weltpixel:theme:configurator --store=GLOBAL --homePage=v8 --header=v1 --categoryPage=3columns --productPage=v1 --footer=v3
php bin/magento weltpixel:cleanup
php bin/magento weltpixel:less:generate
php bin/magento cache:clean
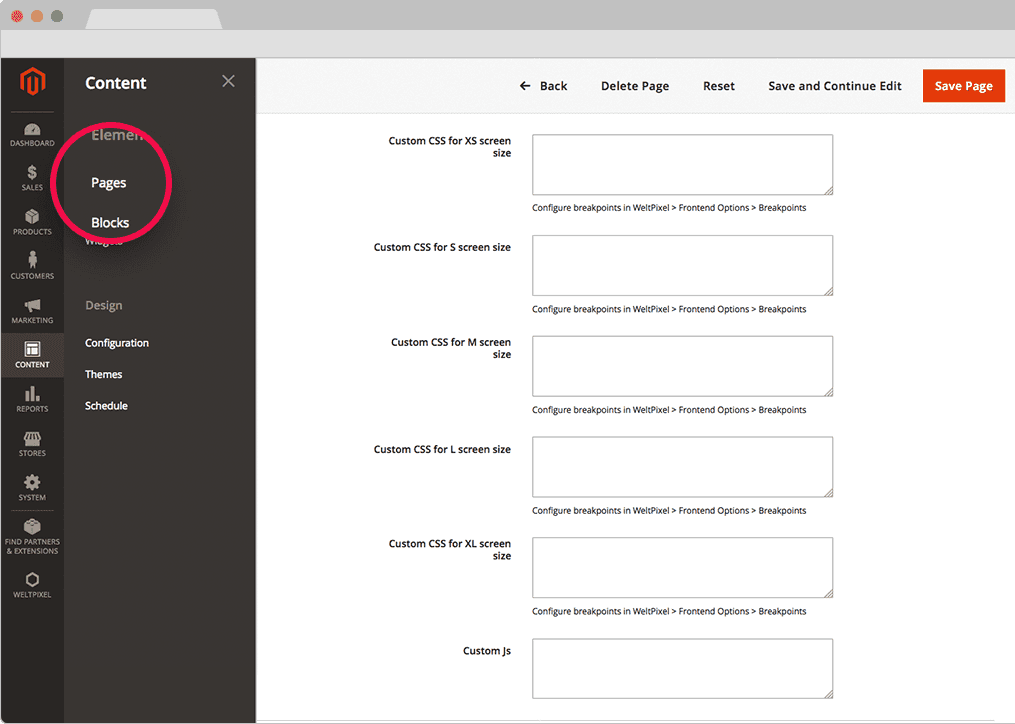
Step 8. Activate Pearl Theme
Enable the theme from Magento Admin:
Go to Admin > Content > Design Configuration and set your default theme to
Custom Pearl Theme for Magento 2, for desired store view.
Or enable the theme directly from SSH:
php bin/magento weltpixel:theme:activate --store=GLOBAL --themePath="Pearl/weltpixel_custom"
php bin/magento setup:upgrade
php bin/magento weltpixel:less:generate
php bin/magento weltpixel:css:generate --store=all
php bin/magento cache:clean
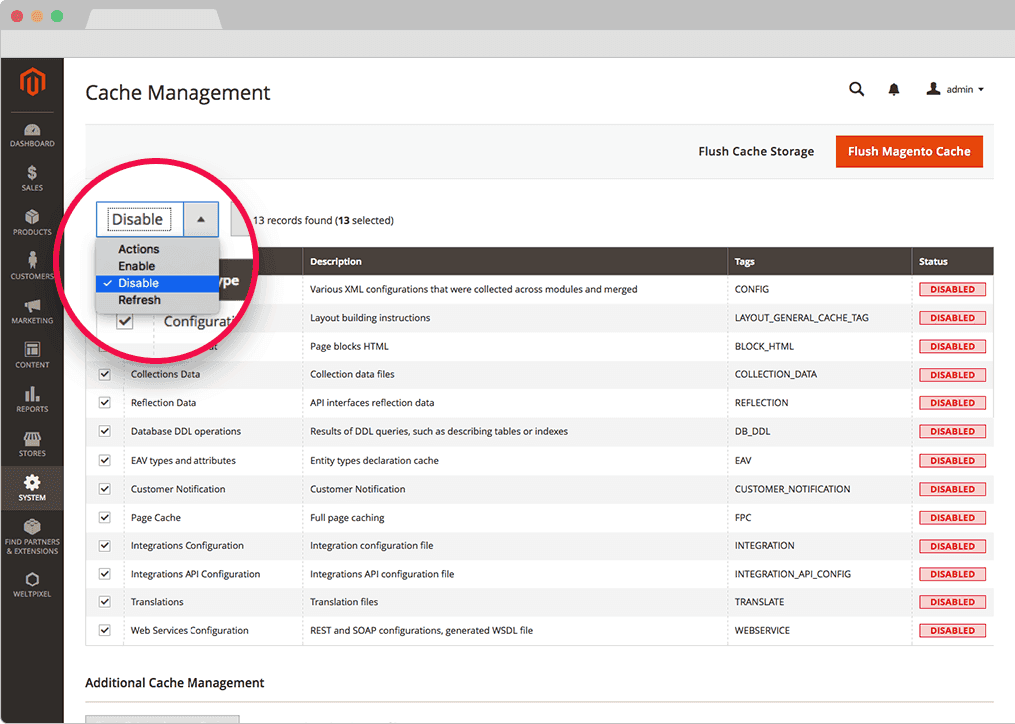
Step 9. Re-enable Caches
Re-enable your Magento caches from System > Cache Management.
Step 10.
Woohoo! Pearl Theme is installed and your store should already be looking awesome!