
In this article, we'll be looking at how to set up Google Ads Conversion Tracking with the WeltPixel Google Analytics 4 and Google Analytics 4 PRO extensions. The process is very simple and only takes a couple of minutes, so let's dive straight in.
Note: This guide assumes you already have the basic Google Analytics 4 tracking set up via the steps provided in the extension's User Guide.
Note: To see conversions in Google Ads, you may need to have an active campaign configured and enabled.
The Magento Admin Setup
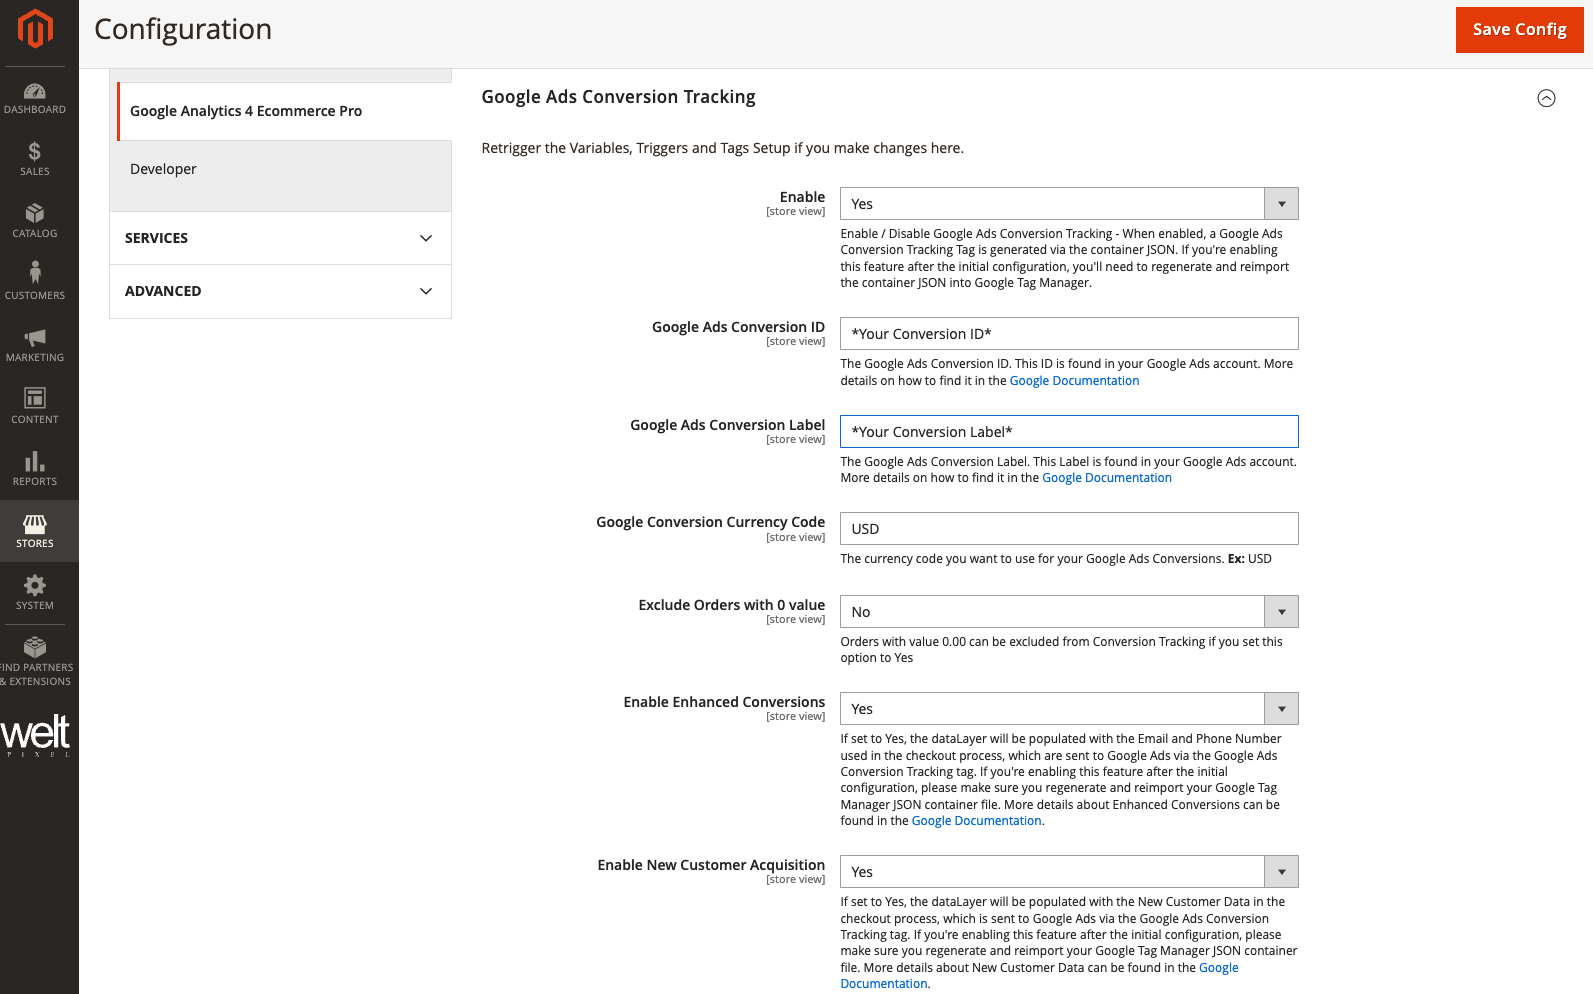
The first part of the configuration process involves enabling the Google Ads Conversion Tracking functionality in the extension's Magento Admin settings, as well as gathering some details from your Google Ads account. Here are the steps:
- Log in to your Magento Admin panel and head to WeltPixel ⮕ Google Analytics 4 eCommerce Settings ⮕ Google Ads Conversion Tracking and expand the section.
- Set the Enable option to Yes.
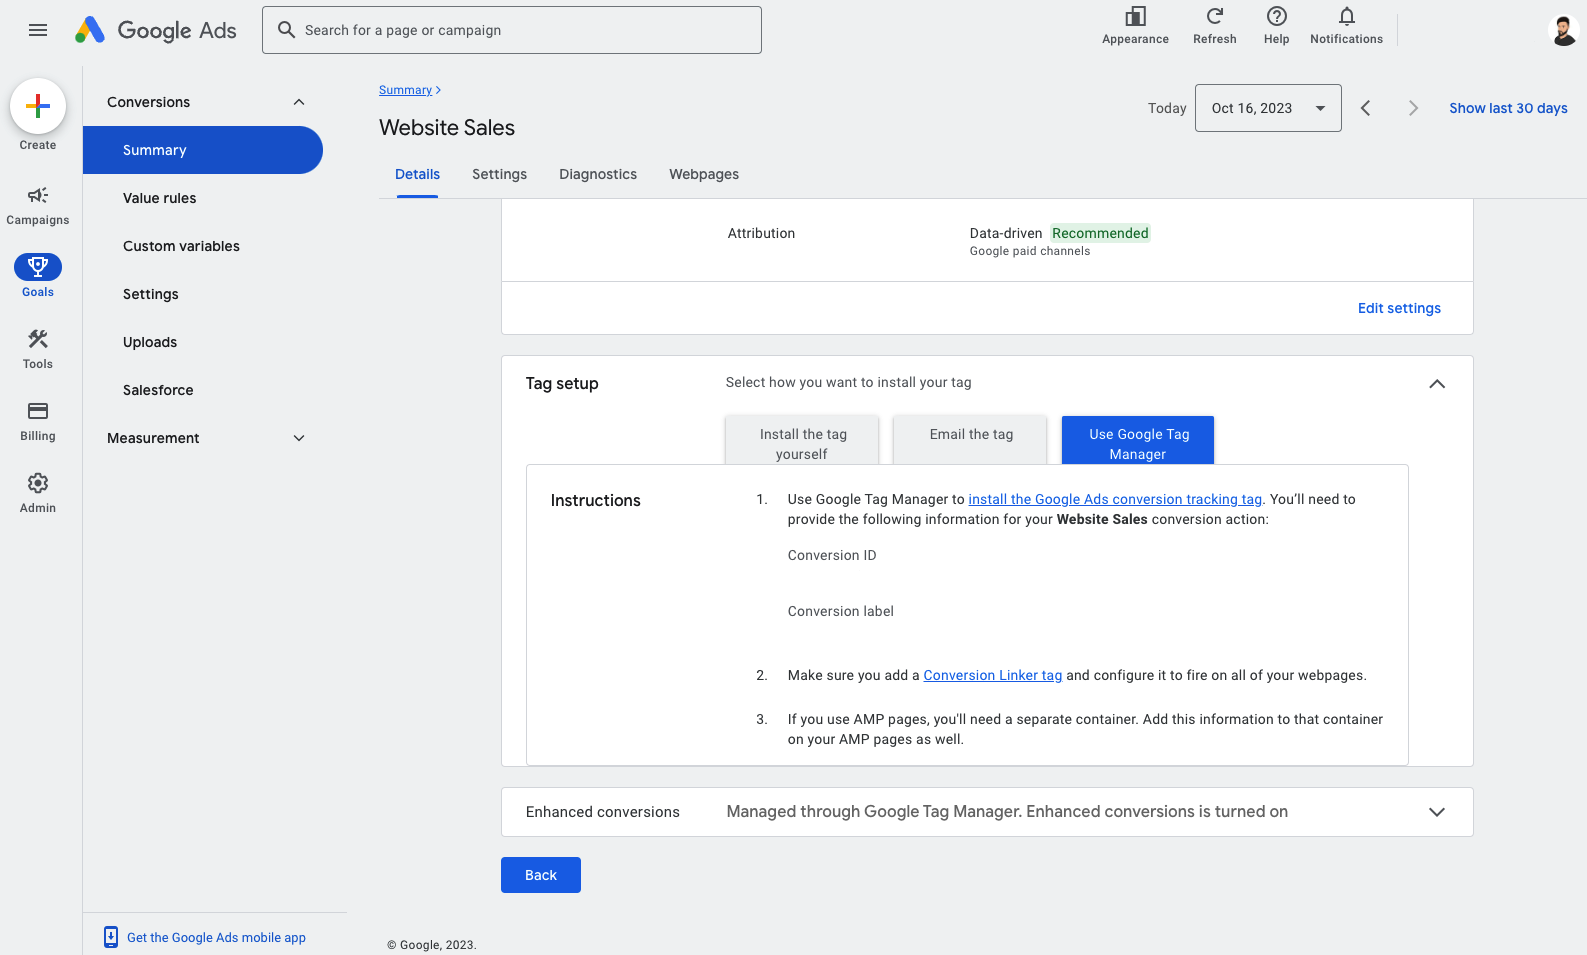
- Get your Conversion ID and Conversion Label from your Google Ads account. You can find them in your Conversion action's settings, under Tag Setup ⮕ Use Google Tag Manager. More details about the process can be found in the Google Documentation.
- Copy and paste the values into their respective fields, then choose your Currency Code and add that to the Magento Admin configuration as well.
- If you have the PRO version of the extension, you can choose to enable Enhanced Conversions and New Customer Acquisition functionalities as well. Your configuration should look similar to the image below:
- Save the configuration, then head to the JSON Export Options section.
- Click the Generate JSON for Tags, Triggers and Variables button.
- Once the JSON file is generated, click the Download button to download the new JSON container.
Importing the JSON Container into Google Tag Manager
The next step of the process involves taking the newly generated JSON container file and importing it into your Google Tag Manager account to get the new Conversion Tracking Tag and dataLayer variables up and running.
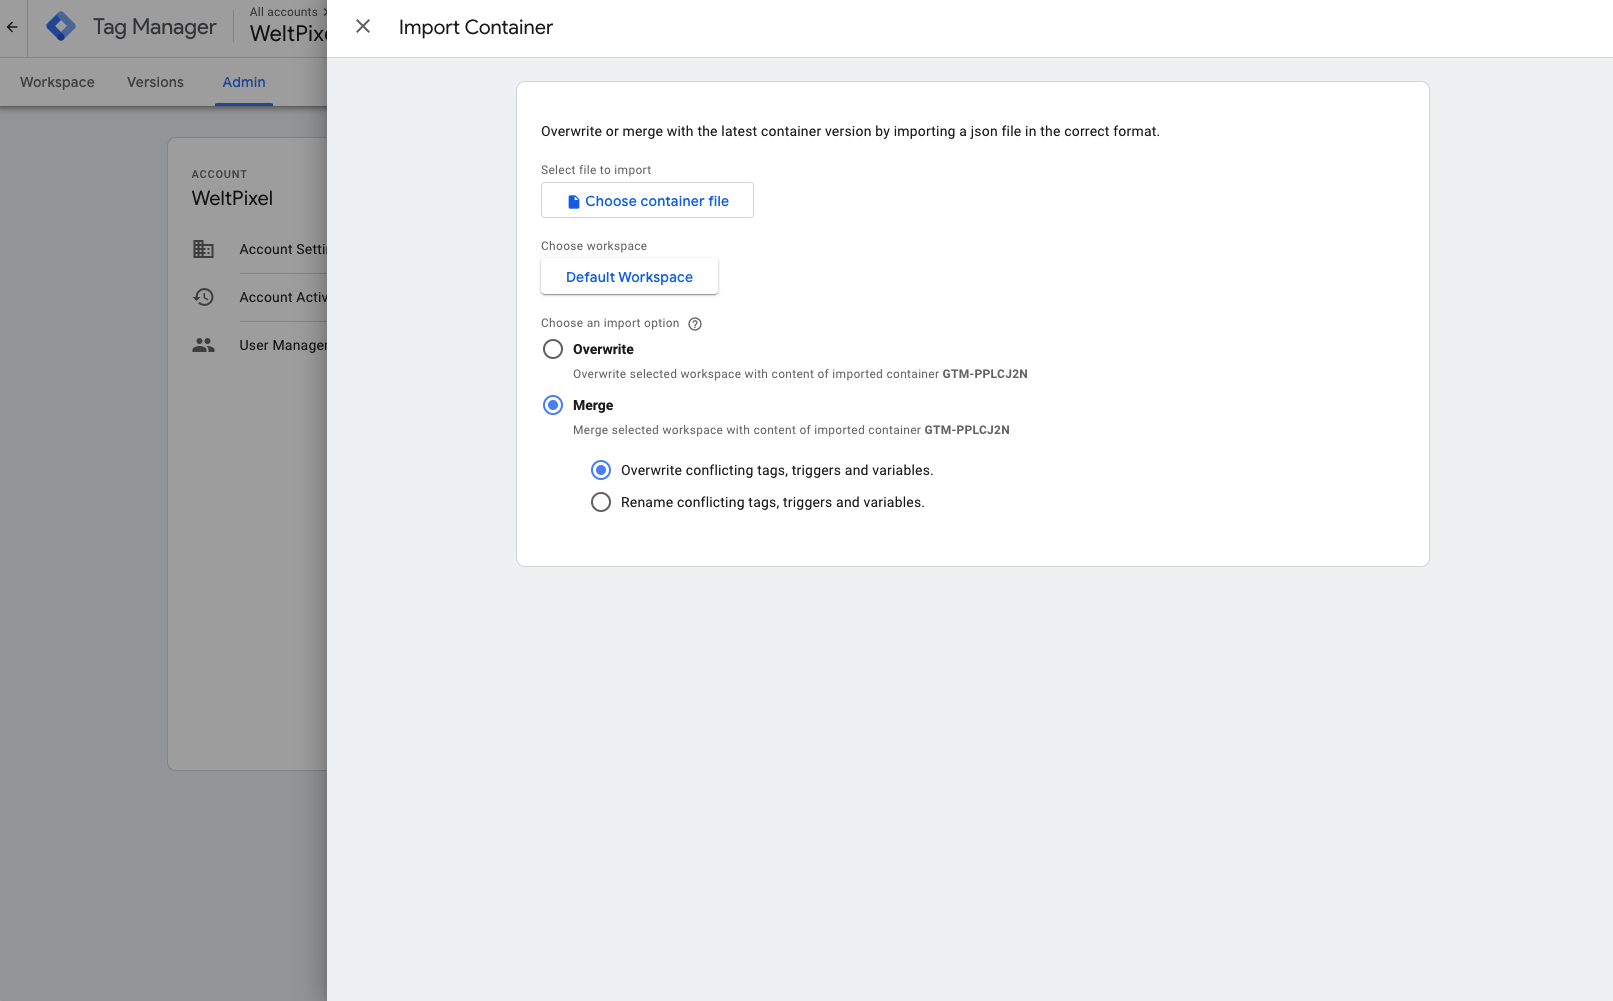
- Log in to your Google Tag Manager account and head into Admin ⮕ Import Container.
- Choose the JSON container file you downloaded.
- Choose your workspace.
- Choose the Merge ⮕ Overwrite conflicting tags, triggers and variables option when prompted. This will ensure you don't completely rewrite the container, so your 3rd party Tags, Triggers and Variables should not be affected.
- If you're promoted, create a Conversion Linker tag as well. This may help ensure more accurate tracking for Google Ads. More details about the Conversion Linker tag can be found in the Google Documentation.
- Hit Confirm to apply the changes.
- Use the Preview Mode functionality to test and make sure everything is working as you expect. See the section below for more details on how this can be done.
- Once you've confirmed everything is working correctly, publish your container.
Testing to make sure Conversions are being recorded
The final step of the process is to test everything out and make sure your Google Ads Conversion Tracking Tag is being fired on the Success Page. This can be done with Google Tag Manager's Preview Mode functionality.
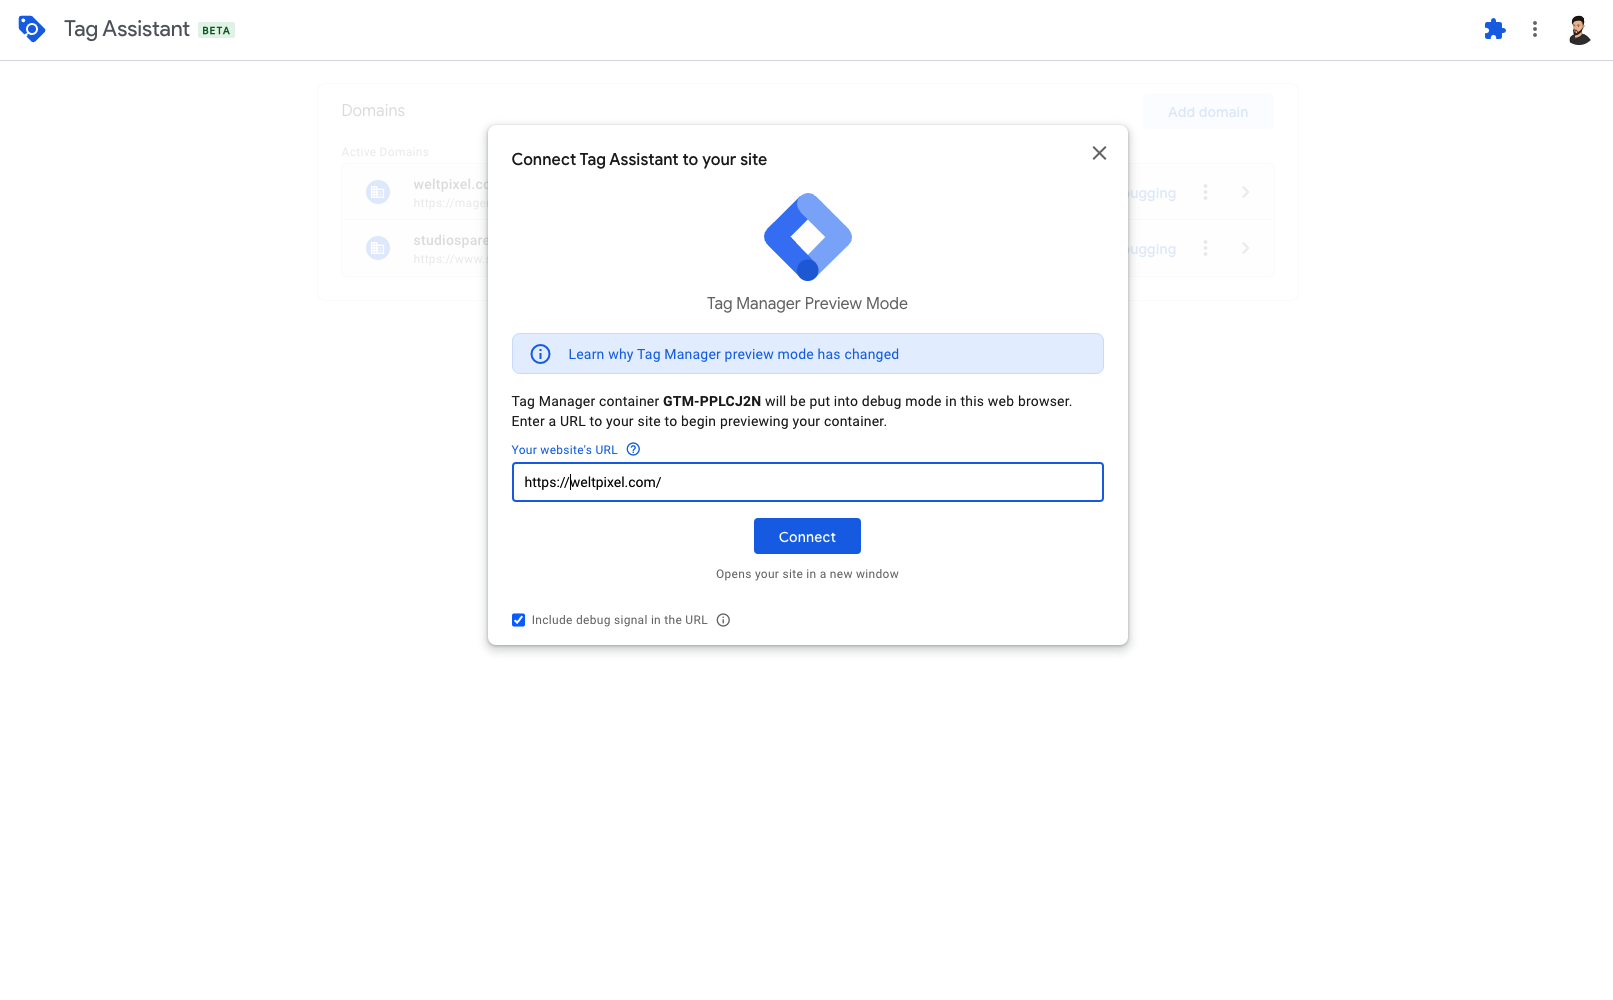
- Head into your Google Tag Manager container and hit the Preview button.
- Input your website's URL and click Connect. This will open your website in a new tab.
- Place a test order on your store.
- Once you're on the Success Page, head back into Google Tag Assistant and check the tags that have been fired on the page. You should see the Google Ads Conversion Tracking tag successfully fired.
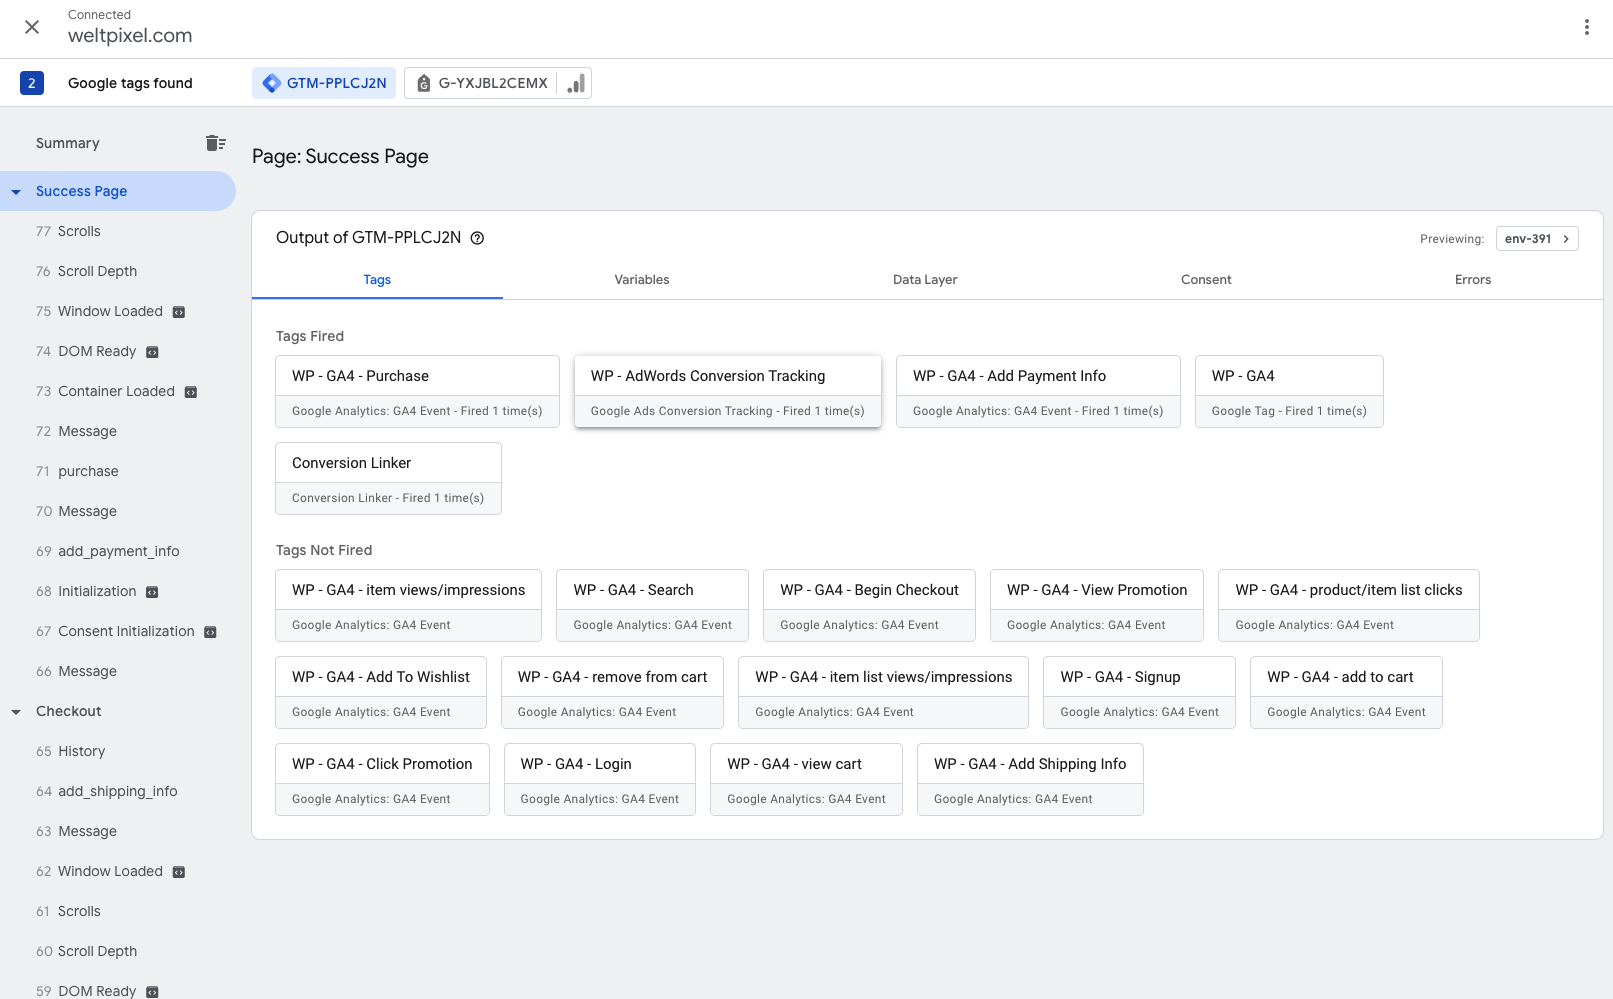
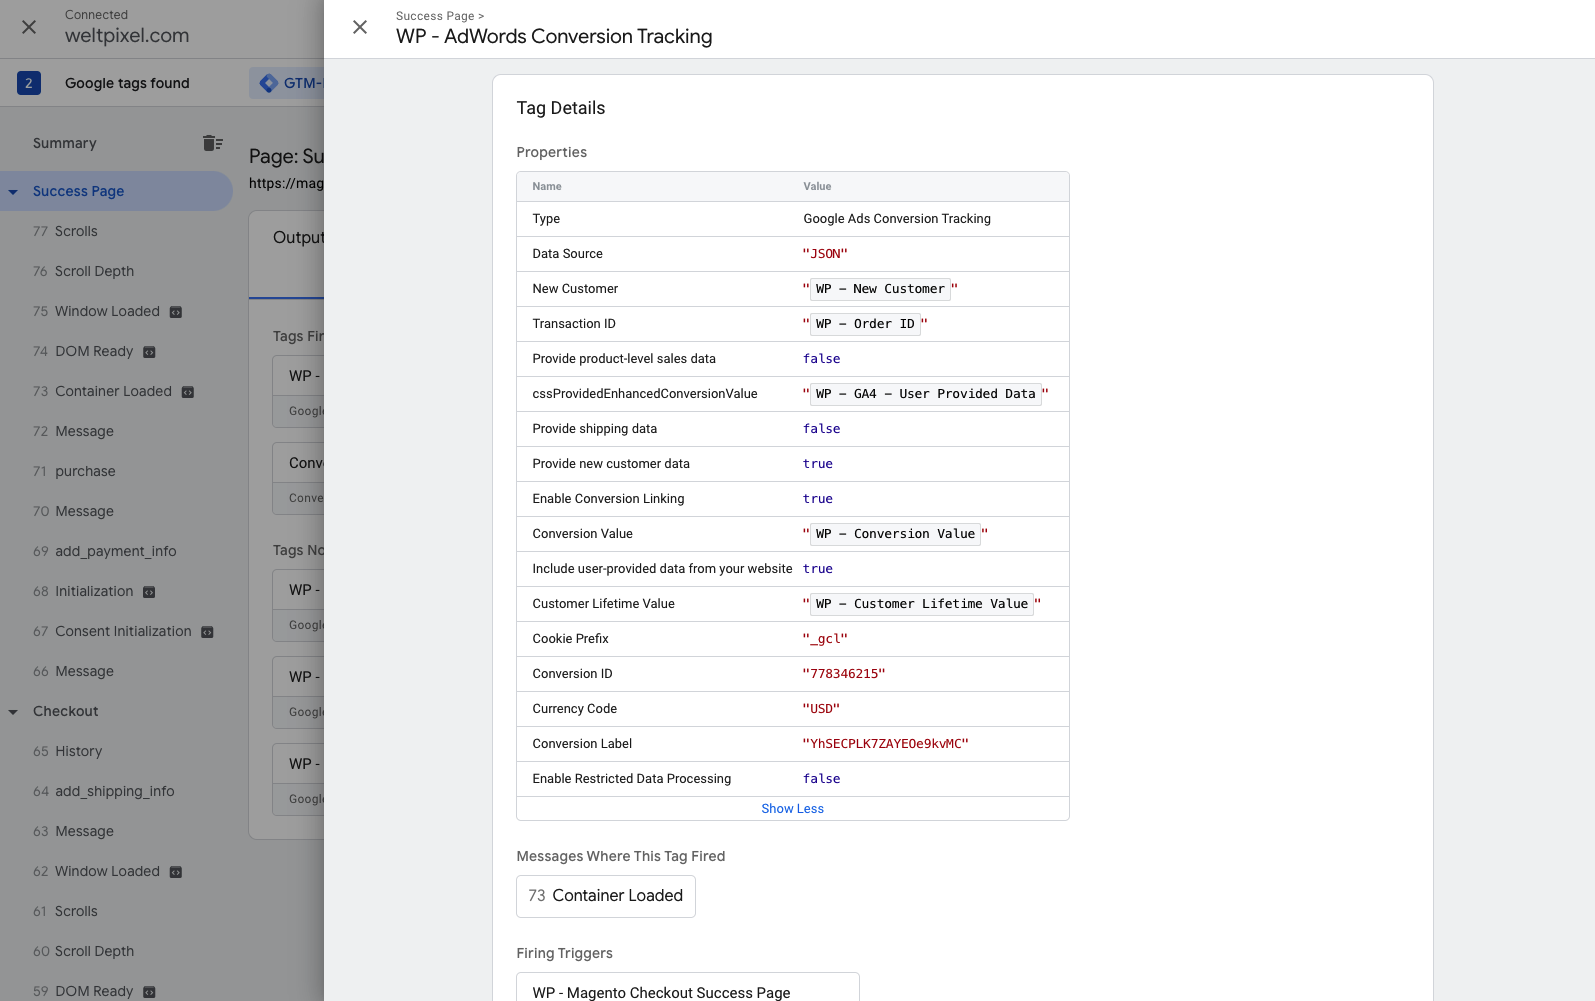
- You can click on the tag to view specific details about it, including the data that's being passed to Google Ads with it.
- Once you've confirmed everything is correct, head back into Google Tag Manager and publish your container if you haven't done so already.
