
Ever since Google has decided to sunset their widely-used Universal Analytics platform, their new Analytics 4 platform has been all the rage, which is a huge upgrade in many regards when it comes to measuring and analysing customer data.
On the Magento 2 platform, our Google Analytics 4 extension has been the frontrunner for a while now, maturing into an extremely powerful tool that allows merchants to integrate with Google Analytics 4 via Google Tag Manager with extreme ease and simplicity, however, the module also features native support for Google Ads Conversion Tracking, which is an awesome advantage that any store needs to make use of.
In a recent update, however, the extension has become even more powerful, as it was upgraded with a new Google Ads feature, namely, Google Ads Enhanced Conversion Tracking. Enhanced Conversions allow you to send Google more accurate conversion data, which in turn helps Google allow you to unlock more powerful bidding. It does this by supplementing the existing conversion tags with user provided data (mainly the customer's email address and phone number, as well as optionally, other first-party conversion data/first-party customer data), which it then hashes using a secure, one-way hashing algorithm (SHA256) before it's sent to your Google Ads account for processing.
To begin with, you'll need to make sure Enhanced Conversions are enabled in your Google Ads account. You can find out how to enable the feature in the Google Documentation. Once the feature is enabled in the Google Ads account, follow the steps below to complete the setup on the Google Tag Manager side.
How to set up Enhanced Conversions with the Google Analytics 4 PRO extension - during initial configuration
If you're just starting the first configuration of the extension, simply follow the instructions in the User Guide to set up your basic eCommerce tracking, Google Ads Conversion Tracking and Google Ads Remarketing and ensure you set the Enable Enhanced Conversions option to Yes before exporting your Google Tag Manager container JSON file.
How to set up Enhanced Conversions with the Google Analytics 4 PRO extension - after initial configuration
To set up your Enhanced Conversions tracking after the basic extension eCommerce tracking and/or Google Ads Conversion Tracking setup, which you can find out how to do in the module's User Guide, you can follow the steps below to set up Enhanced Conversions:
-
Head into your Magento Admin section and open up the Google Analytics 4 PRO extension configuration options.
-
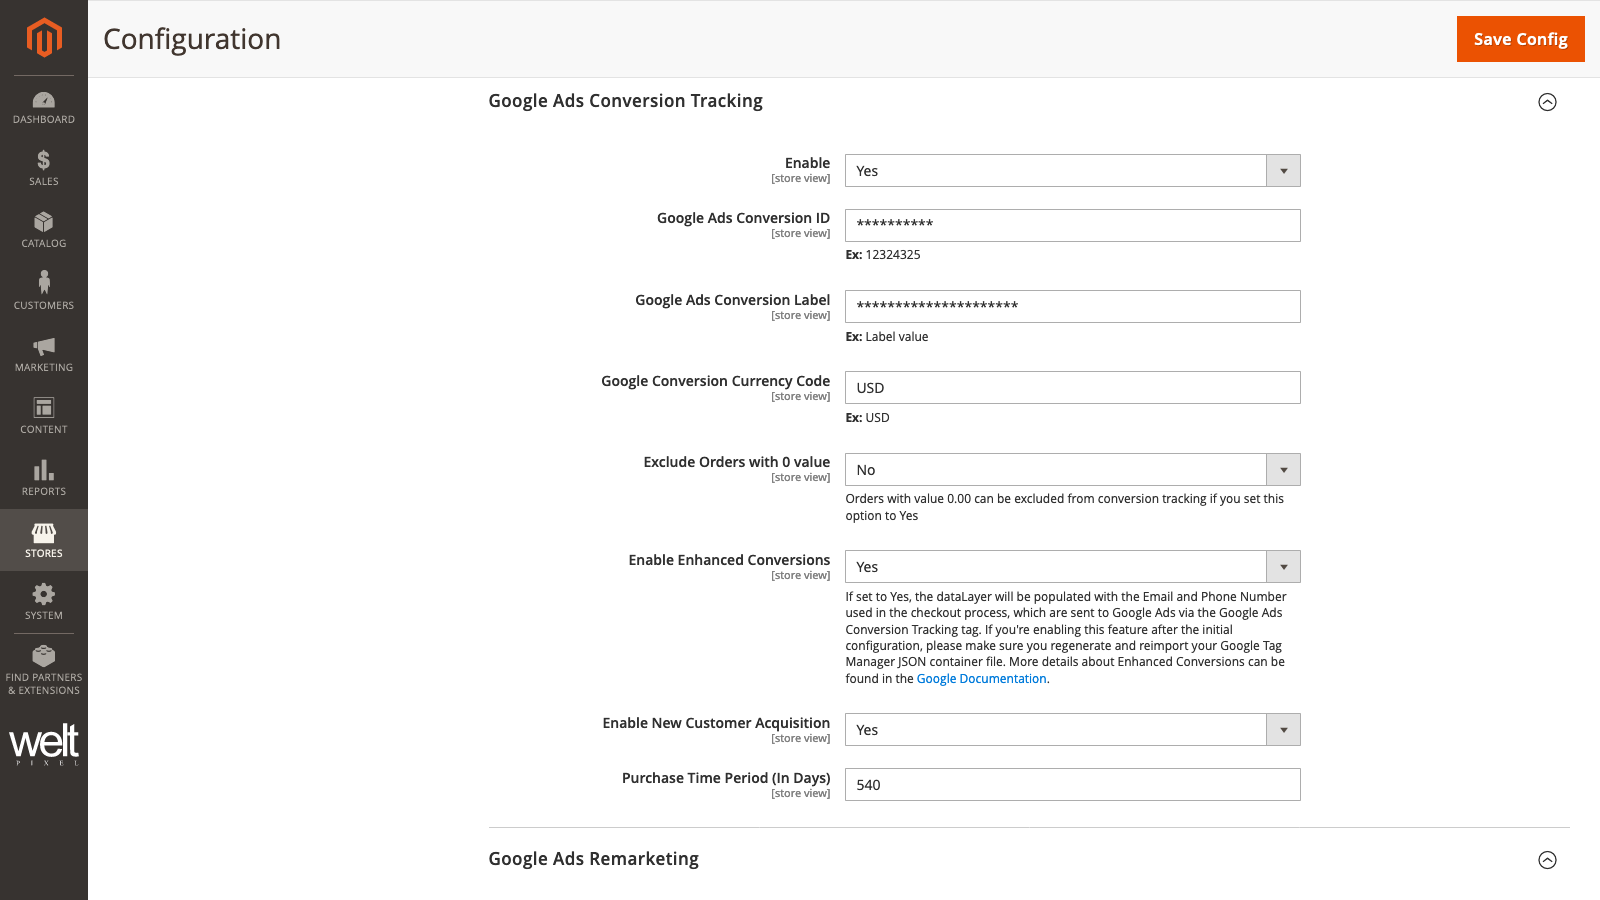
Open up the Google Ads Conversion Tracking section.
-
Set the Enable Enhanced Conversions option to Yes.
-
Save the configuration and flush the Magento Cache.
-
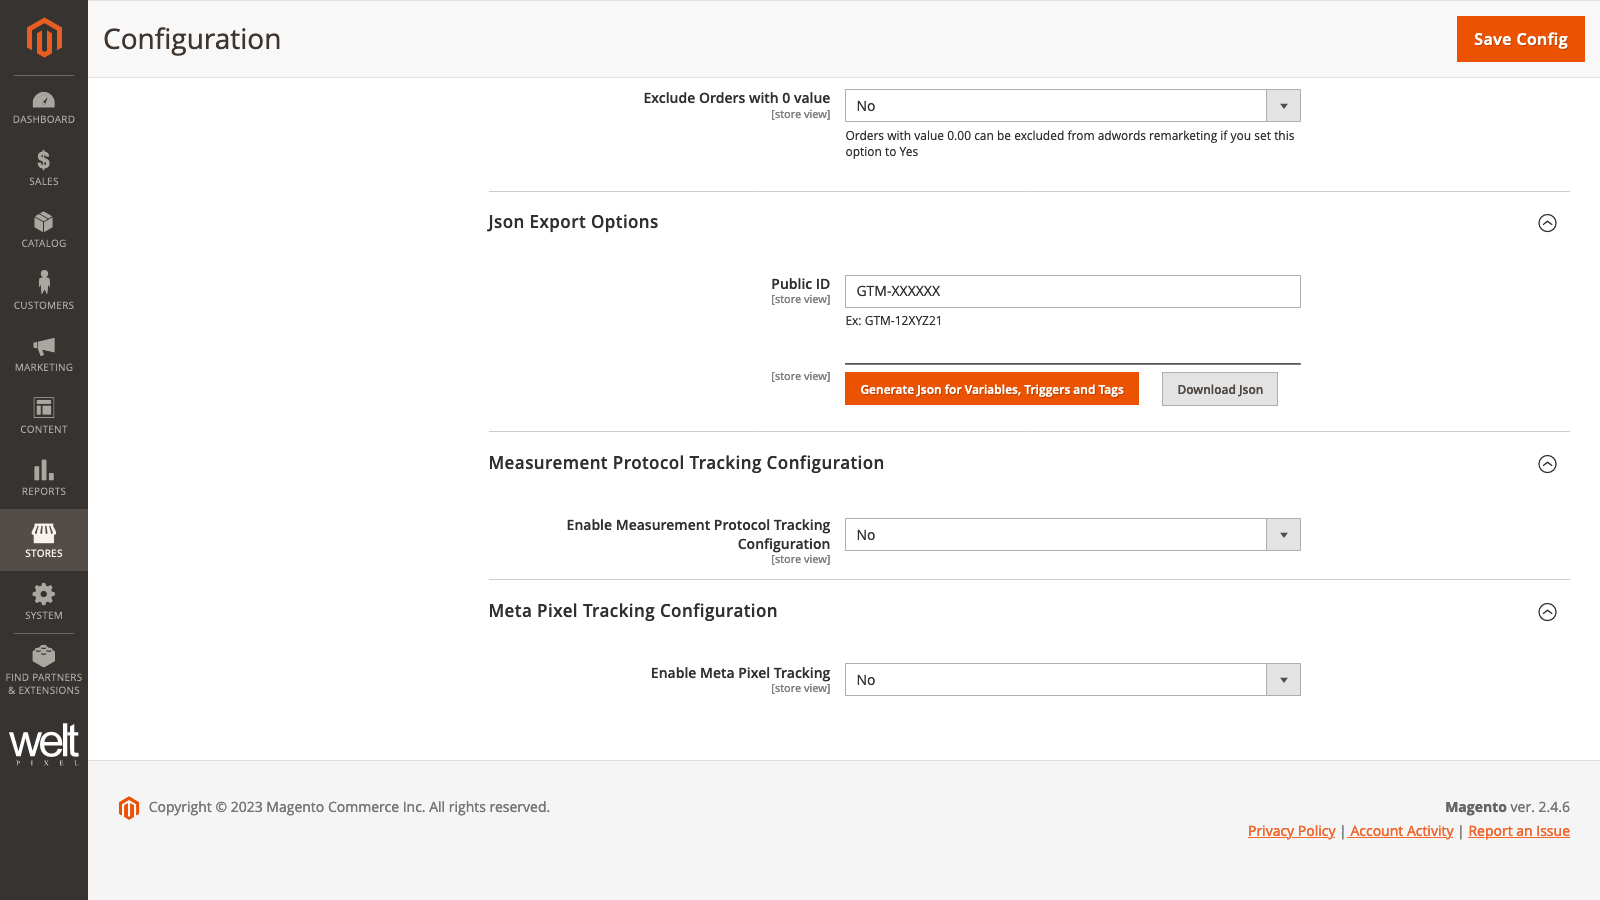
Scroll down to the Json Export Options section and make sure your Google Tag Manager account's Container Public ID is filled out.
-
Click the Generate Json for Variables, Triggers and Tags button. This will refresh the container Json with the new Tag configuration, as well as the new data layer variables required for Enhanced Conversions.
-
Click the Download Json button.
-
Once you've downloaded the updated Google Tag Manager container Json file, head into your Google Tag Manager account and log in.
-
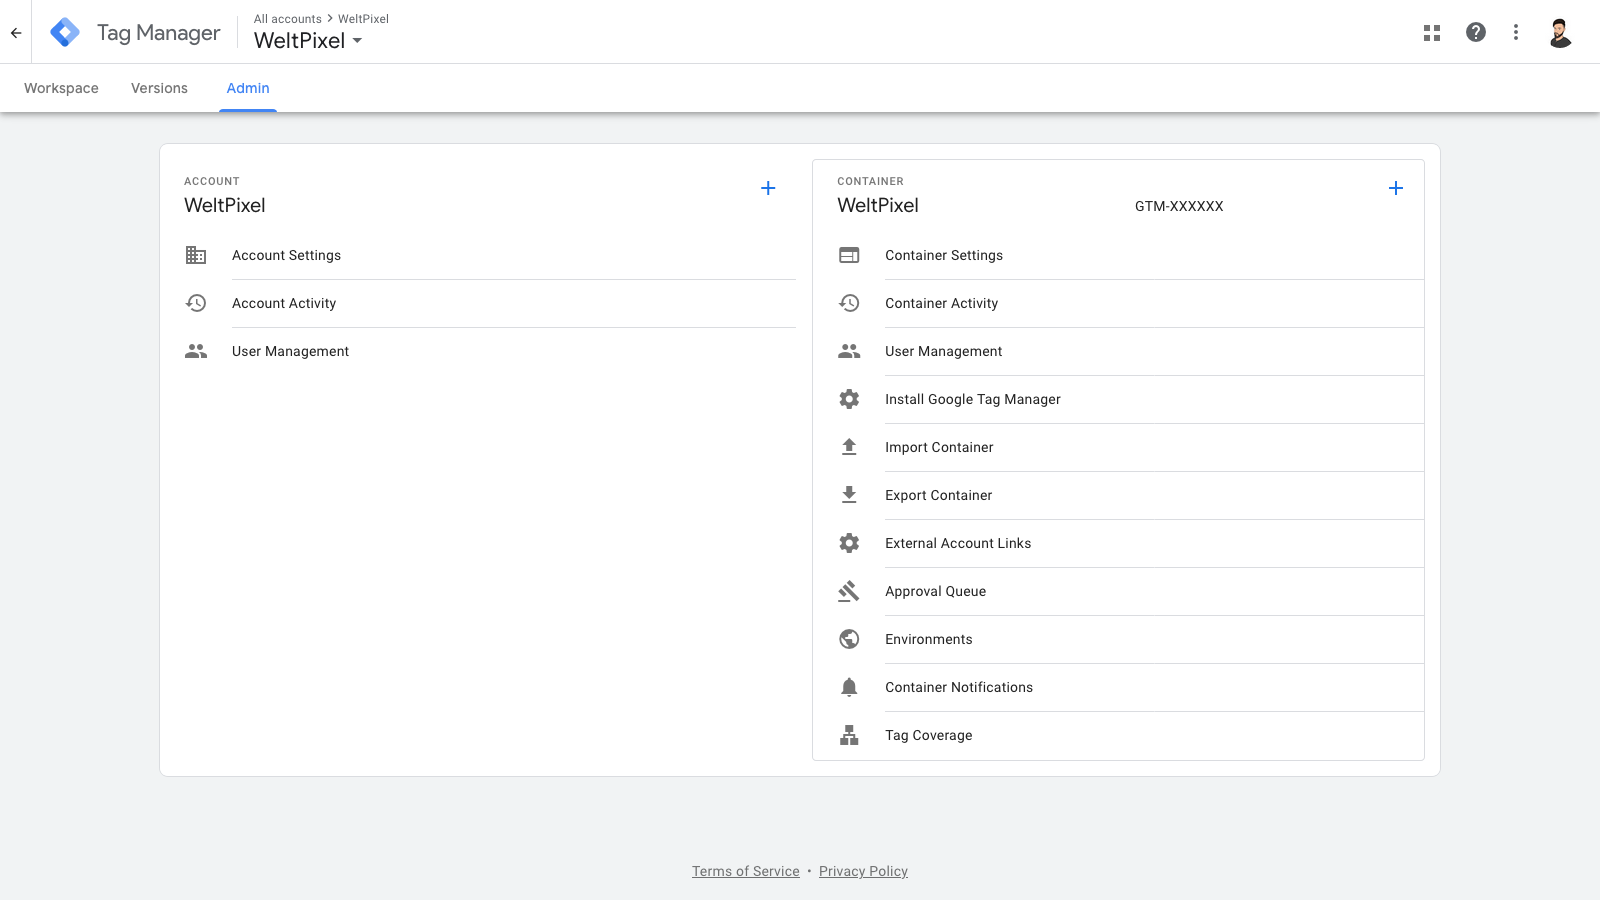
Access your Google Tag Manager container and click Admin to access the Admin section.
-
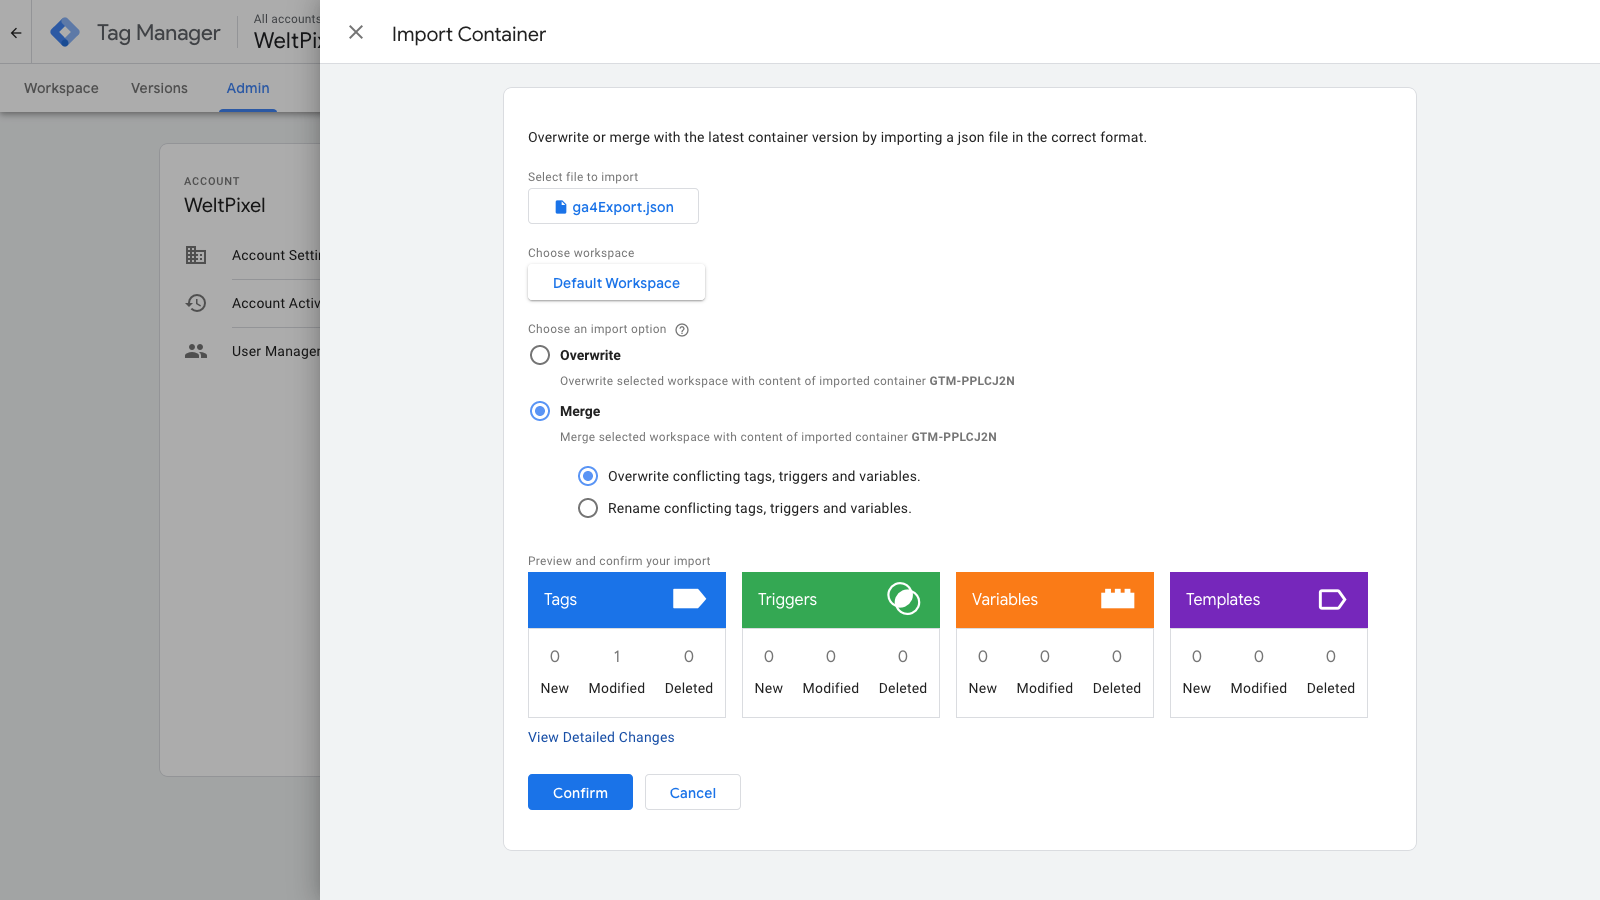
Click Import Container, select your Workspace and choose the Merge - Overwrite conflicting tags, triggers and variables option. This will prevent any of your custom Tags, Triggers or Variables from being overwritten, and will only overwrite the ones that have conflicting changes. Click Confirm.
-
At this point, you can start using the Google Tag Manager Preview Mode to test the container and make sure everything is working fine before you hit the Publish button.
-
Publish the container after testing and flush the Magento Cache from the Cache Management section of the Magento Admin.
Your Google Ads Conversion Tracking Tag is now collecting User-Provided Data via the corresponding data layer variable, which enhances it with more accurate customer data and facilitates the Enhanced Conversion Tracking. Next up, we'll take a look at how to verify that Enhanced Conversion data is being sent to your Google Ads account.
How to verify your Magento 2 store is sending Enhanced Conversions data to Google Ads
Note: You'll need to be able to place a test order to complete the steps below.
Usually, it takes a while for reports in Google Ads to start populating, so we'll take a look at a simpler method of ensuring the Magento 2 store is passing hashed data (Enhanced Conversion data) over to Google Ads. There are two things we need to look for:
-
The Enhanced Conversions data layer variables - we can use the Google Tag Manager Preview Mode for this.
-
The hashed data being sent to Google Ads - we can use the browser's inspector console for this.
To start checking for the data, follow the steps below:
-
First off, head over to your Google Tag Manager account and open up the container. Access your website url in Preview Mode.
-
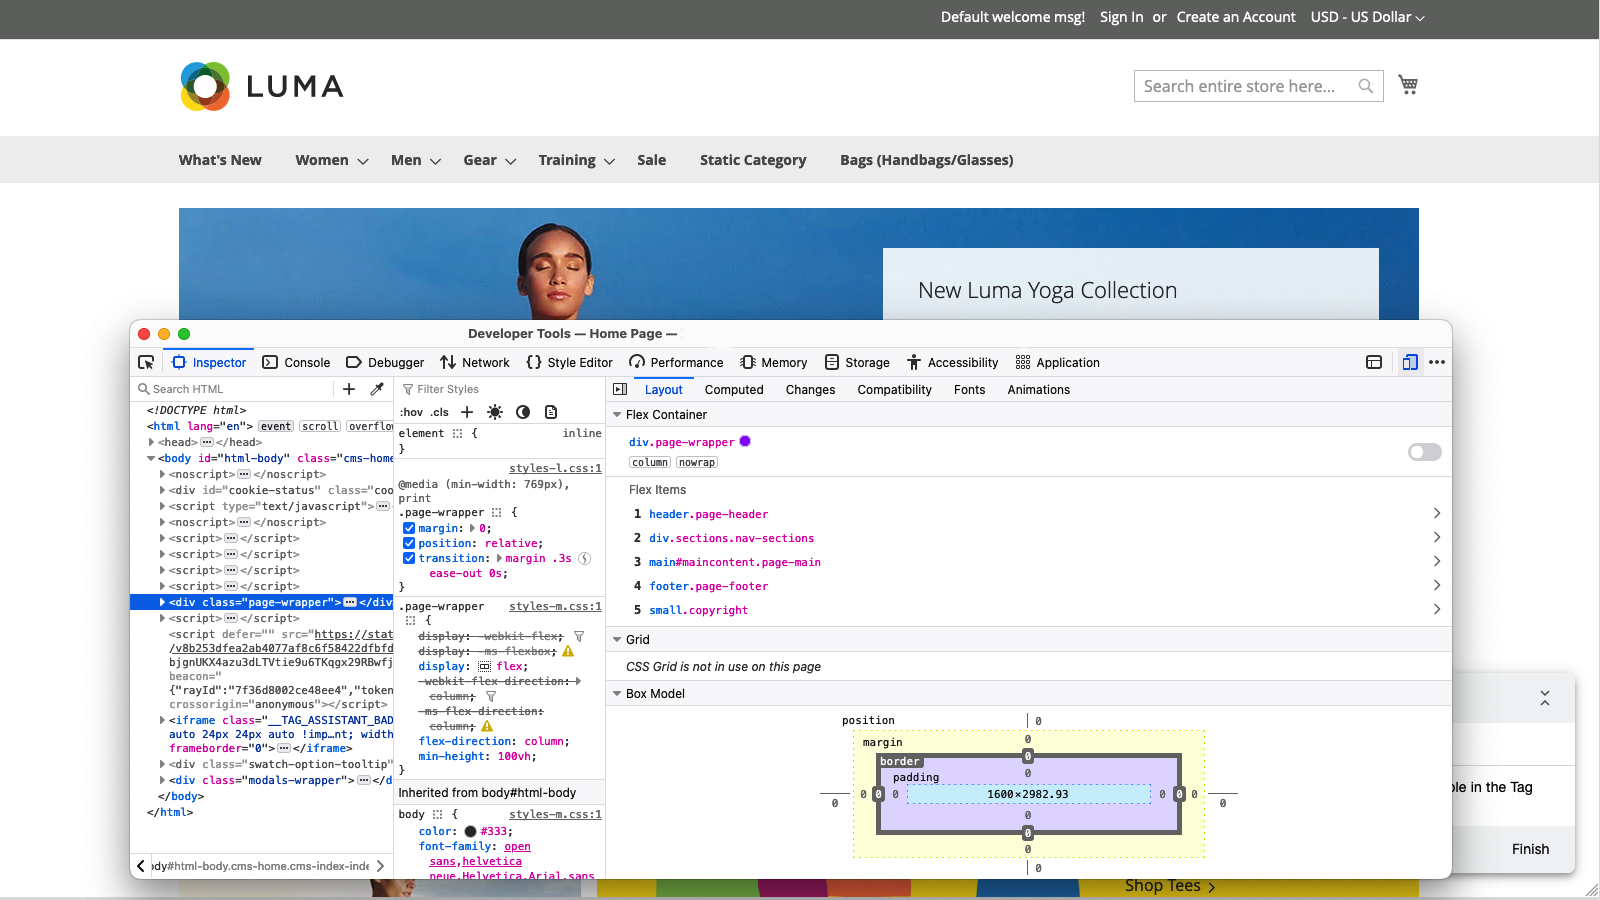
Your website will open up in a new window. Open up the browser console by right-clicking the page and selecting Inspect.
-
Add a product to the cart and head to the checkout. Complete the checkout process with the browser console open and make sure you reach the Success Page.
-
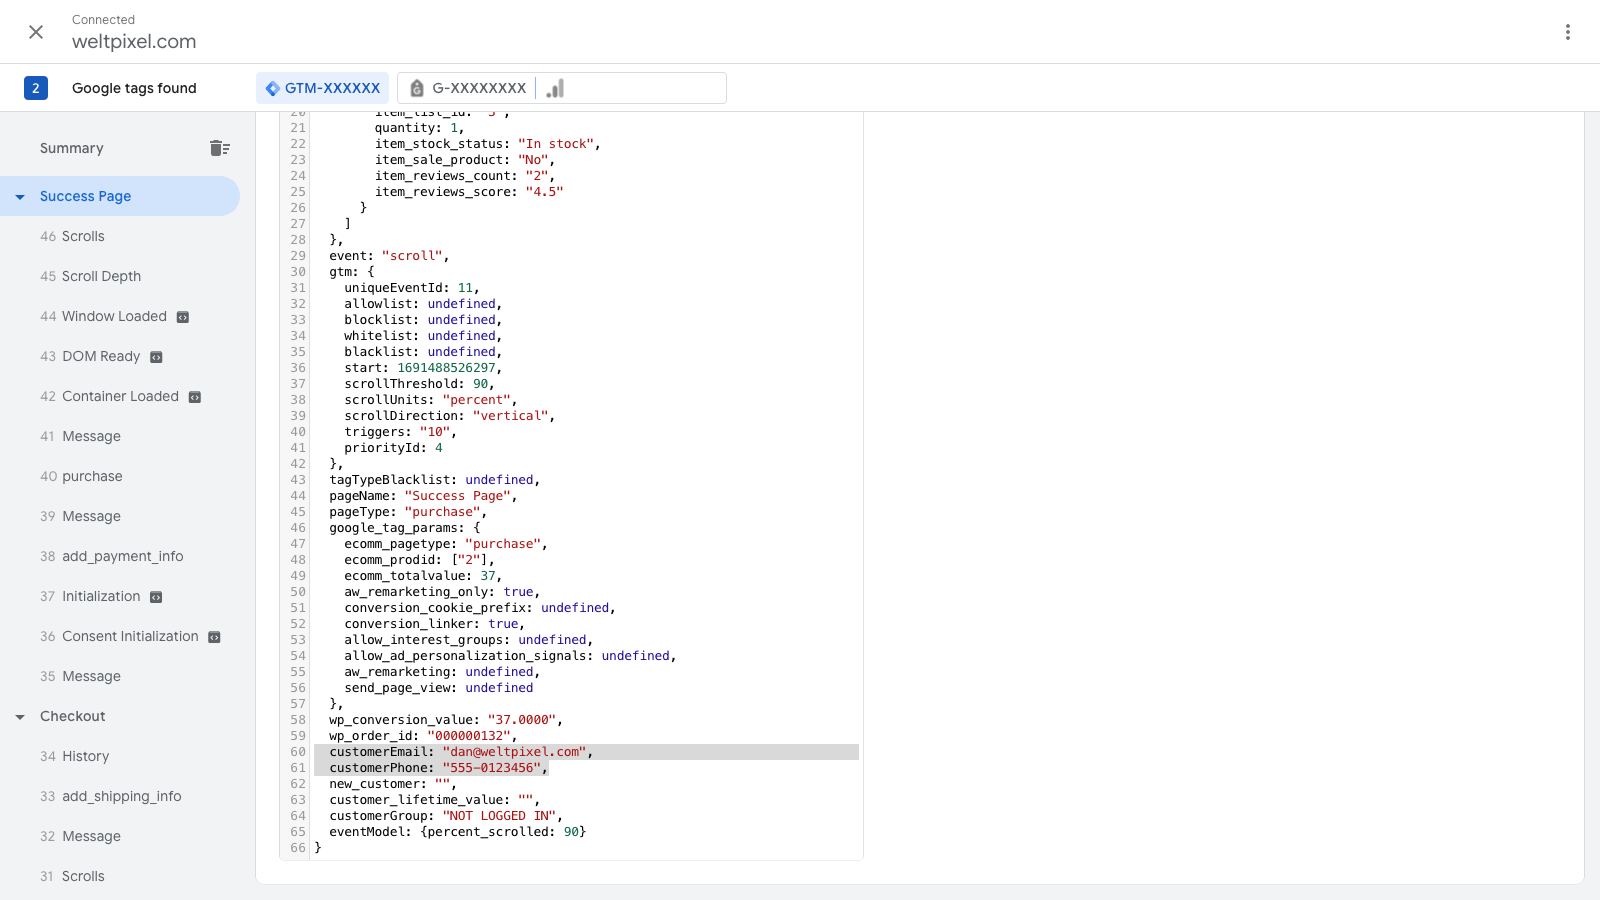
Using the Google Tag Manager Preview Mode, check the data layer on the Success Page. You should be able to see the customerEmail and customerPhone data layer variables being sent.
-
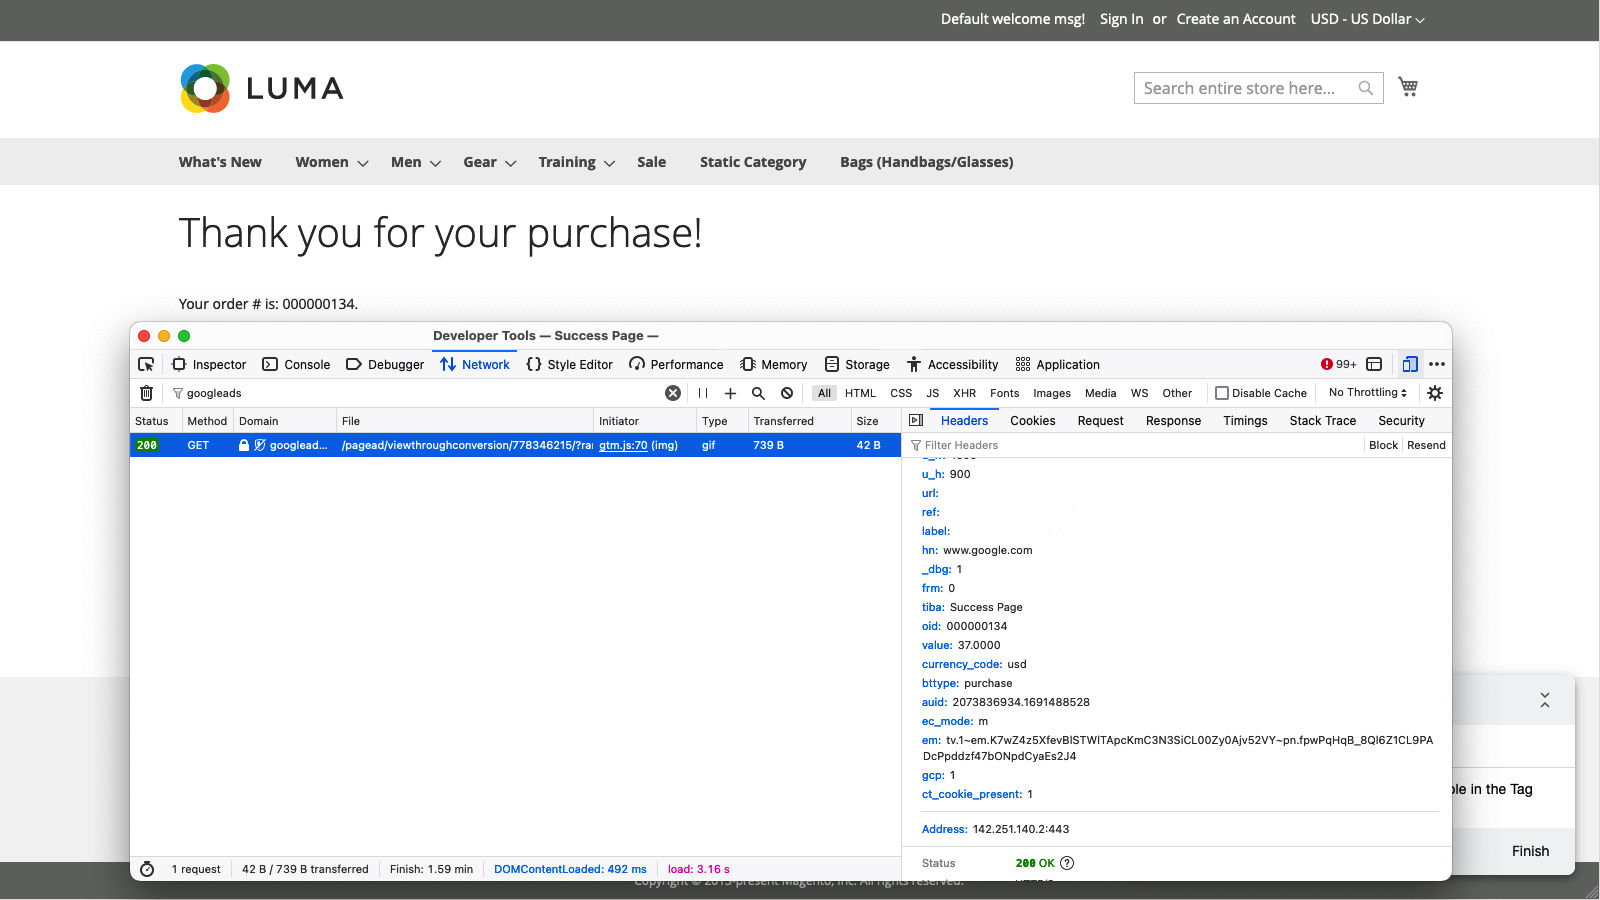
Finally, in the browser console, head over to Network and, using the search function, search for "googleads". You should find one or more entries, but you'll need to select the one that contains a number of Query String Parameters either in the Headers section or the Payload section, depending on your browser.
-
You should find one value listed here. Click on it and head to Payload, where you'll see a long list of Query String Parameters. The one that we're specifically looking for is the em parameter. It should be comprised of a string of random characters preceded by "tv.", as exemplified in the image above.
If you see this parameter, that means your store is currently sending hashed data to Google Ads, which is being used for the Enhanced Conversions functionality and you're all set! Google's Enhanced Conversions feature should now be working and boosting the capabilities of your Google Ads campaigns.
