
Have you ever heard of Cache? As a webmaster, you should study as much as possible about the Magento 2 platform, so that you can understand as many terms as possible and know how to solve simple problems or where to look for help when necessary. You probably already know that customers need a quick interface that allows them to view and purchase the products they want in the shortest possible time. Studies have concluded that it takes only 2 seconds to load a page for a user to leave the page. We are sure that you do not want to lose customers and that you will look for solutions so that your website loads quickly.
One of the best and handy solutions is to Clear Cache. Before we tell you how you can do this, let's explain what Cache is and what it is used for. The cache is a distinct part of your hosting server, used to improve the loading speed of pages. The problem occurs when you make various changes to the website because in some cases, the web browsers may not see them and load the old version. How can you solve this situation? By clearing the Cache and making it visible on the frontend.
In addition to the Clear Cache action, you should also install various Magento 2 Extensions to help you provide your customers the best user experience. Thus, in addition to a website that loads quickly and is easy to access, customers also need a menu that allows them to sort products according to their preferences and why not, even a menu with recently viewed products. You can get all this with the help of WeltPixel extensions. You can even significantly enhance your users' front-end experience with the Pearl Theme for Magento 2, which comes bundled with 25+ WeltPixel extensions!
What kind of information can be stored in the Cache? Magento allows you to store the following file types: layout, full-page, collections, translation, integration configuration, web services configuration, and many others. A big number of these files will slow the website performance and the conversion rate because the customers will not have the best experience when accessing your online store. Next, we will show you how to clear Cache on Magento 2 and solve all the inconveniences. Also, we will show you how to enable and disable Cache.
How to Flush Cache
This is a simple task that can be done in two ways.
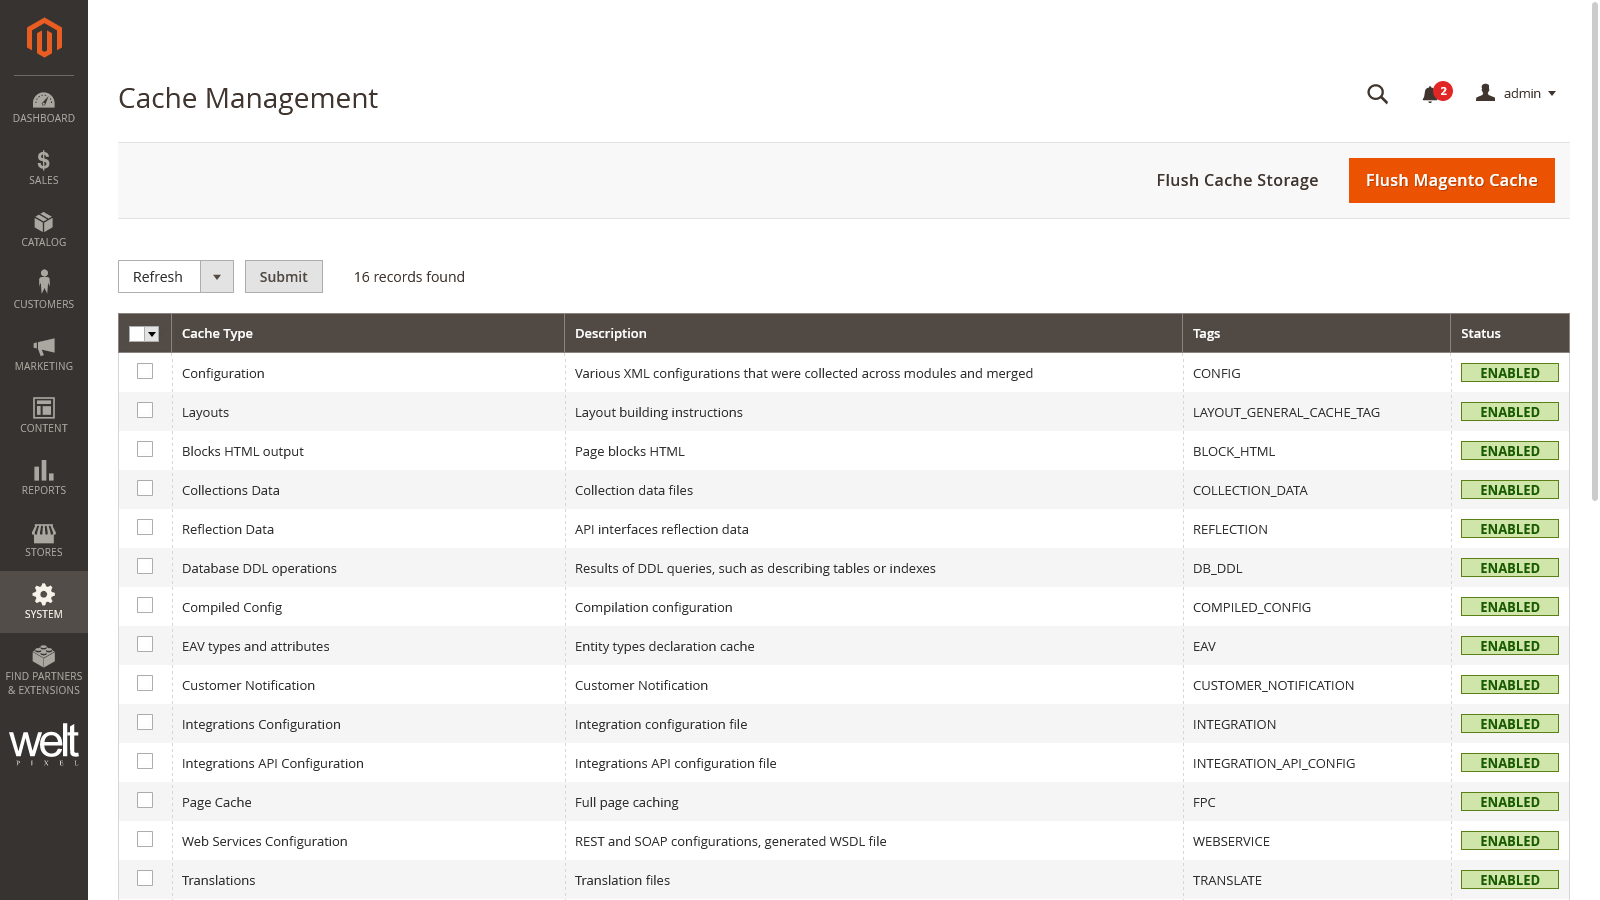
One way is via the Magento Admin Cache Management section:
- Go to System
- Access Cache Management
- Press the orange Flush Magento Cache button
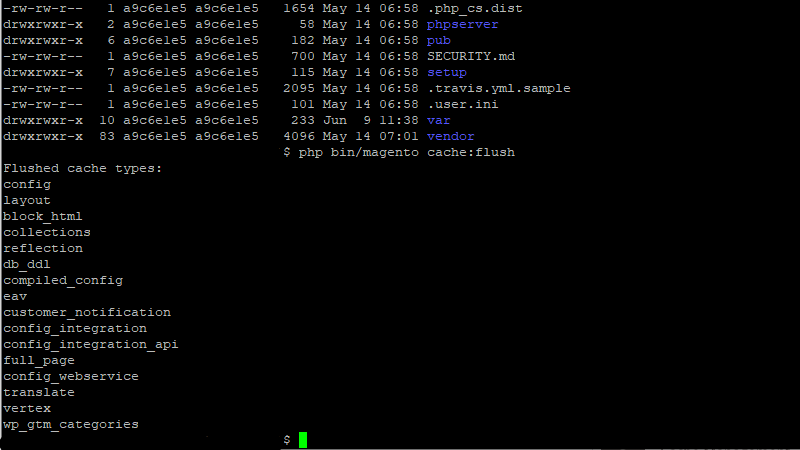
The other way is via the Command Line:
- Go to Magento 2 Root Directory
- Access Flush Cache Storage: php bin/magento cache:clean
- Flush Magento Cache: php bin/magento cache:flush
- Save, exit, and check the results
It is good to know that whenever you need to enable or disable Cache on Magento 2, it is very easy to do it.
Enable Magento 2 Cache
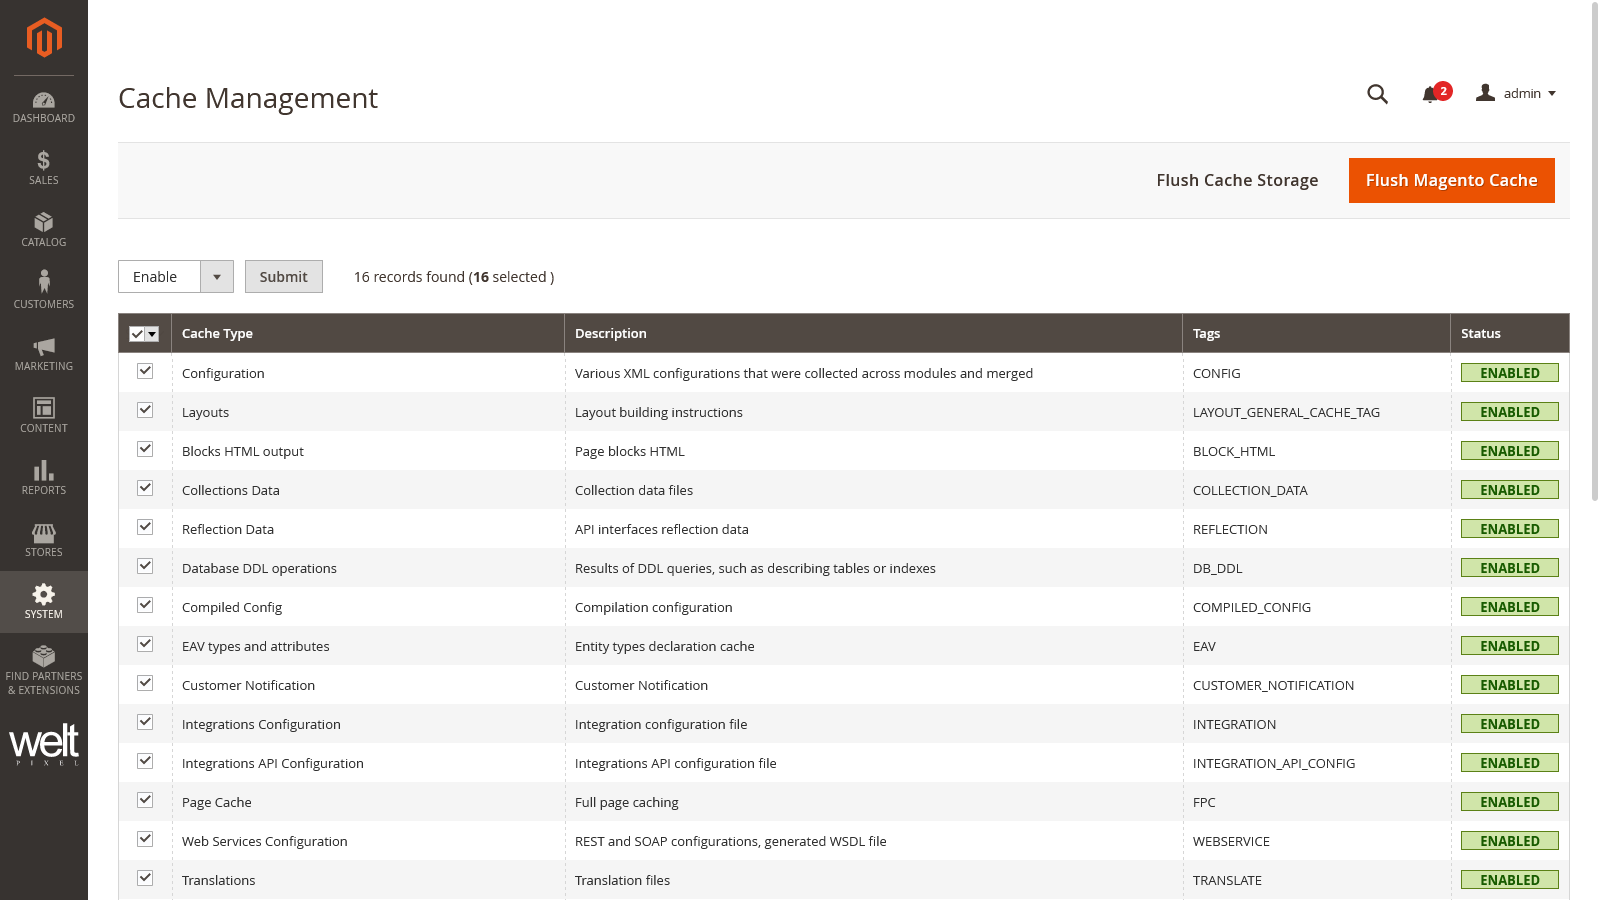
In order to Enable Cache you need to follow these instructions:
- Go to System
- Access Cache Management
- Enable the required cache types
Disabling Magento 2 Cache
This is also a simple process:
- Go to System
- Access Cache Management
- Select all unnecessary cache types
- Open the Actions drop-down menu (on the left)
- Select the Disable option

As you can see, it is very easy to access Magento 2 Cache and perform various actions on it. Whenever it seems to you that your website is no longer working at full capacity or if you notice that the conversion rate is not the best, consider clearing Cache and you will see improvements as soon as possible.
