
There's no doubting the fact that eCommerce has become more dynamic over the past few years, especially in the last two, considering the vast migration of large numbers of stores from brick and mortar to the online medium, as well as with the recent popularity of dropshipping. This change in pace means that stores are finding it harder and harder to keep up, and the ability to adapt is what separates brands that succeed from those that don't.
Setting up a store on the Magento platform, which is ever-evolving, can help you keep up as it offers you most of the tools you need to stay up to date with everything that matters in the eCommerce industry, however, it doesn't account for everything. The average customer's online shopping style has changed alongside the industry and has become more fast-paced. This means that, if a customer isn't hooked at a glance, it's likely they'll be leaving your page and taking their business someplace else.
Why do you need the Magento 2 Product Labels extension?
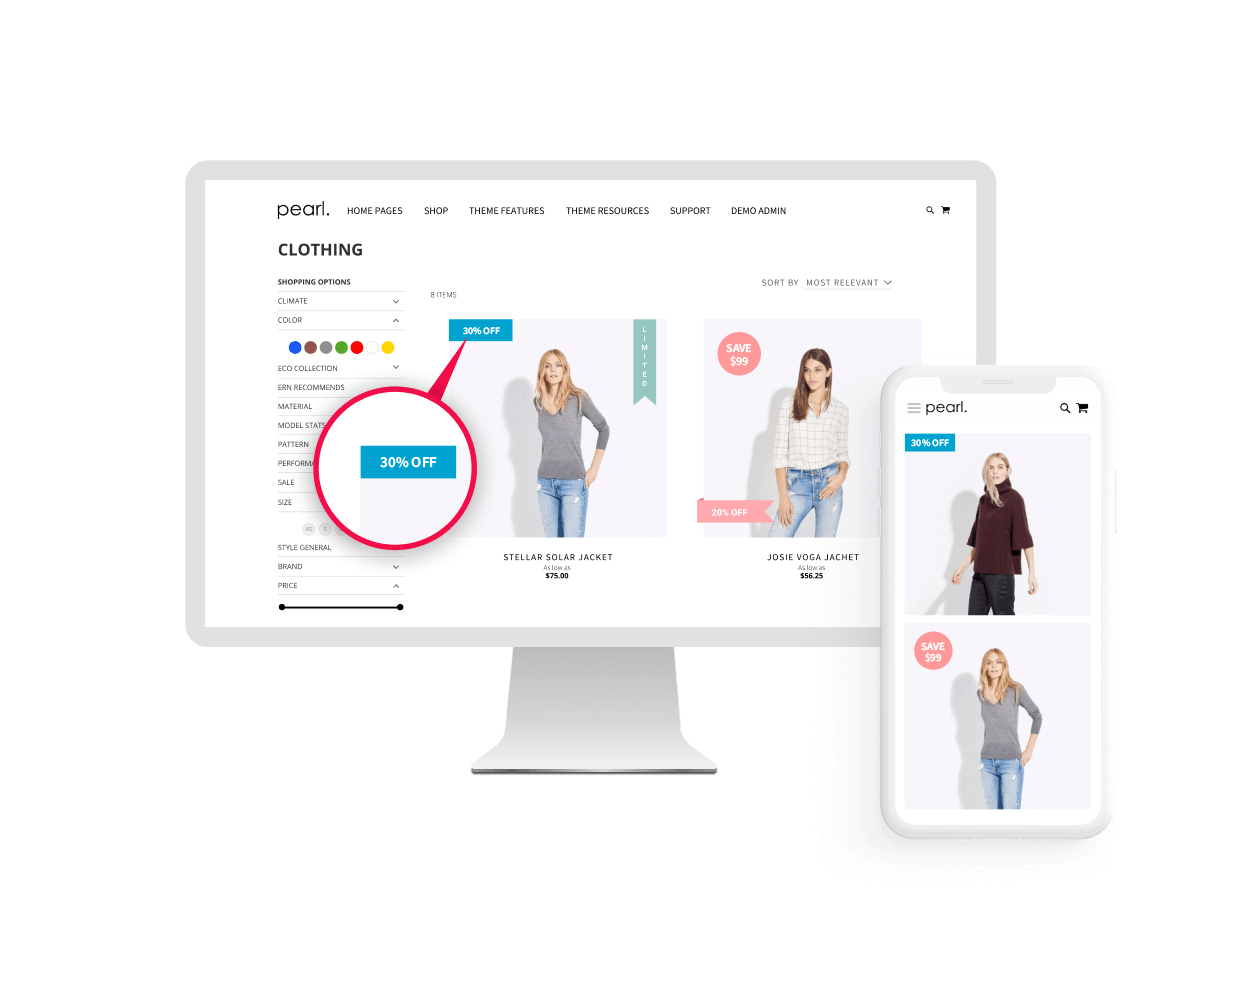
Unfortunately, Magento doesn't come with too many ways to grab a customer's attention out of the box, however, this is where we come in. Our Product Labels extension allows you to display beautiful labels and stickers on your products, either on the Category Page or on the Product Page. This means you're able to incentivize the customer whether they're just scrolling through your products or already looking at a specific one. You can put the spotlight on newly added products with a "Just Added" or "New" sticker, or advertise a sale with a "Discount" or "Sale" label.
These labels are set up via Conditions, which means you can target items either very specifically or very broadly. For example, you can single out a single Product on which to show a label or a whole Category. A tool that allows you to achieve this is an absolute must-have for any holiday season, such as Black Friday (which, coincidentally, happens to be coming up quite soon, at the time of writing this post!), allowing you to put the proper bullseye on your revenue generators and make sure conversions skyrocket.
That's good, but it gets even better
Starting with version 1.10.17 of the extension, it's gotten even better at helping you drive sales through the roof with a new functionality. Basically, what you can now do is construct labels via a set of predefined variables that can be used to increase the impact of your promos, as well as induce a FOMO effect in users browsing your store. This turns boring old static labels into dynamic ones that are sure to catch the eye! So how's it done? We'll explore a scenario below, however, the usable variables are the following:
- {NL} - This is used to form a new line, similar to a linebreak.
- {DAYSLEFT} - This variable is used to show the number of days a label has before expiring.
- {PRICE} - This shows the Base Price of the product the label is on.
- {SPECIAL_PRICE} - This shows the Special Price you have configured in Magento for the product.
- {DISCOUNT_PERCENT} - This variable dynamically calculates the value between the Base Price and Special Price of the product and shows it via percentage.
- {DISCOUNT_AMOUNT} - Similar to the variable above, this calculates the value between the Base Price and Special Price, but displays it as a flat value instead of a percentage.
- {SKU} - This pulls the product's SKU and displays it on the label.
- {QTY} - This variable displays the current Stock Quantity for the product in question.
So how do you use Label Variables?
Let's go ahead and take a very common scenario in which constructing a label with variables will surely net you more purchases. We're going to be showing users exactly how much they're saving on one of our Products that has a Special Price. To do this, we'll be using the {DISCOUNT_PERCENT} and {DISCOUNT_AMOUNT} variables. We'll first be showing the customer the percentage, and then what that percentage means in dollars. Let's get started!
Step 1 - Creating the Product Label
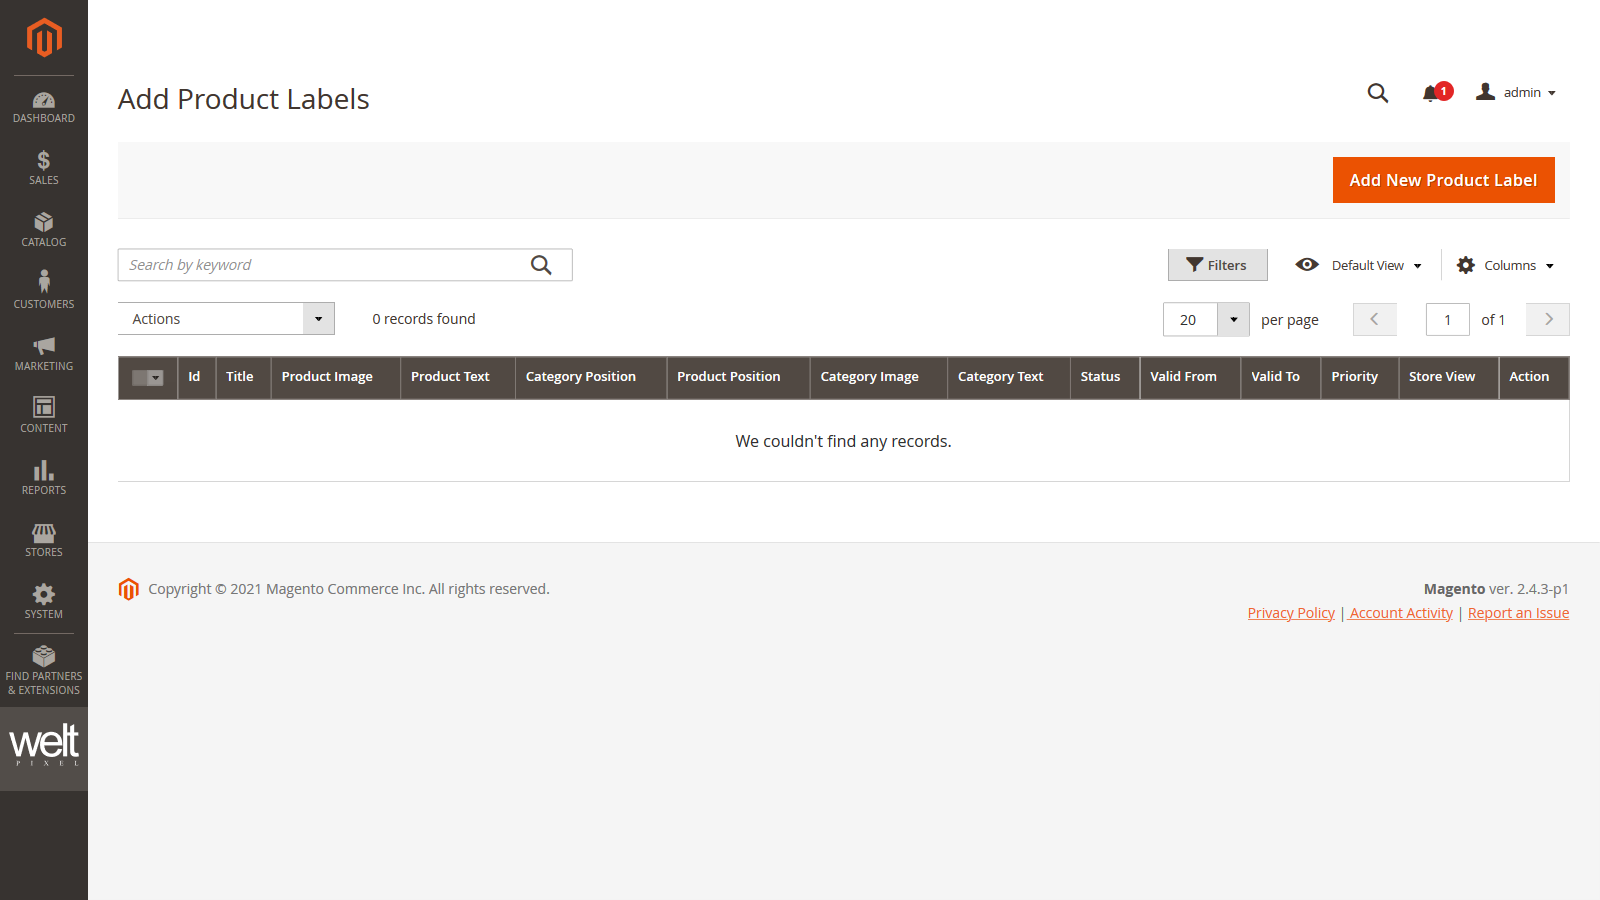
To create a Product Label, head into Admin -> WeltPixel -> Product Labels -> Manage Labels and click Add New Product Label.
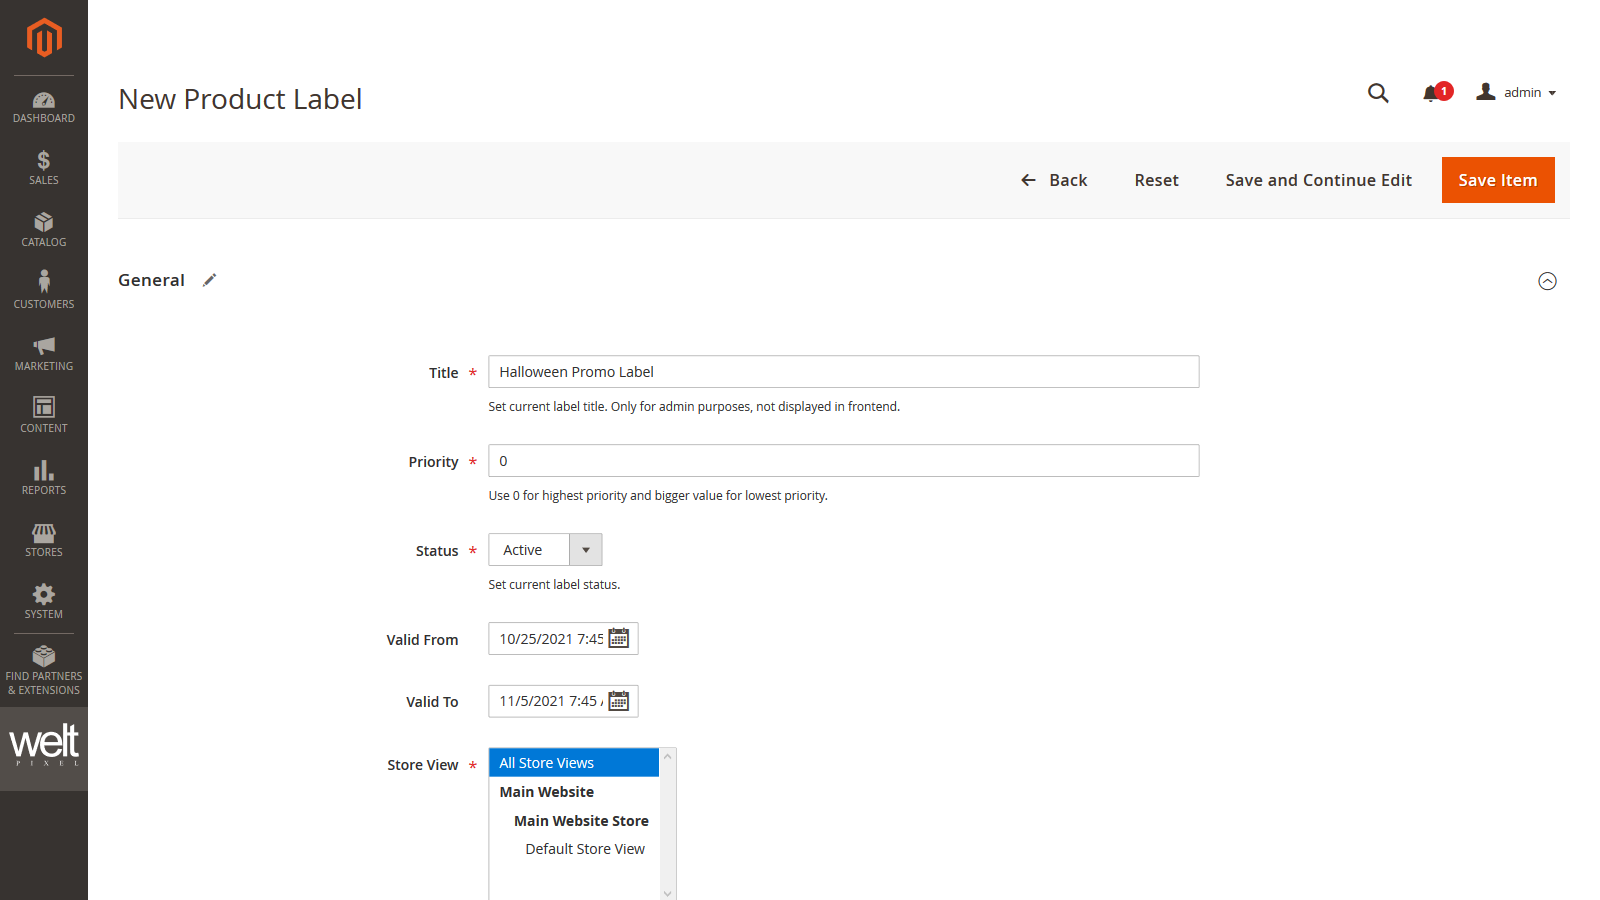
Step 2 - Configuring the Product Label - Basic info
Add the basic info for your Product Label. Give it a suggestive name, set the Priority (0 for highest), and set the active dates. In this case, we'll be displaying the label from the 25th of October to the 5th of November, so we'll call it a Halloween Promo. Spooky!
Step 3 - Configuring the Product Label - Label Design and text
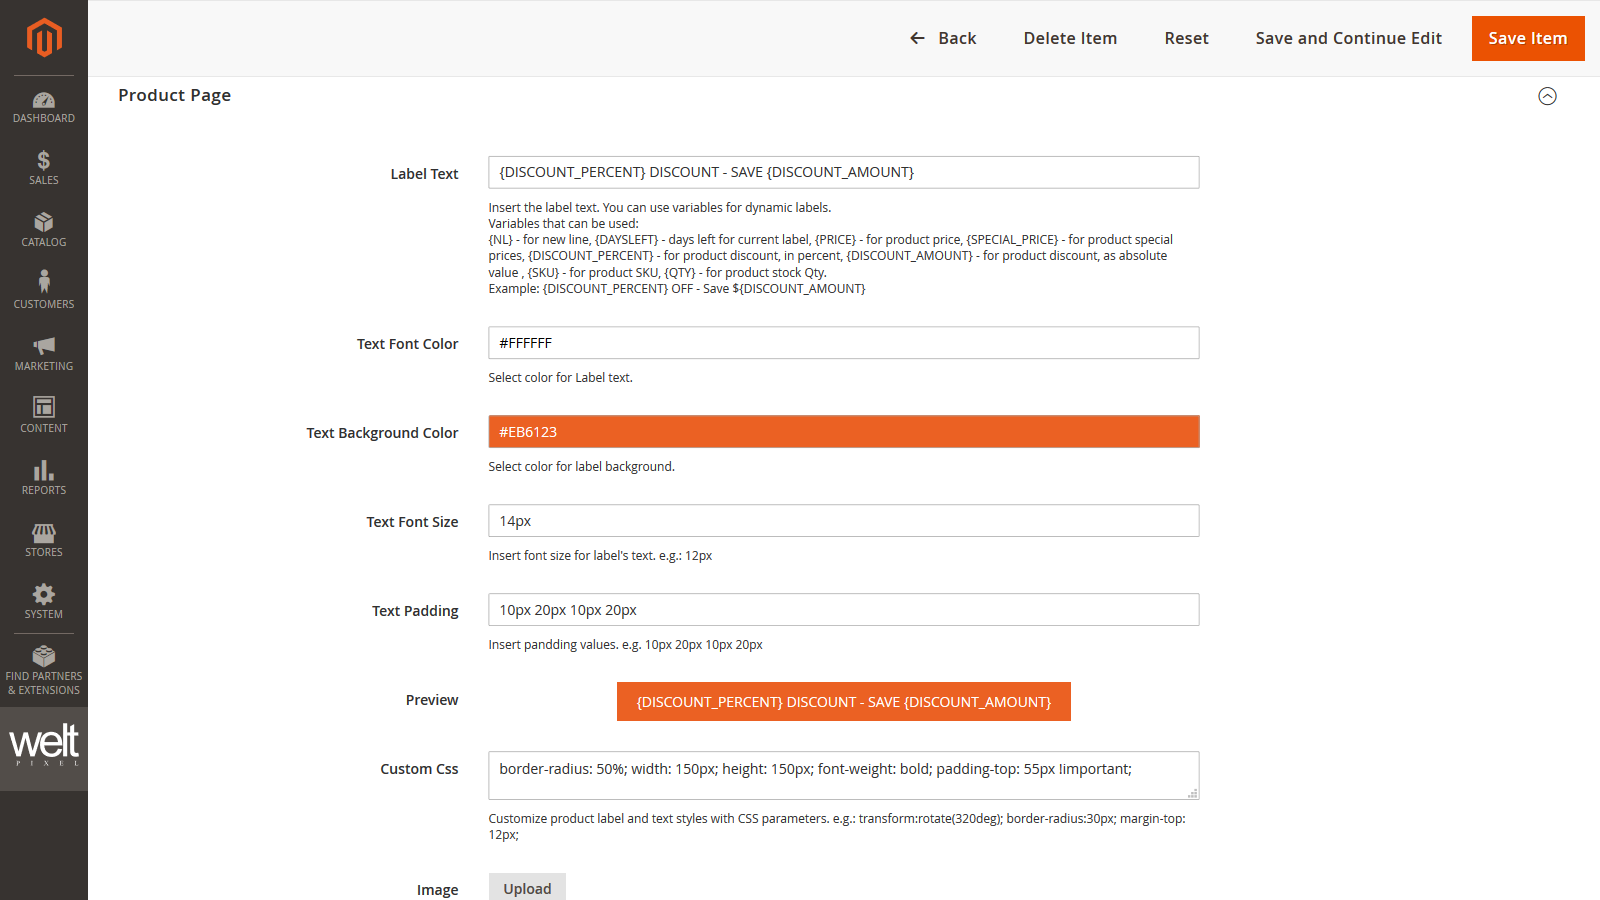
Moving on, we'll have options for the Product Page and the Category Page. The fields are the same, however, you can have a different configuration for each. The Label Text field is where we'll be using our Variables. As mentioned above, in this example, we'll be using the {DISCOUNT_PERCENT} and {DISCOUNT_AMOUNT} variables to show customers the percentage of the discount they're receiving, and what that translates to in a flat value.
Configure the rest of the label options, add your Custom CSS (if required). You'll see a preview of the label that will be generated on the front end. The variable values will not be rendered here, so you can expect to only see the variable itself.
Step 4 - Configuring the Product Label - Label Position
This step involves choosing the position of the Product Label. Relative to the item image, and you have 9 options available in the grid. Normally, the labels are displayed either in the top-left or top-right corners, however, you can choose whatever position works for you.
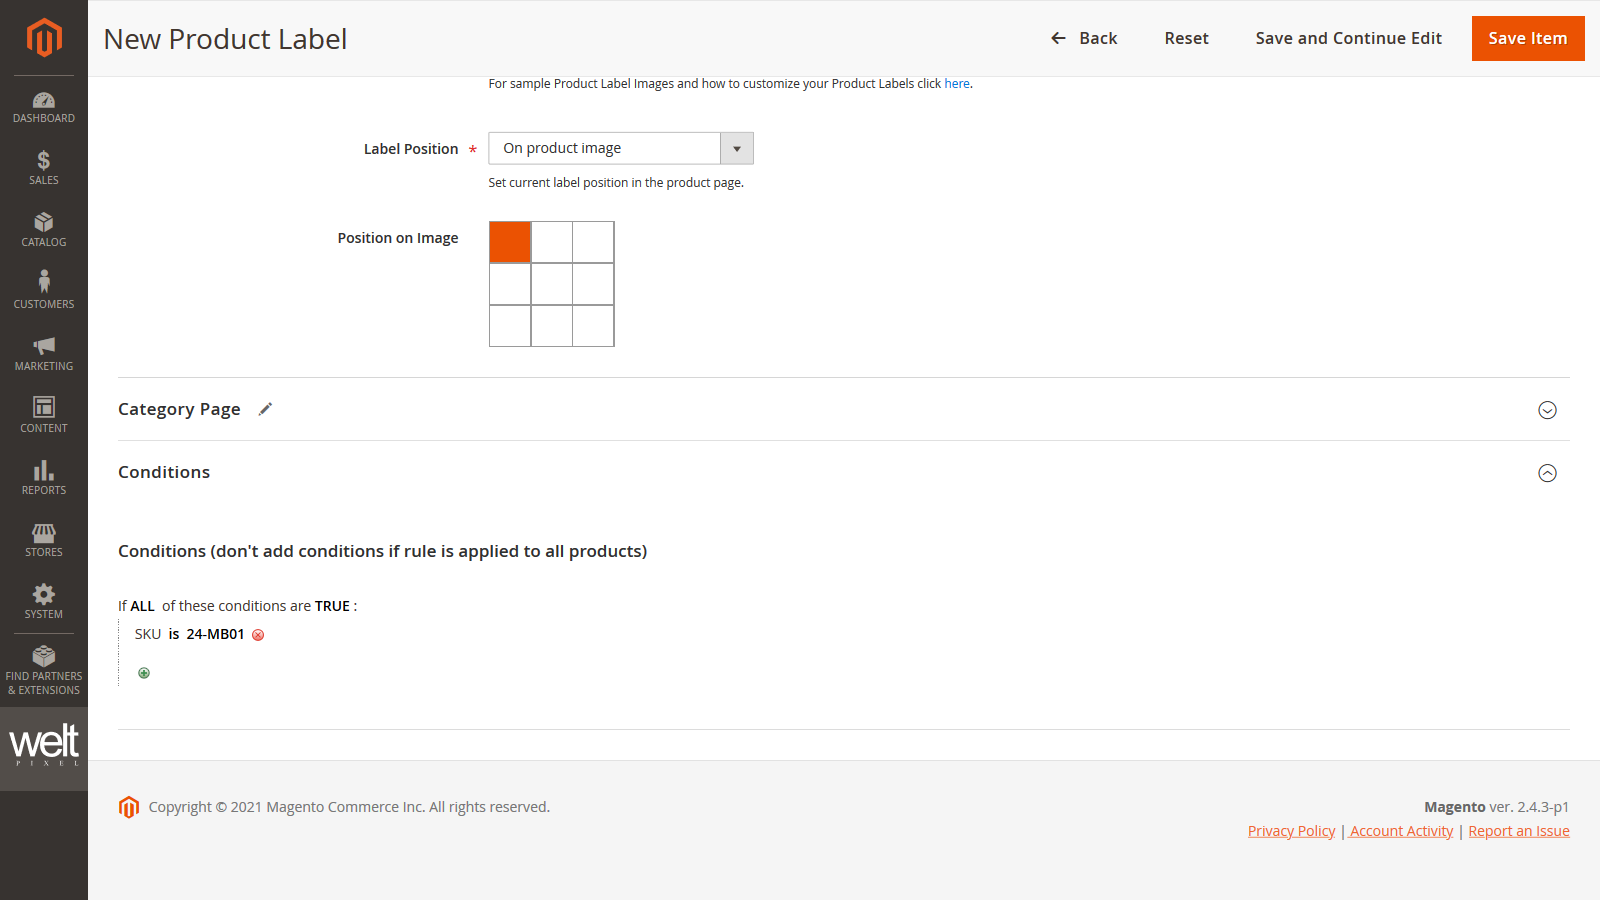
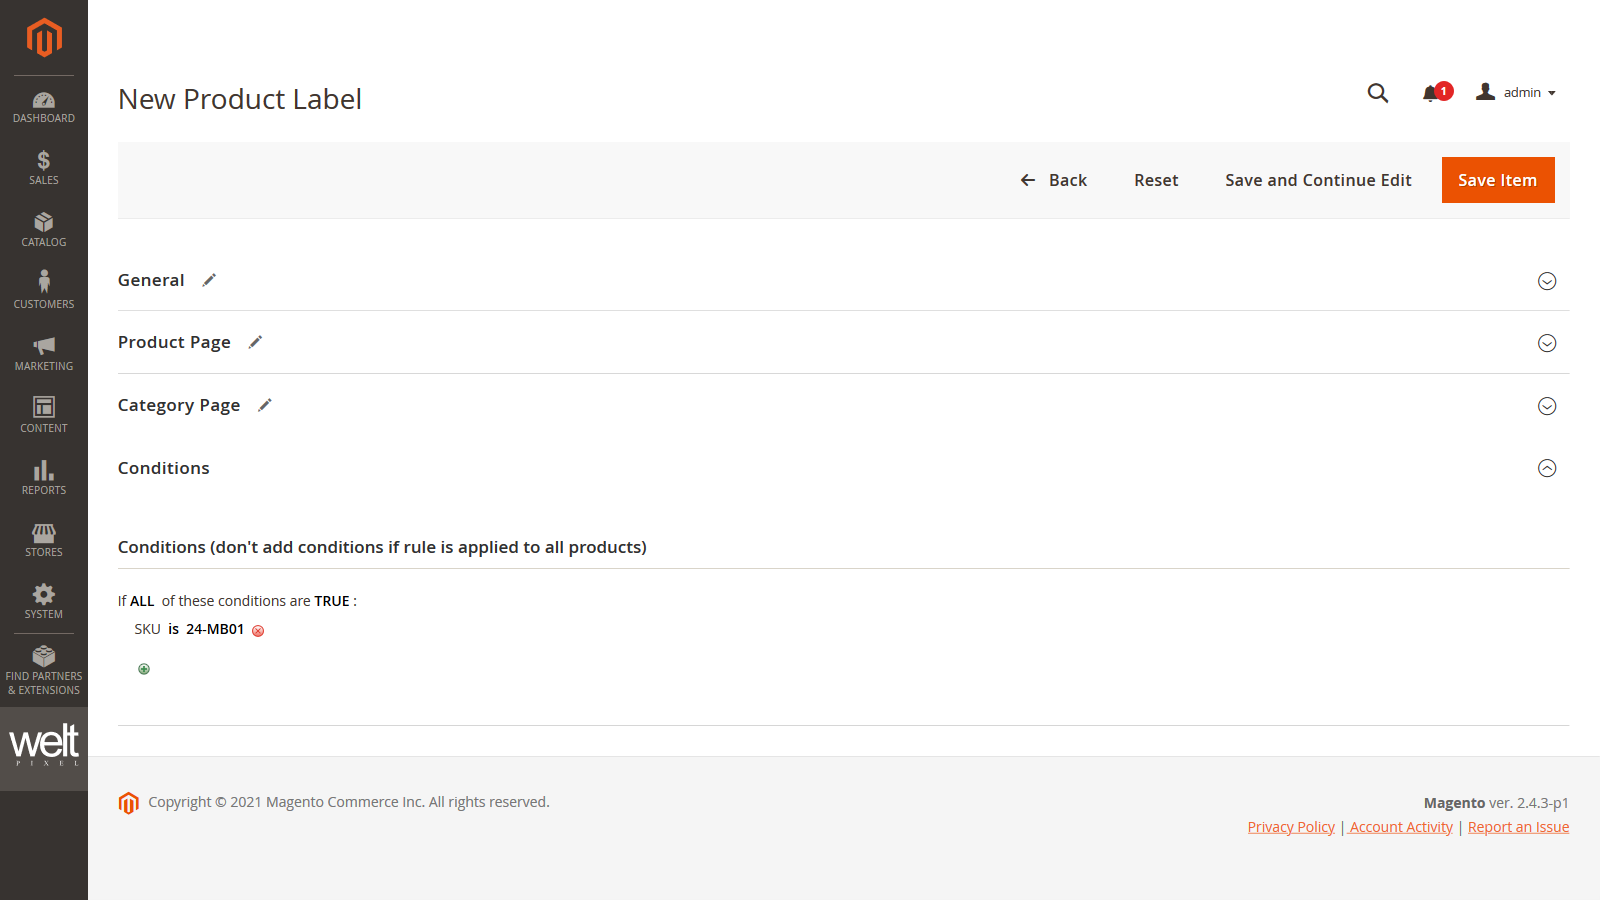
Step 5 - Adding Conditions
The final step is choosing the Conditions under which to display the Product Label. For this example, we've chosen a simple rule that only applies to one Product, however, a lot of different combinations can be applied. You can find a few examples in this guide: How to customize Product Labels - New, Sale, 20% off, etc.
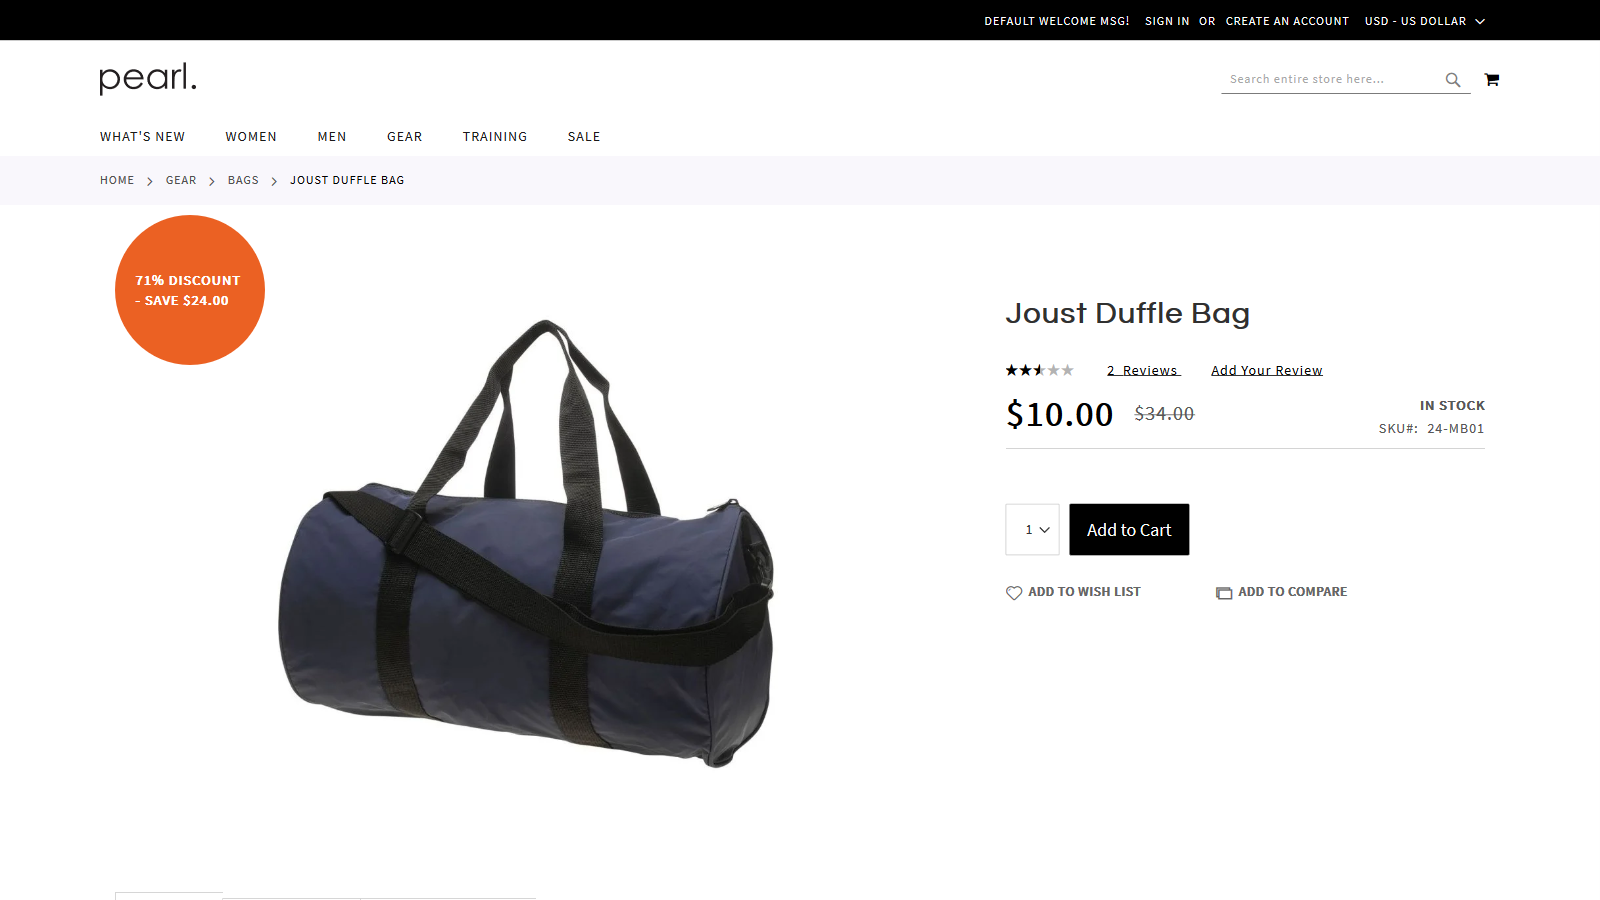
Step 6 - Checking the frontend
After saving your Product Label, flush your Magento Cache from the Cache Management section and check the frontend of the store. If you've configured the label for the Category Page and the Product Page, you can expect to see the label displayed on both, on the Products that fit your applied Condition.
Congrats! You've successfully added a Dynamic Product Label via Variables, which is sure to bring more attention to your products and help you take your revenue to the next level! Download the Product Labels extension here: Magento 2 Product Labels extension
The module is also included in the Pearl Theme for Magento 2, so make sure you check it out!
