
Store exodus to the online medium is growing larger and larger by the day which means there's more competition for Search Engine ranking, particularly Google ranking. Your website can be equipped with all the bells, whistles, and cutting-edge technology available, but if users can't find it, you'll see your revenue stalling and potentially even dropping from month to month. This is why one of the most important aspects you can consider for your online business is visibility. The equation is simple: higher visibility = more customers, which translates into more sales.
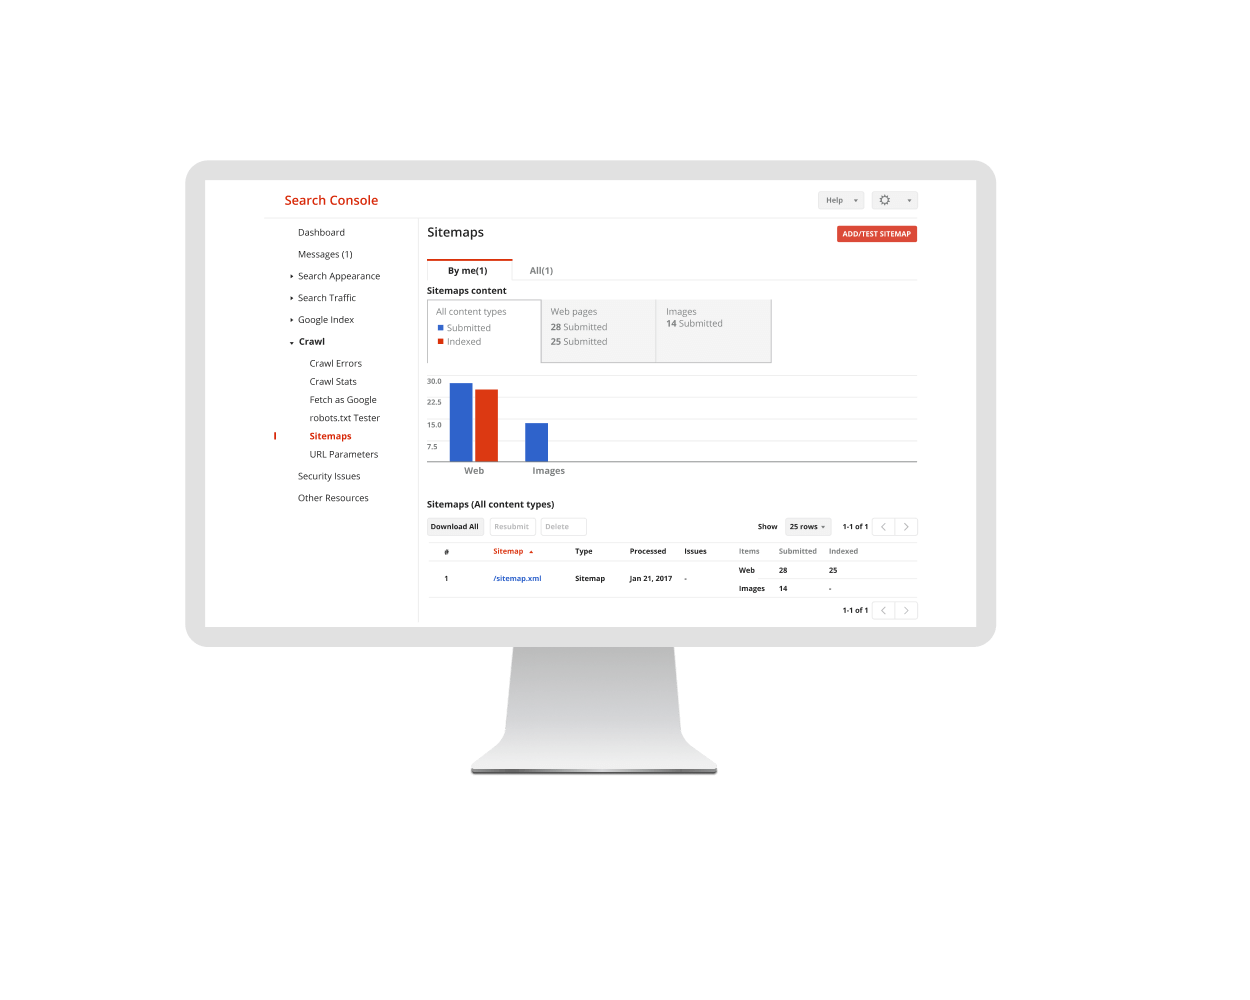
Improvements to your site's SEO prowess and overall visibility can be performed using various tools, however, we'll be discussing one of the most simple and efficient of those, namely, the Sitemap. In essence, a Sitemap is a navigational tool that contains essential links for all pages on the website. With the help of a Sitemap, you can ensure Search Engines such as Google are able to properly index your website and that visitors are never lost when navigating your pages.
There are two types of Sitemaps: XML - used by search engines for indexing, and HTML - used by site visitors. An XML Sitemap consists of a text file that lists all the links on the website and can include metadata for each URL while an HTML Sitemap consists of an HTML page that lists all the subpages of the website. It's usually placed in the Footer so as to be accessible by all users.
To sum it all up, you need a proper, well-optimized Sitemap to make sure Search Engines such as Google can index your website. Without a Sitemap, store visibility goes down, which results in sales and overall revenue going down as well. Keeping your visibility and SEO score at high levels will result in revenue skyrocketing!
How does Magento 2 handle XML Sitemaps and what are its limitations?
Magento provides a method of generating a Sitemap out of the box, which is very useful as you don't have to manually generate the file and add your website's URLs. This can be done quite easily through the Magento Admin panel, however, there aren't very many customization options available for Sitemaps generated automatically by Magento. You can set the frequency at which the Sitemap is refreshed, in other words, the frequency at which Magento checks for new URLs added to the store, which, if it finds any, are automatically added to the generated Sitemap for individual page types. For example, you can have Magento check for new Products daily and for new content Pages (CMS Pages) weekly. You can also choose whether or not to include Product images.
When it comes to including or excluding specific URLs from the Sitemap, Magento doesn't allow you to do this without altering the code. This is where we come in with our Google XML Sitemap for Magento 2 extension. This module is essentially an extender of the base functionality of the Magento 2 Sitemap which allows you to perform the following actions that are not available out of the box:
- Exclude specific pages (Category, Product, CMS) from being included in the Sitemap
- Add NOINDEX, NOFOLLOW meta tags to specific pages
- Add Canonical URL meta tags to specific pages
- Add custom URLs to the Sitemap
That being said, let's showcase these functionalities through a few examples. We'll start with a general "How To" that explains how to generate a Sitemap in Magento 2, after which we'll see some specific use cases for our module, such as excluding a product from the Sitemap and adding NOINDEX, NOFOLLOW meta tags to one of our pages.
XML Sitemap Generation
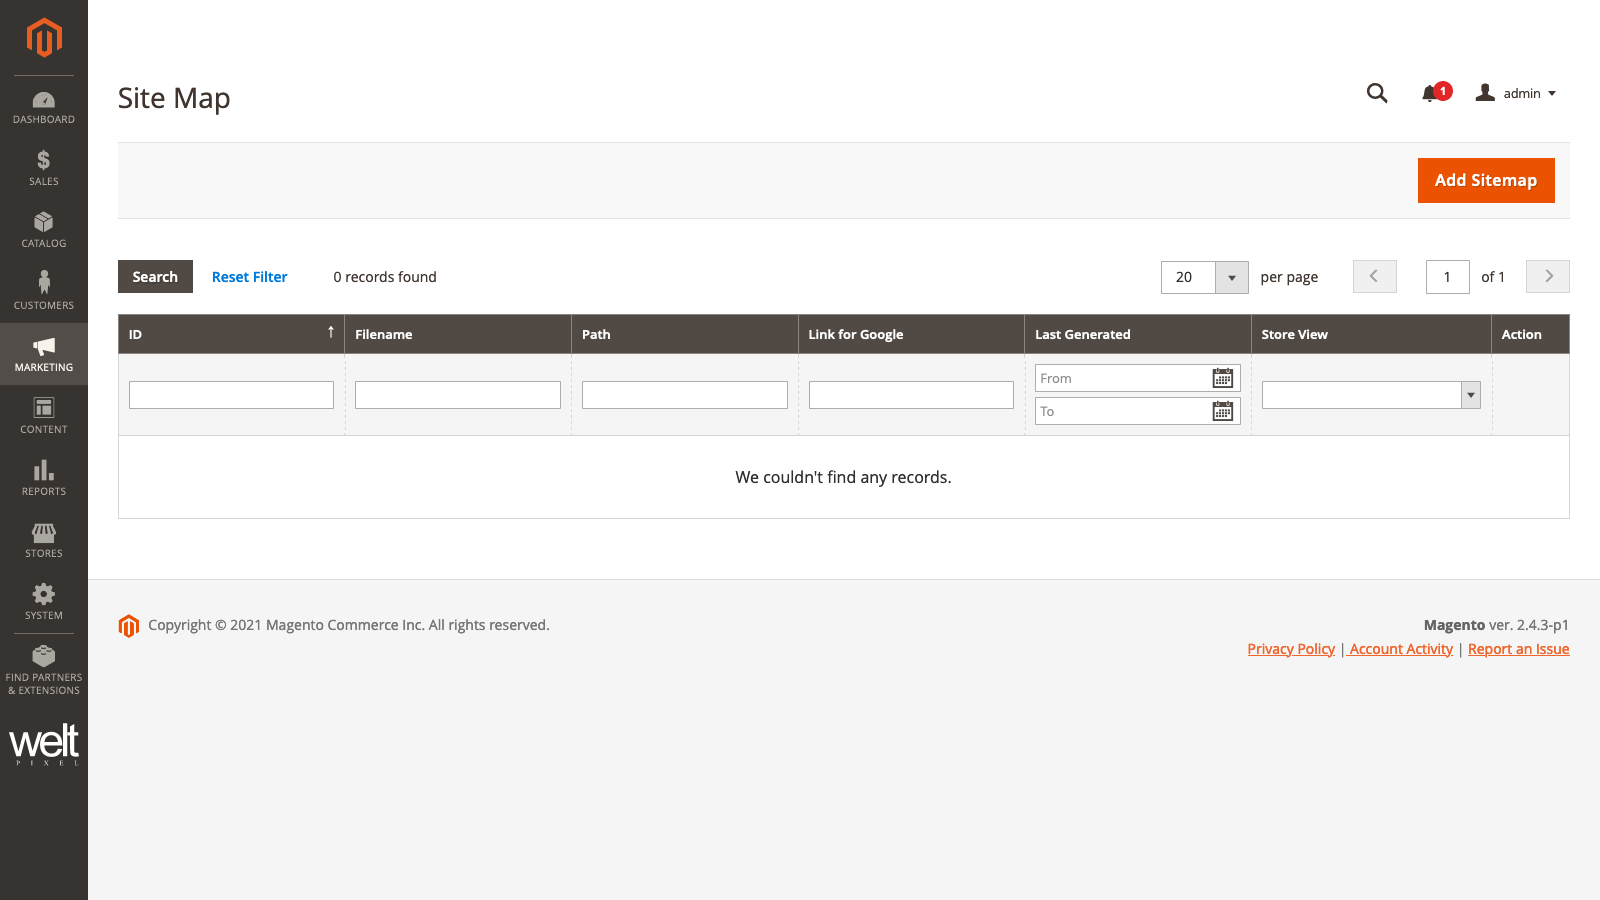
STEP 1 - CREATING AND NAMING THE SITEMAP
We'll start by logging into our Magento Admin panel and navigating to Marketing -> SEO and Search -> Site Map and clicking on Add Sitemap.
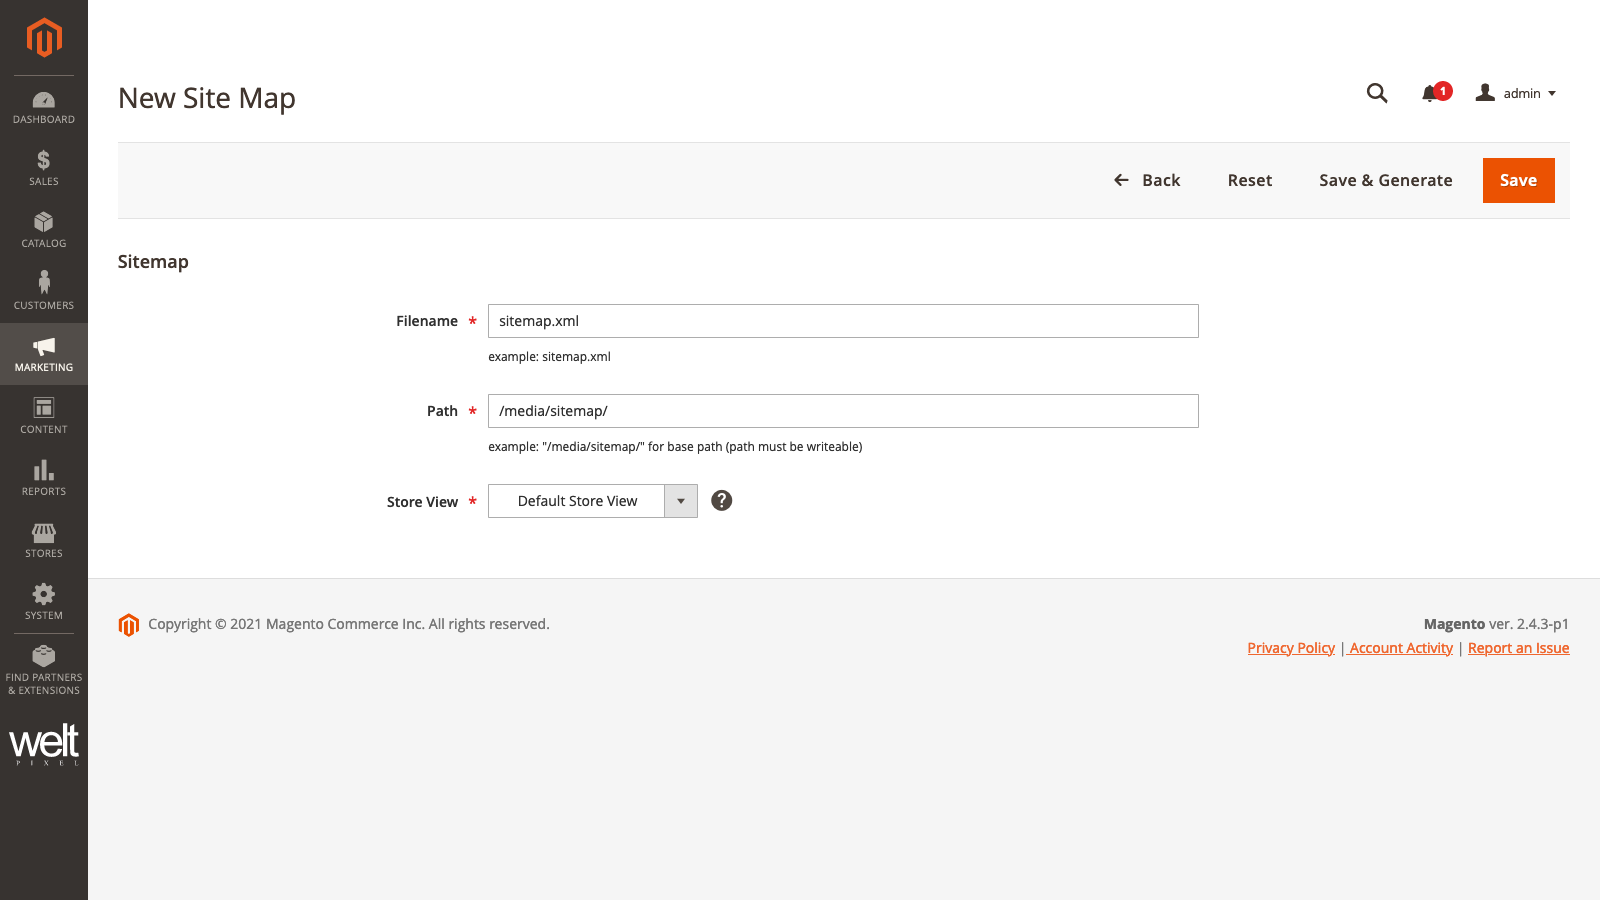
STEP 2 - SAVING AND GENERATING THE SITEMAP
Choose a filename (the default sitemap.xml name provided in the example is fine), a path in which to save the file on the server (the path has to be a writable location - the example /media/sitemap/ path should be fine as this is generally a writable location) and the Store-View you'd like to generate the Sitemap for. Click on Save and generate.
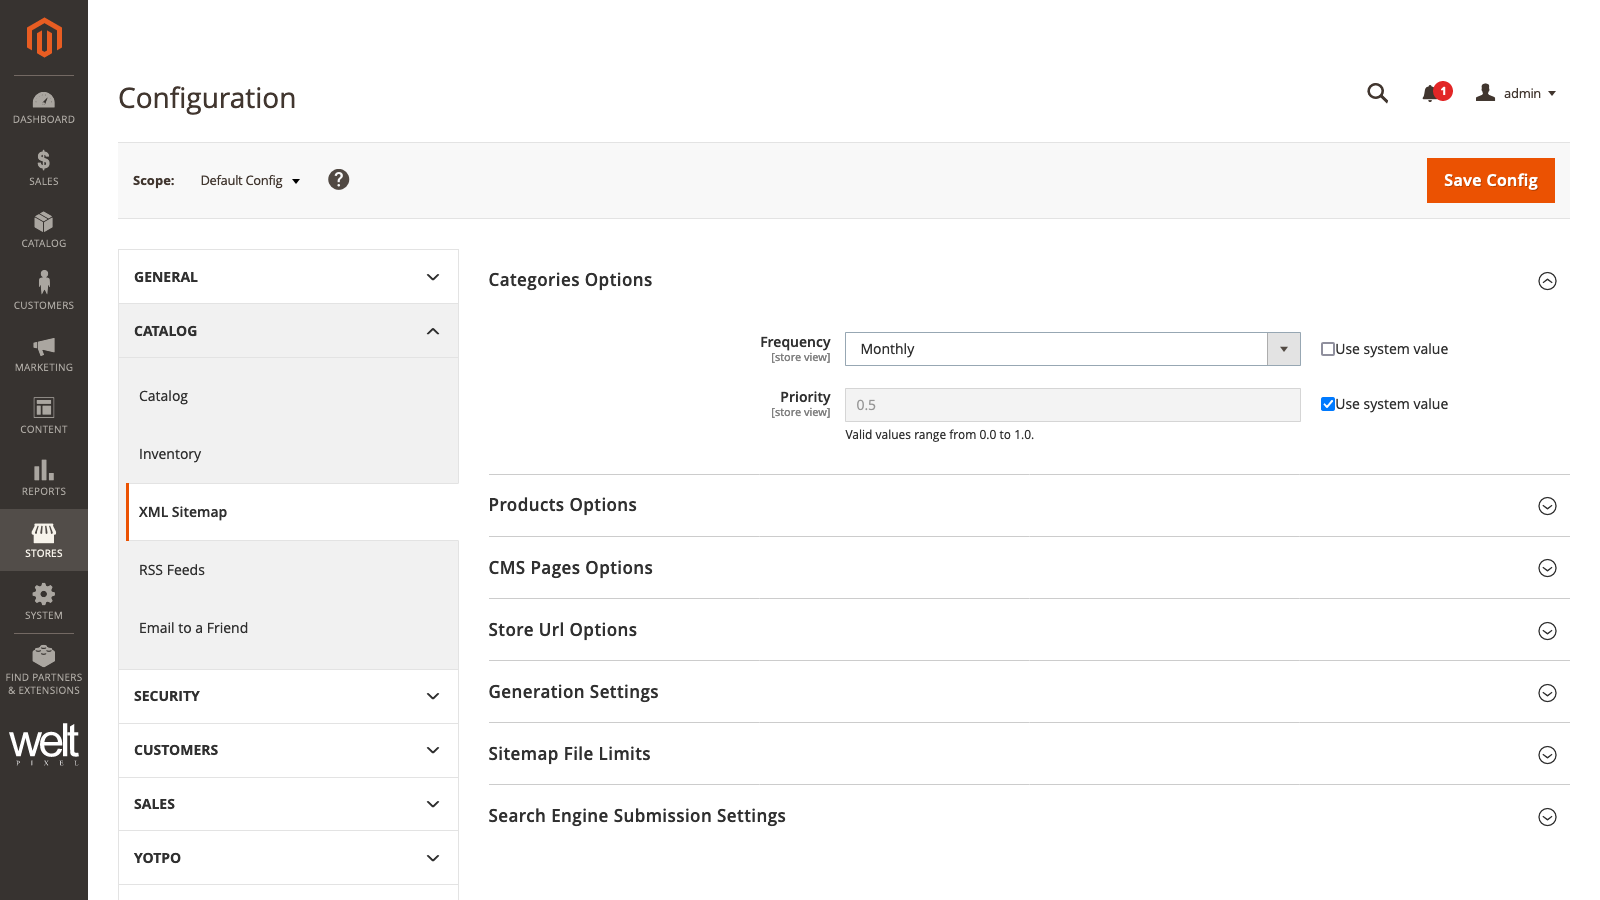
STEP 3 - EDITING SITEMAP REGENERATION FREQUENCY
The generated Sitemap will now show up in the table. We can move on to the additional generation settings that Magento allows, such as frequency per page type and priority. Generally, these settings are fine to keep at their default values, however, we'll be editing the frequency for our Category Pages in this example. We'll head into Stores -> Configuration -> Catalog -> XML Sitemap. Over here, we'll expand the Categories Options tab and set the frequency to Monthly, instead of the default Daily value.
Note: The functionalities that follow are specific to the WeltPixel XML Sitemap for Magento 2 extension, and require it to be installed and enabled on your store.
How to exclude a specific Product from the Sitemap in Magento 2
Now that our Sitemap is generated, we'll take a look at how to exclude a Product from it. This means that the next time Magento checks the store's URLs, the one we marked as excluded will be removed from the generated Sitemap. To do this, we'll need to find our Product in Catalog -> Products and hit Edit. In the Edit section, scroll down to WeltPixel Options and expand the tab. Set the Exclude from Sitemap option to Yes and save the Product.
![]()
How to set up NOINDEX, NOFOLLOW meta tags for specific pages in Magento 2
There may be certain pages that you want to tag with NOINDEX, NOFOLLOW, or both meta tags to prevent Search Engines from indexing and following the links included on the page. This can help with your SEO strategy by allowing you to control how search engines make your content available on their result pages and how your links can be utilized by other websites.
Meta tags need to be introduced in the section of a specific page, and Magento does not provide access to the section of individual pages, but rather only to the section of the whole website. Let's see how the XML Sitemap for Magento 2 extension can be used to add these tags to specific pages, without influencing other sections of the store.
Simply navigate into your desired page, be it Category, Product, or CMS Page, and scroll down to the WeltPixel Options section. Over here, set the Enable Index Follow option to Yes and select the Index Value, as well as the Follow Value. You can combine these options however you see fit. Save your page, clear the Magento Cache and you're done!
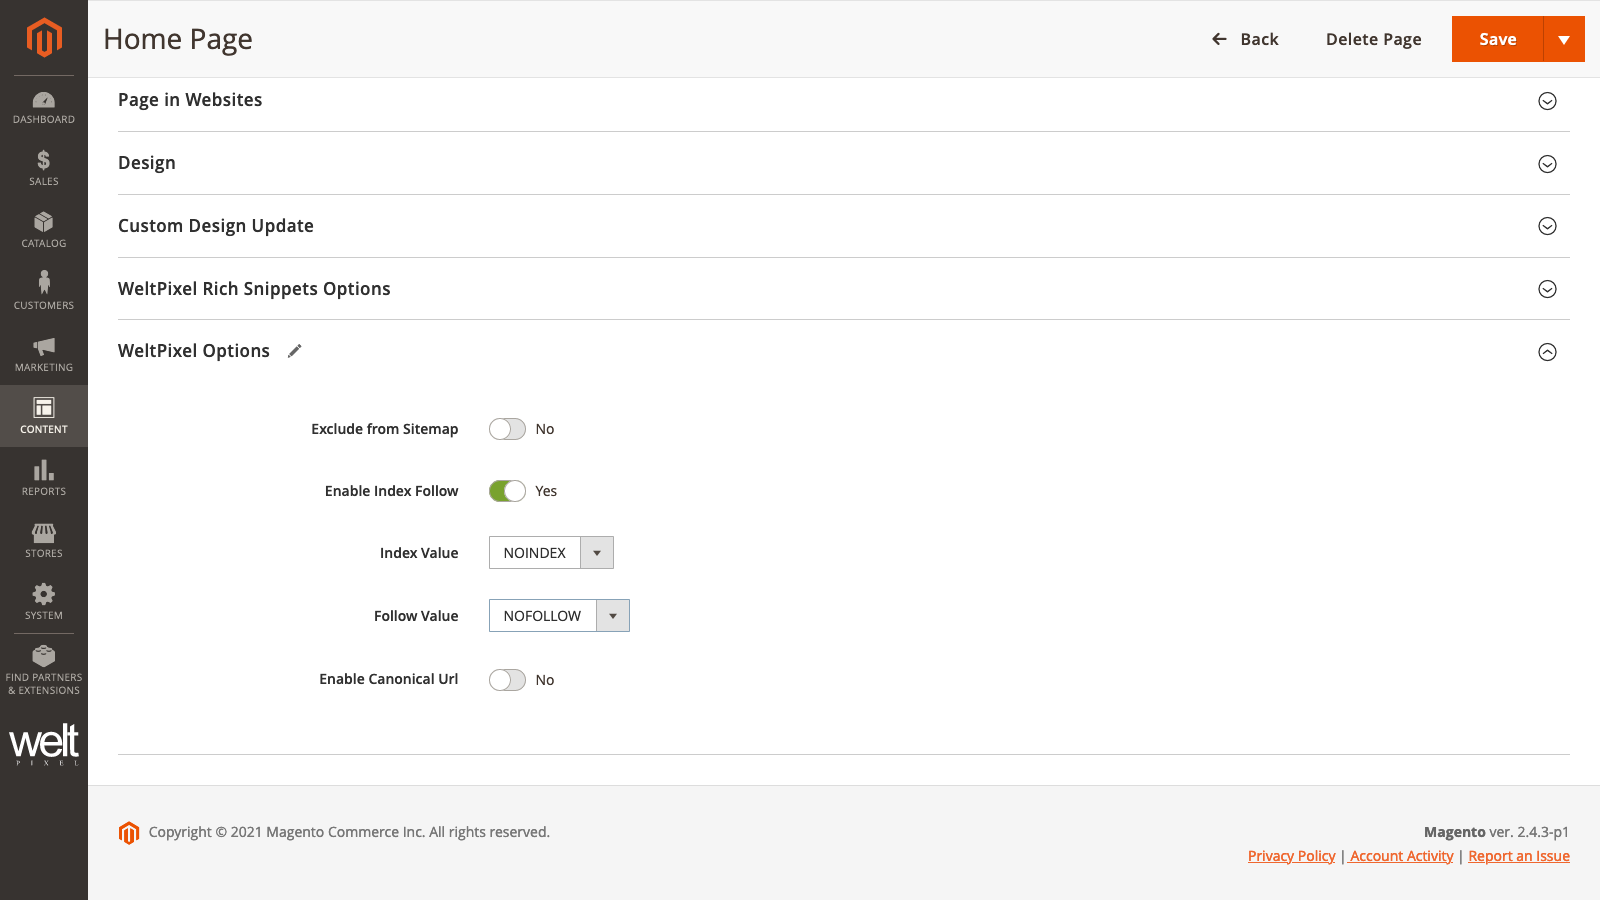
Confirming NOINDEX, NOFOLLOW meta tags are applied in Magento 2
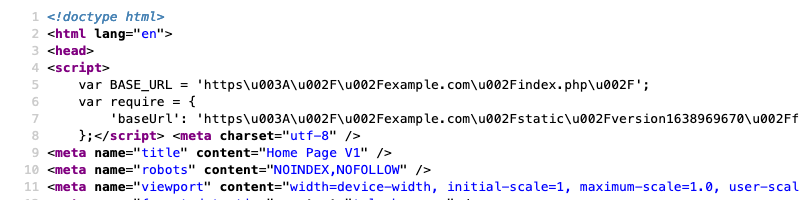
To confirm the meta tags are correctly applied as you configured them, navigate to your page on the front end of the store and open up the Page Source (CTRL+U). In the section, you should see the meta tags as you configured them.
Conclusion
We can see just how easy it is to properly set up and customize a Sitemap in Magento 2, an SEO aspect that is all so important to ensure your store stays relevant and visible in a time when more stores than ever are migrating to the online medium. Download the WeltPixel Google XML Sitemap for Magento 2 extension now!
