
In the previous step, we went over a detailed walkthrough of How To Set Up a Custom Domain For Your GTM Server-Side Container, which is a very important part of the Google Tag Manager Server-Side configuration process as a whole because it's crucial to being able to transform third party cookies into first party, thereby ensuring your measurement data makes it into Google Analytics, whether that's Google Analytics 4 or Universal Analytics.
To find a list of all the steps required to implement and set up a GTM server-side container, as well as to get a better idea of why it's absolutely crucial that you implement server-side tagging via Google Tag Manager (GTM) and Google Analytics (GA), head over to Server-Side Tracking In Google Tag Manager (GTM) For Google Analytics 4 And Universal Analytics.
It's important to note that, while Server-Side tracking can be implemented for Google Analytics Universal Analytics, this platform is going to be decommissioned starting July 1st, 2023, so it's highly recommended you use Google Analytics 4. If you're unsure how to set up Google Analytics 4, check out the How To Add Google Analytics 4 Guide.
Verifying Google Tag Manager (GTM) Server Event Data
Now that your GTM web server is up and running and has a custom domain associated with your own website, you're ready to go ahead and verify that your GTM server's data collection is operational. Let's see what the steps to do that are!
-
Head back into the GTM Dashboard and login to your Google Tag Manager account, if you haven't done so already.
-
Once logged in, access the server-side container we created back in the first step of the implementation process.
-
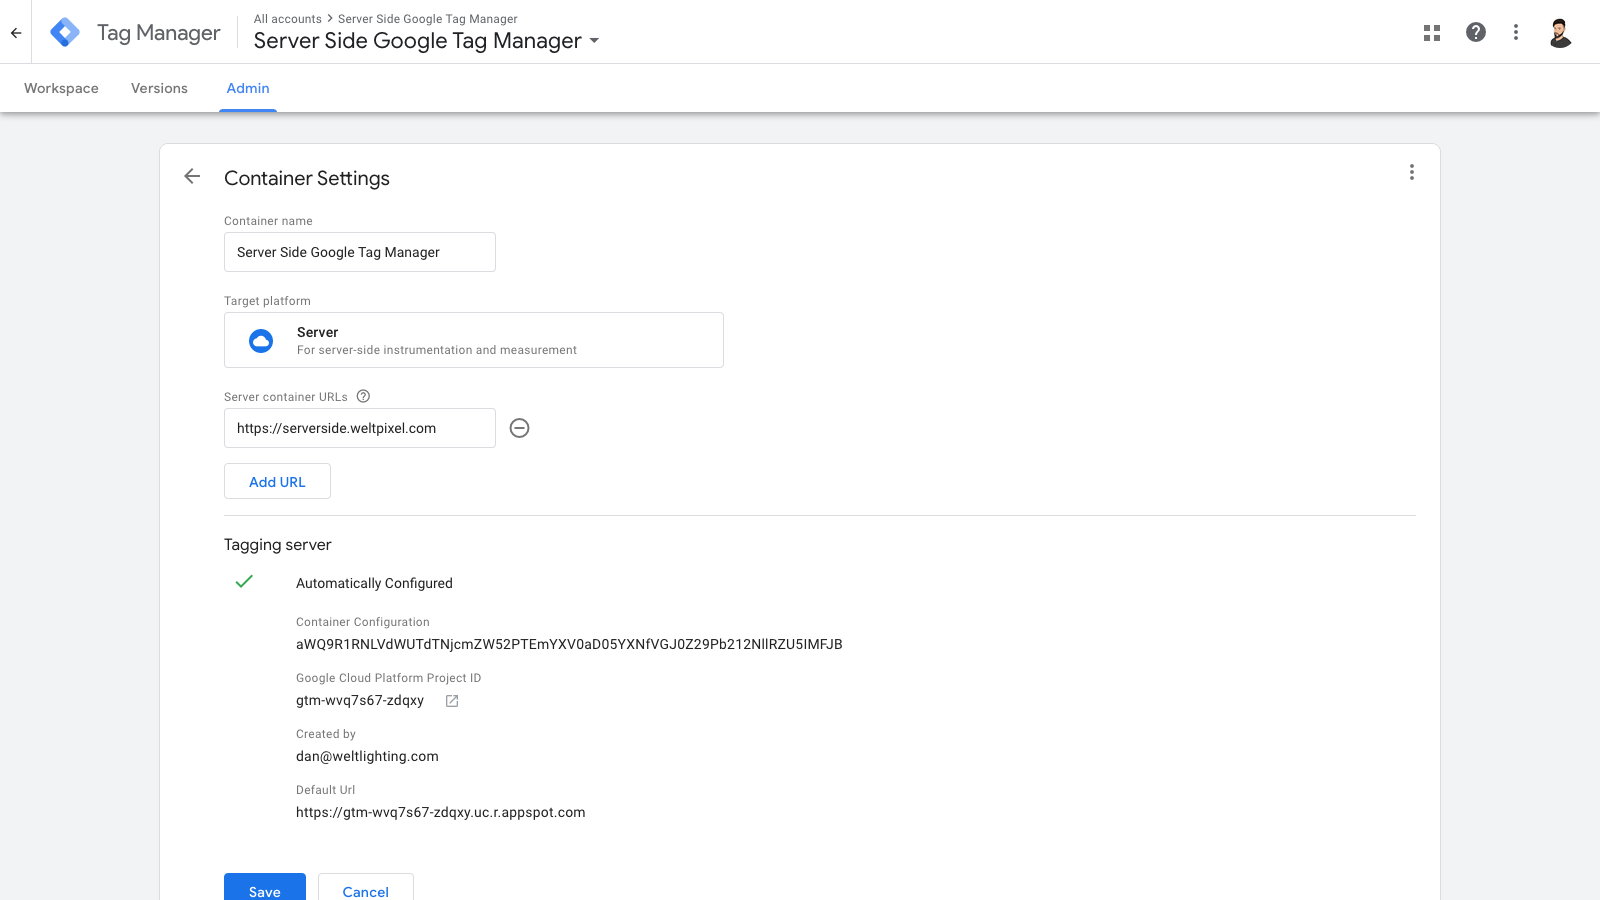
Click Admin and then click Container Settings. Once in the GTM Container Settings, add your configured Custom Domain to the Server Container URLs section and click Save. This will now basically be the server container endpoint!
-
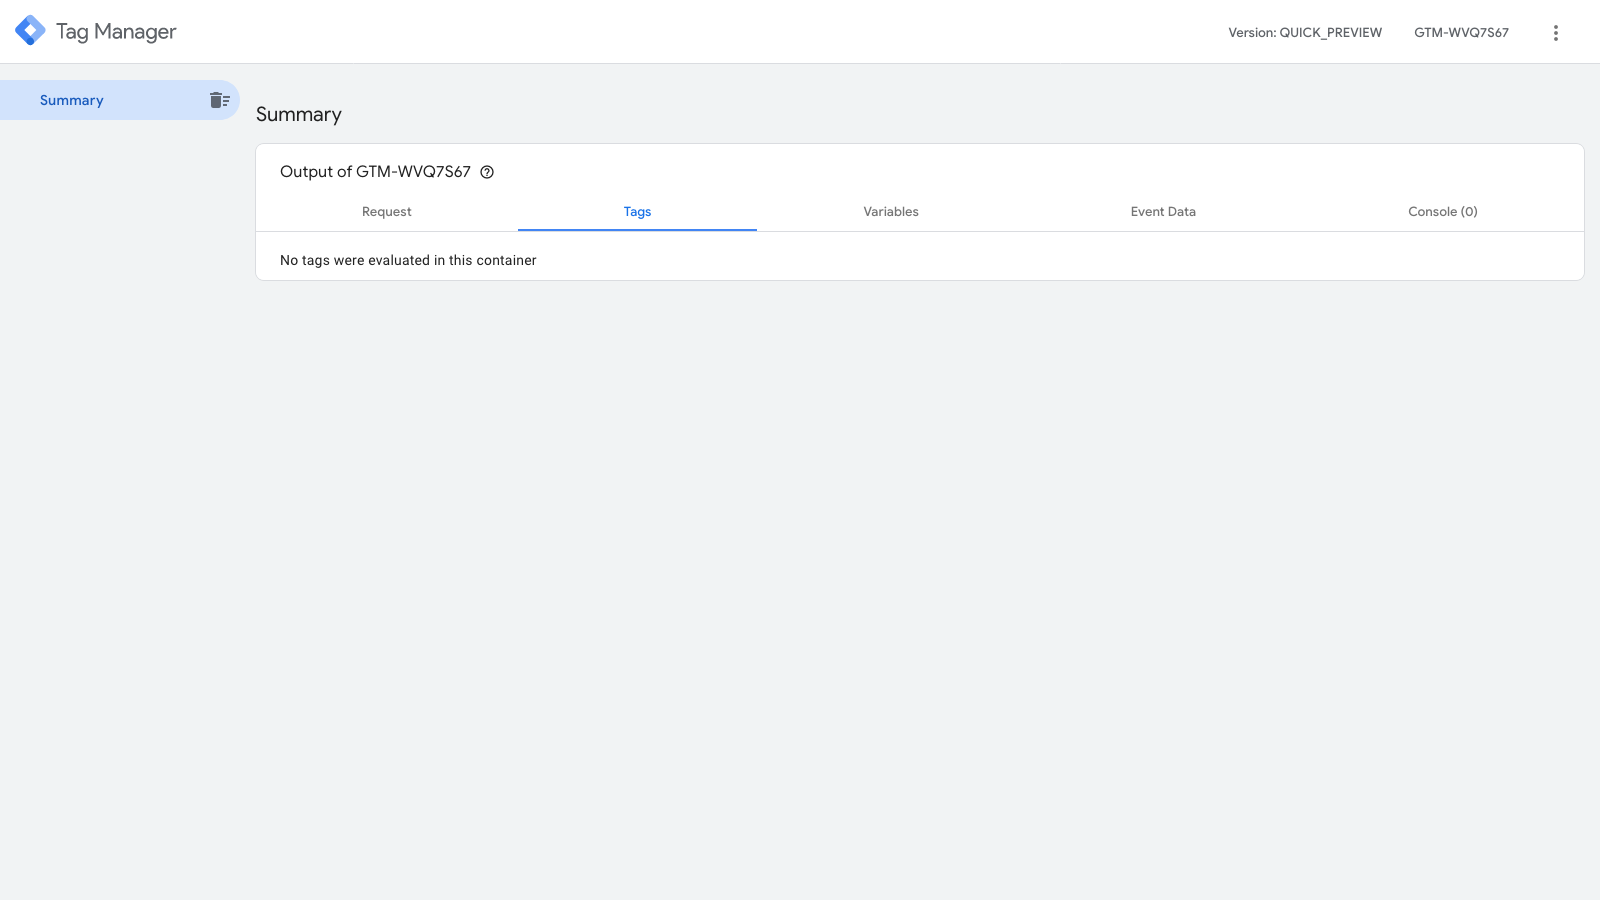
Next, click on the Preview Mode button, found in the top right corner of the GTM container dashboard. You should see a summary of the event data in the container, but there'll be nothing populated here for now.
-
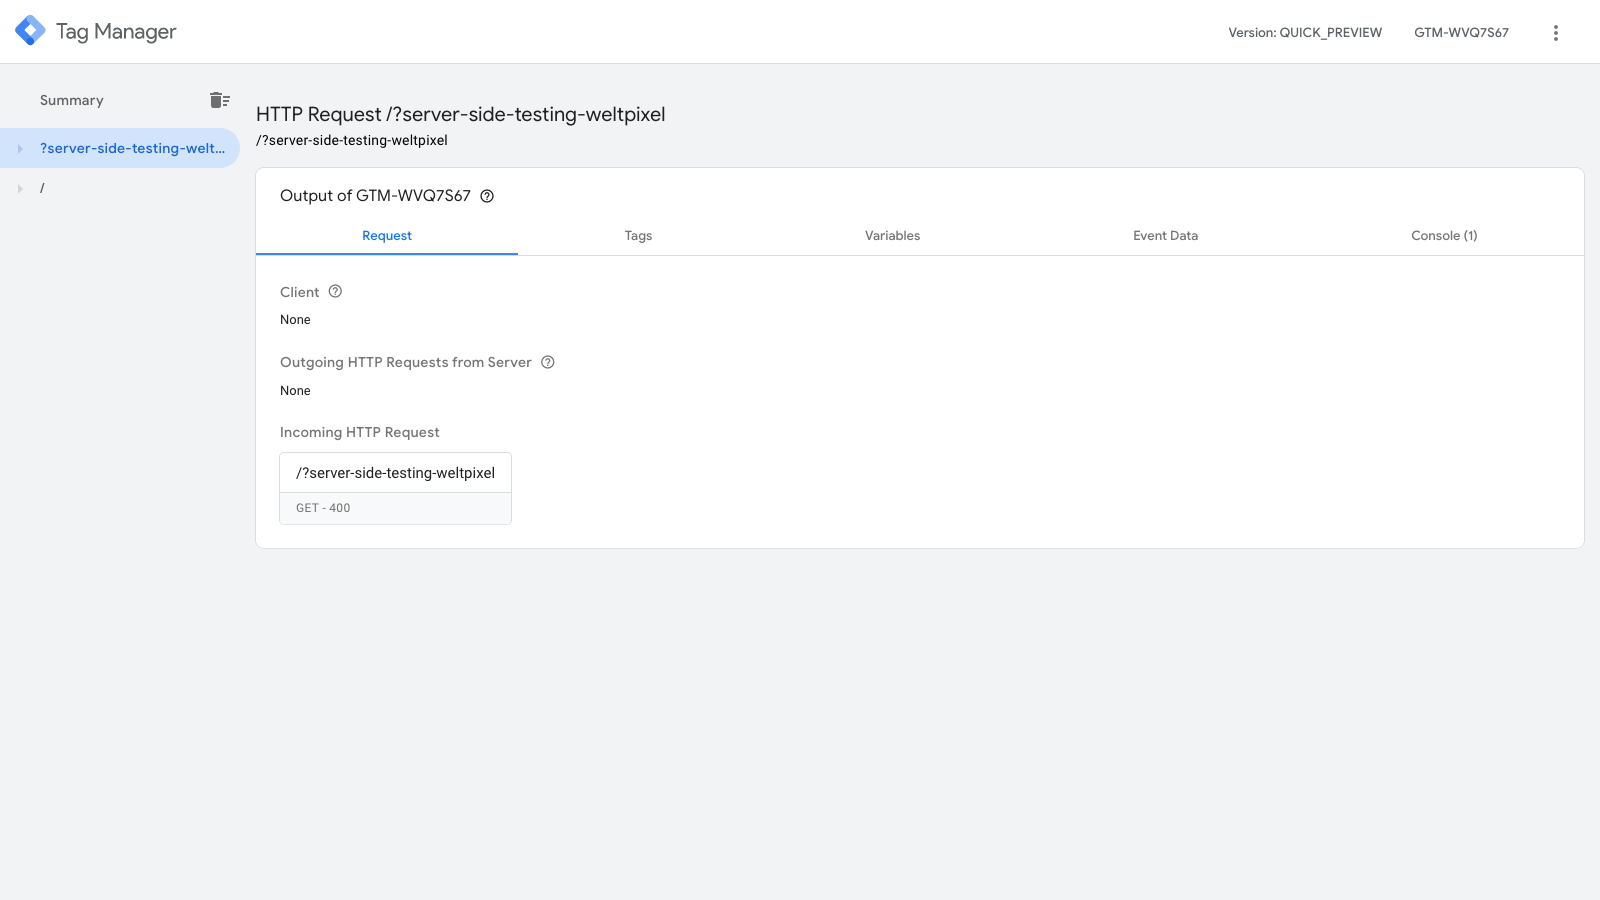
Access the Custom Domain you configured via your browser. You'll see a 400 error or a blank screen, but no worries, this is expected.
-
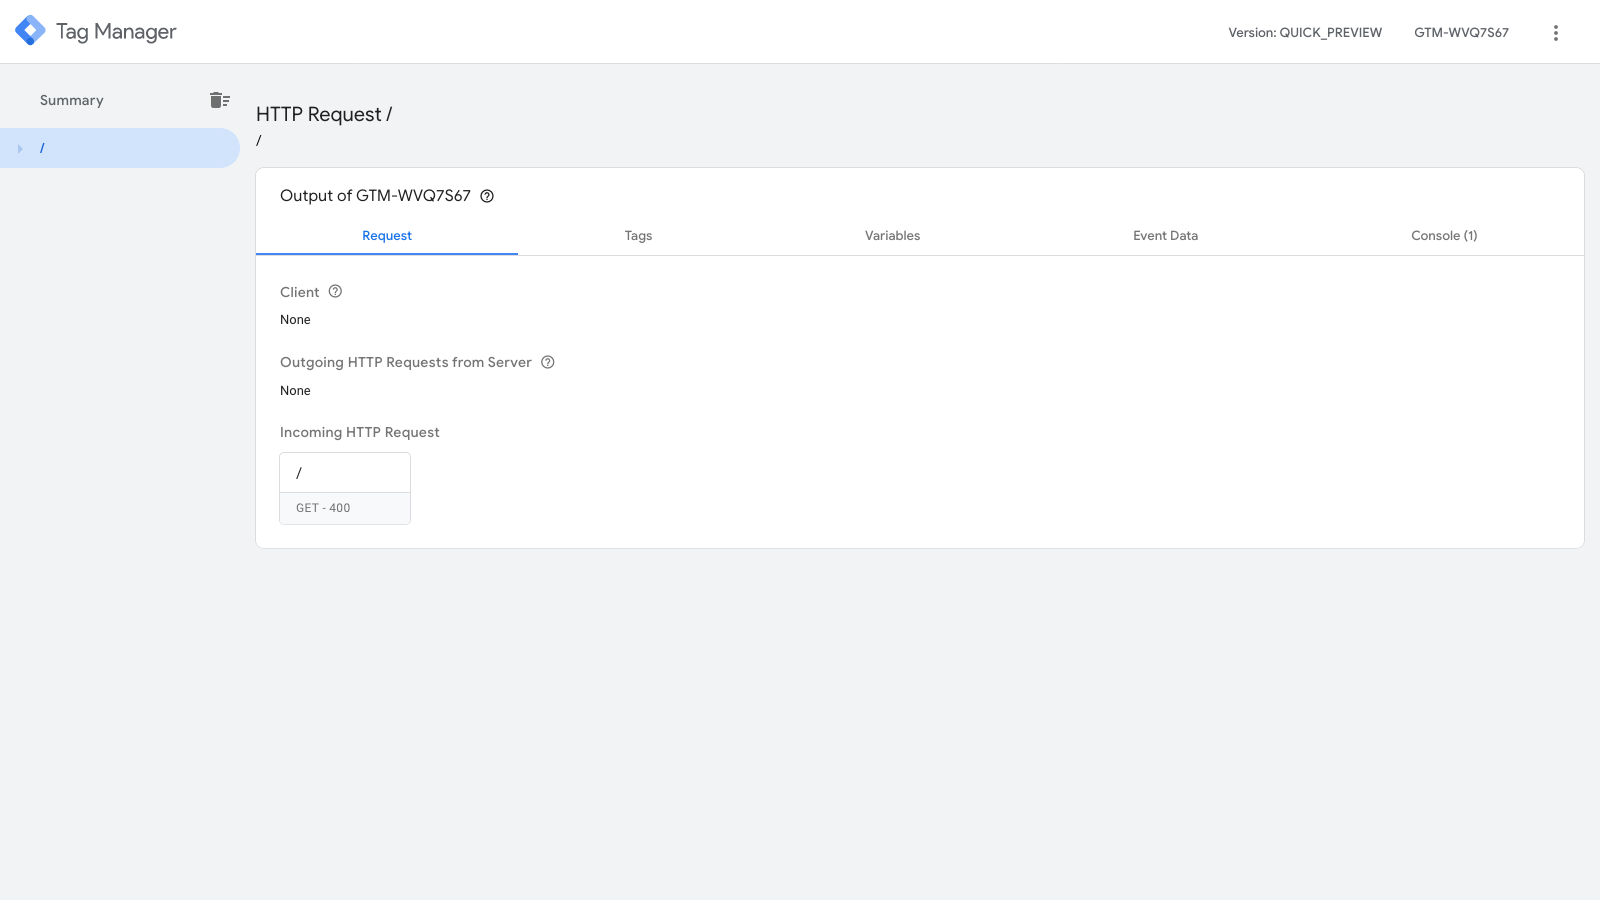
Next, head back into the Google Tag Manager Preview Mode that you have open and you'll see that there's an event in the Summary tab. Click on it and you'll see an incoming HTTP Request displayed in the Request tab. This is great because it means our visit to the web page was picked up by the server-side container!
-
Because we simply accessed the page via the browser, the incoming request doesn't say much or give us too many details, however, we can see that, when we add more details ourselves via a parameter added to the default URL, this is also picked up by the GTM container.
With this very simple test, we've just confirmed that the tagging server is correctly picking up request data, so we're ready to move on and see how to send data from the client-side tracking implementation over to the server-side Google Tag Manager container.
Send Data From Client-Side Tracking To The Server-Side Setup
Now that we're confident the server-side Google Tag Manager container can receive data, we're ready to perform another basic test and send data over from our client-side tracking GTM container. In this way, when a user accesses the website frontend, this data will also make it into the tagging server.
Note: It's highly recommended you do this on a development/staging website and Google Tag Manager container first, in order to make sure everything works as intended before you migrate the production tag configuration over.
-
Head over into your client-side Google Tag Manager container and find your Google Analytics tag under the Tags tab. Click on the tag, and then click on the Tag Configuration tab.
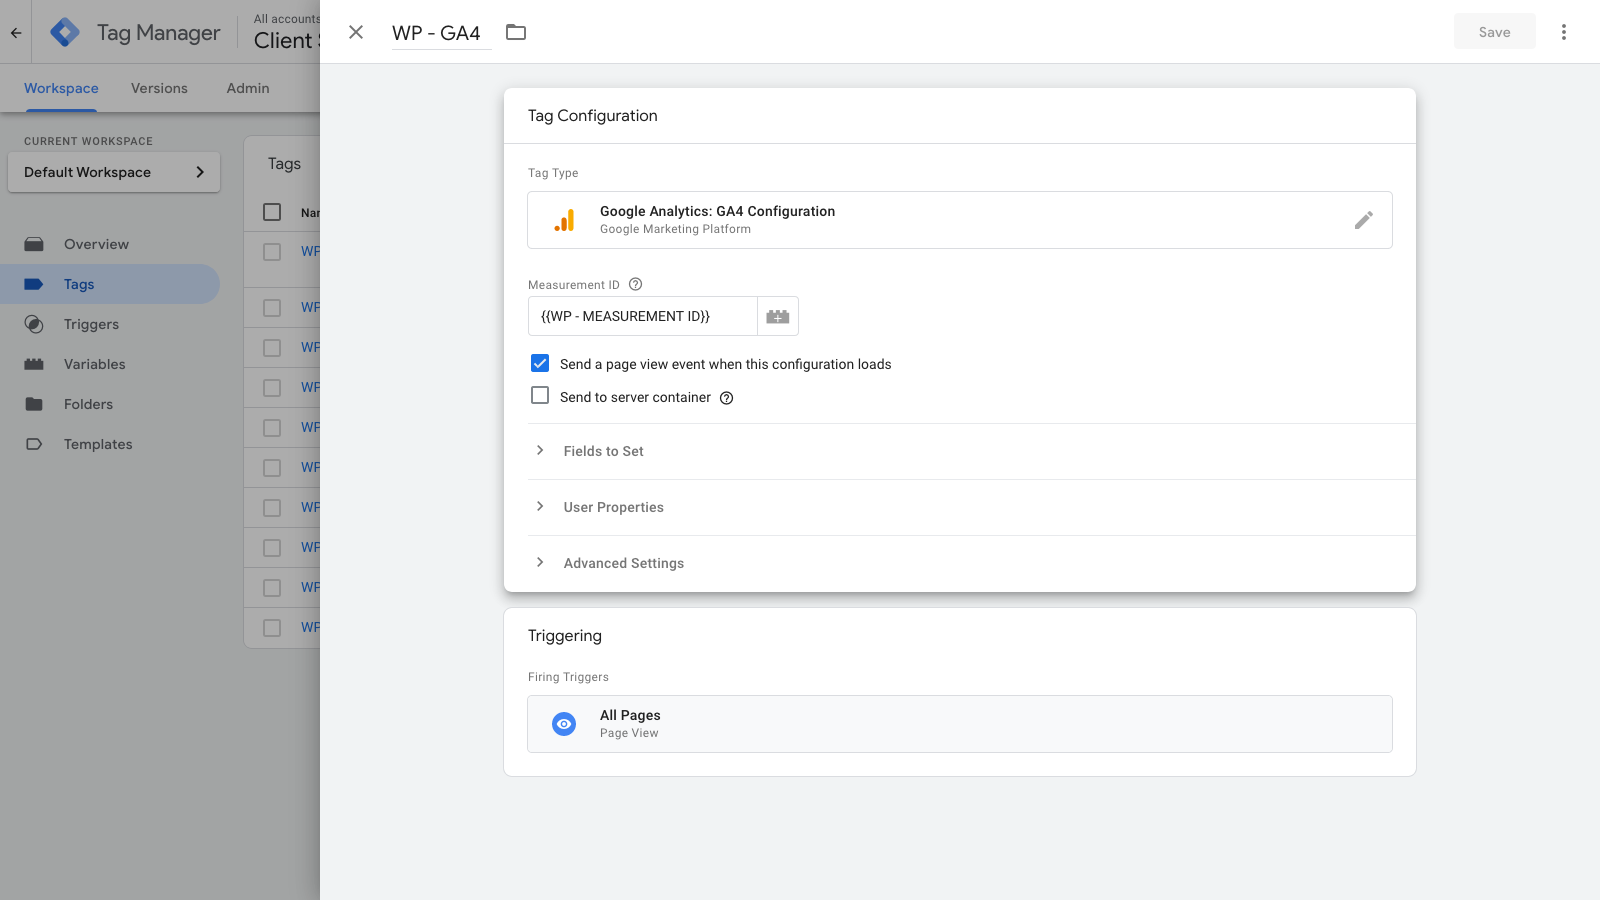
-
Next, check the Send to server container checkbox. Once you've done so, you'll need to input your Server Container URL, which is the custom domain we've configured for the server we created in the Google Cloud Platform.
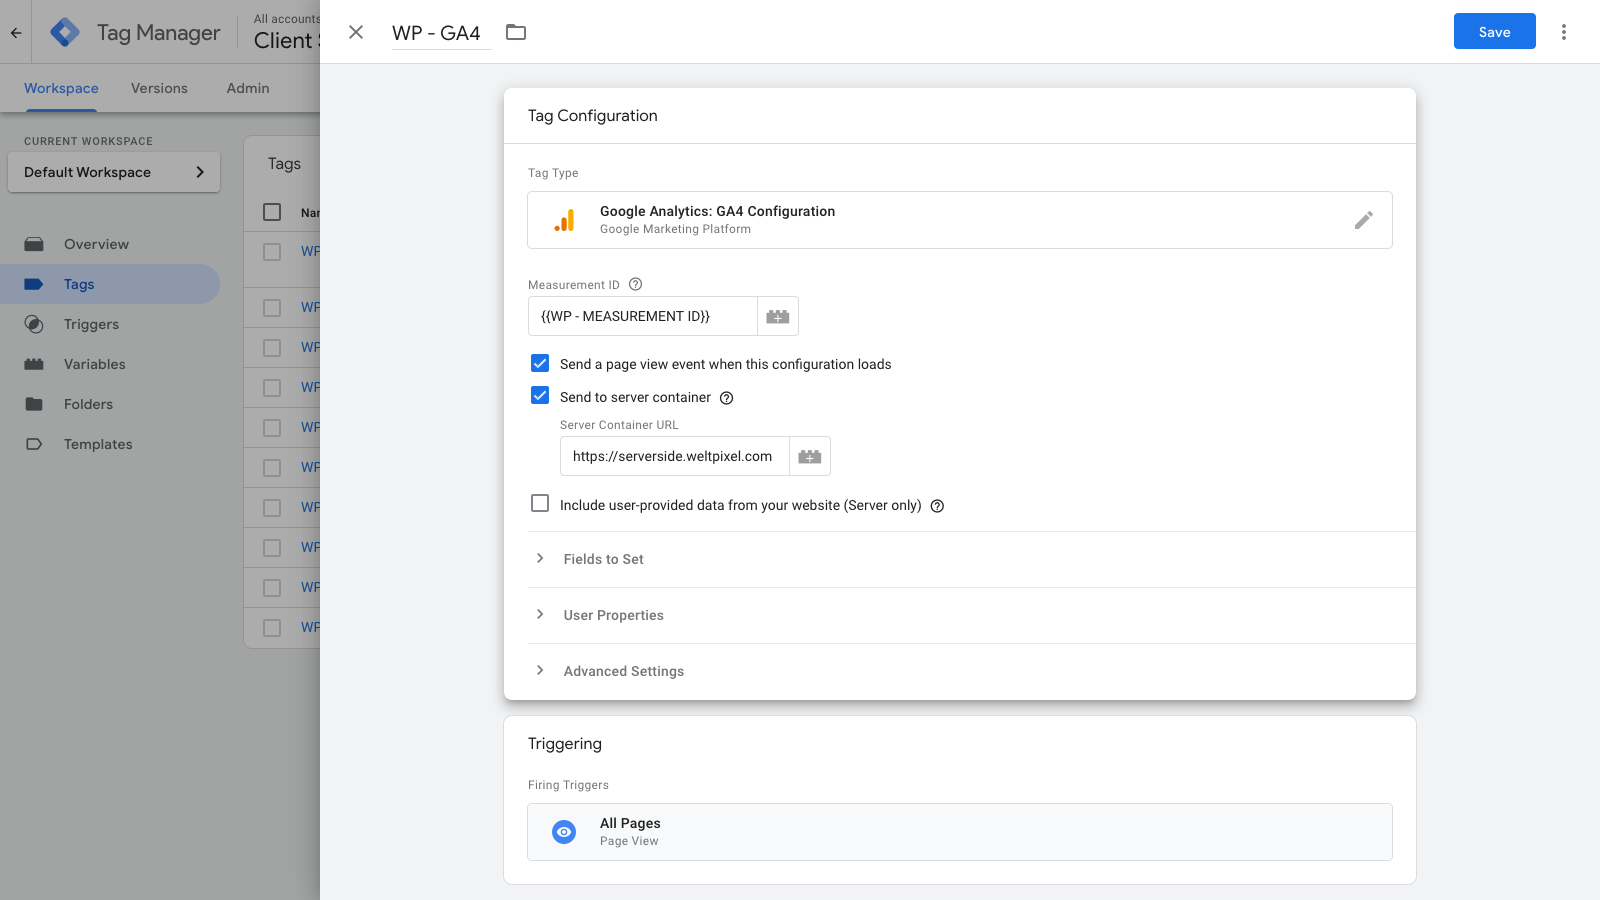
-
Click Save, and then Submit and Publish your GTM container to ensure the changes are updated.
With the GTM container published, you should now be able to fire up the Preview Mode via your client-side implementation and confirm that the data is indeed making it to the tagging server.
Check out all the steps in the guide here:
- Step 1: How to create a server-side GTM container
- Step 2: How to set up a custom domain for your GTM server-side container
- Step 3: How to send data to your GTM Server-Side Container
- Step 4: How to preview and debug the server-side container
- Step 5: How to monitor realtime server-side data in Google Analytics 4
- Step 6: How to move the Google Analytics 4 tagging server from testing mode into production mode
