
In the previous step, we went over the details of How To Send Data To Your GTM Server-Side Container, which means it should now be receiving the data from our Google Analytics Tag, bypassing the client-side container and, thus, being transformed from a third-party cookie into first-party!
In case you missed any of the configuration steps, or just need a refresher on why server-side tagging is so important, check out the Server-Side Tracking In Google Tag Manager (GTM) For Google Analytics 4 And Universal Analytics guide page for more details.
It's important to note that this process can be followed for Universal Analytics properties as well, however, Google will be decommissioning these starting with July 1st, 2023, so we recommend using Google Analytics 4.
Now that you've configured your Google Analytics Tag to send its data to the server-side Google Tag Manager container, it's time to preview and debug the container to ensure it's receiving the information correctly.
Debugging the Client-Side Container using Google Tag Manager Preview Mode
This part is quite straightforward and simple, as we've already been over it briefly in the previous step. Usually, Preview Mode is used to debug client-side and server-side containers before publishing them, so that you can make sure all the tags fire on the website as expected. It works by connecting the previewed site to Tag Assistant, and you can inspect the order and content of the fired tags.
For the purpose of this guide, we'll be using it to verify that our Page View tag is making it into our server-side container, so it won't matter if it's published or not. Let's take a look at the steps!
-
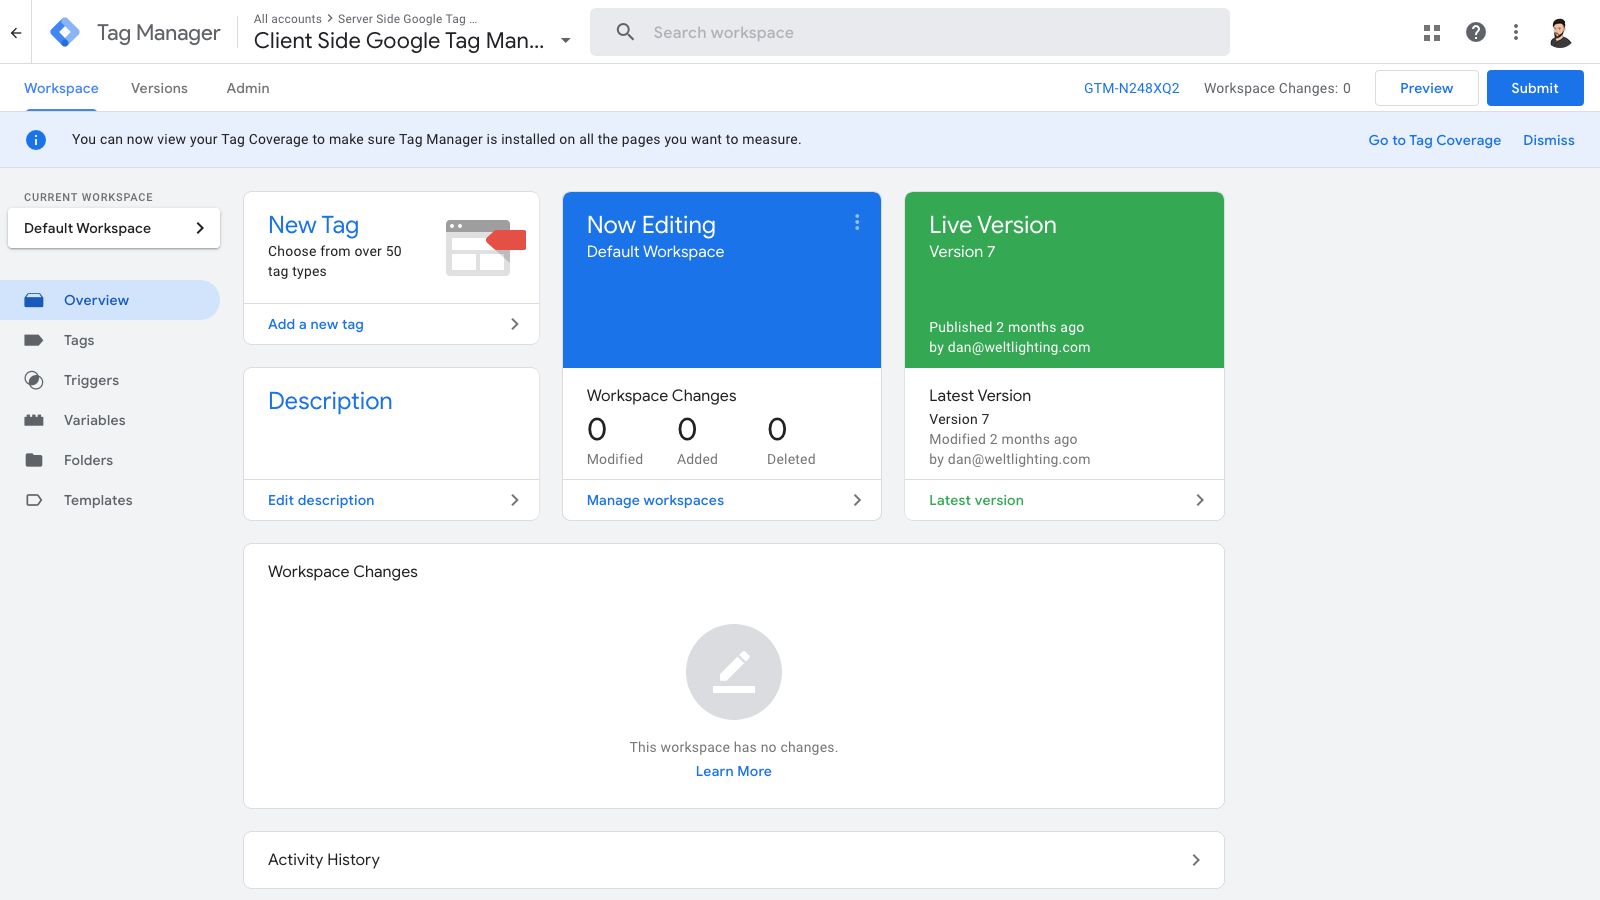
Access your Google Tag Manager account and select your client-side container.
-
Click the Preview button in the top right corner of the browser page. This will open up a new browser window in the Tag Assistant platform.
-
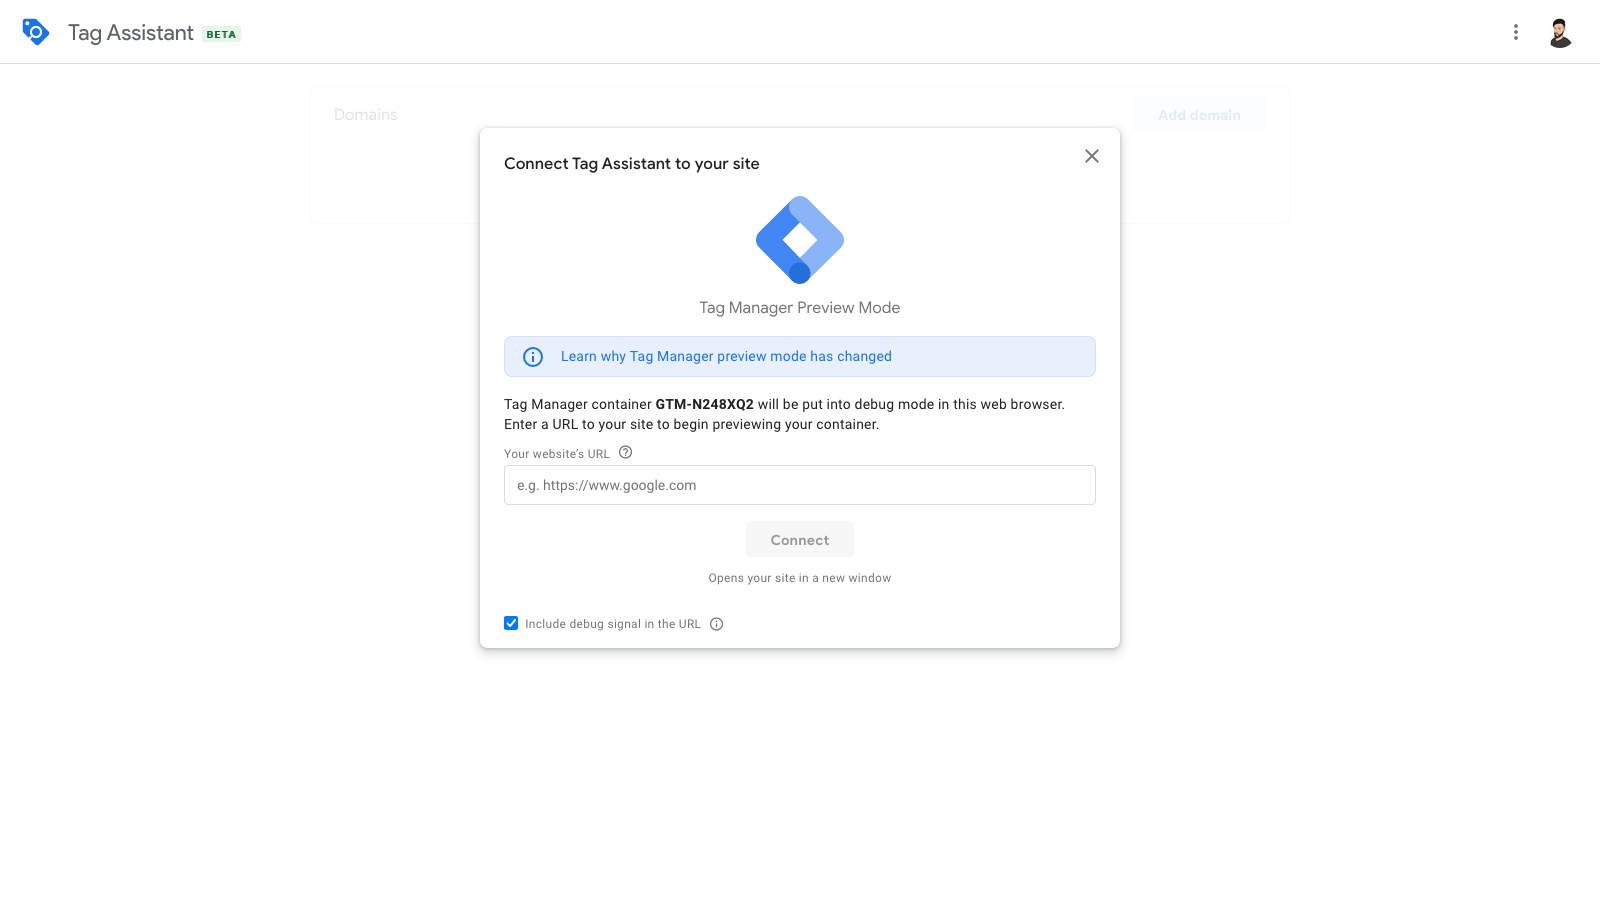
Input your website URL (if it's not pre-populated) and click Connect. This will open the link in another browser window. Once the website loads, you'll see the Tag Assistant box in the lower right-side corner of the page.
Note that this will also add some additional debug parameters to the URL, which may break certain websites or pages. If you know this is the case for you, uncheck the Include debug signal in the URL box.
-
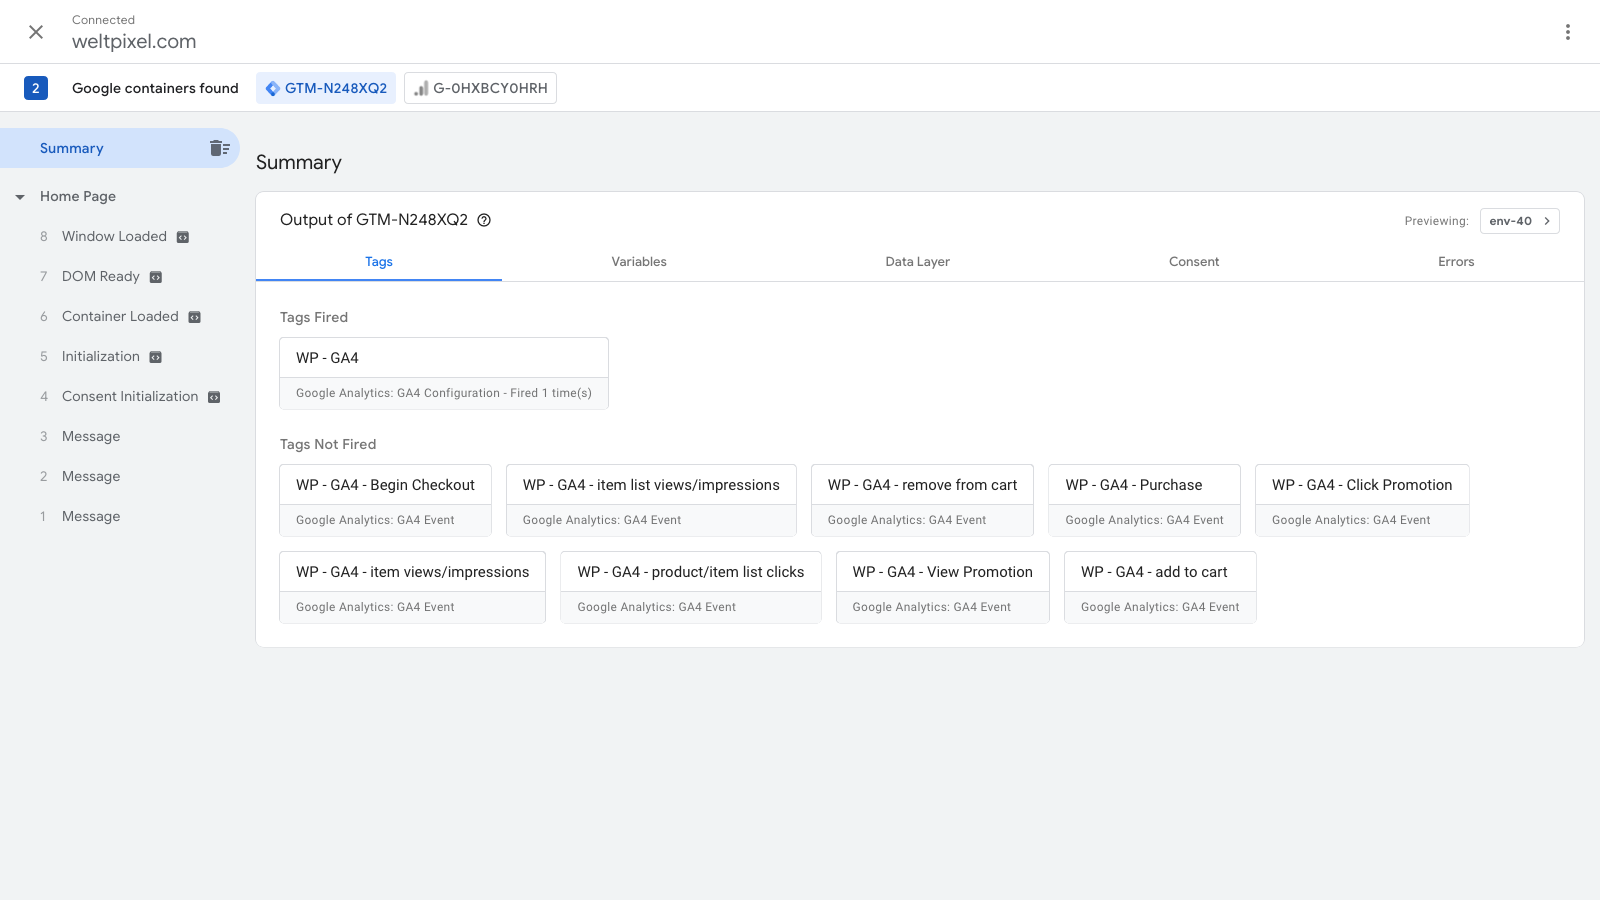
Switch the browser tab over to the Tag Assistant and you should see all the fired tags, including the Google Analytics (4) tag.
-
Click on it and a Tag Details window will show. Under Properties -> Server Container URL, you should see the URL you set up during the How To Set Up A Custom Domain For Your Server-Sider Container step of the configuration process.
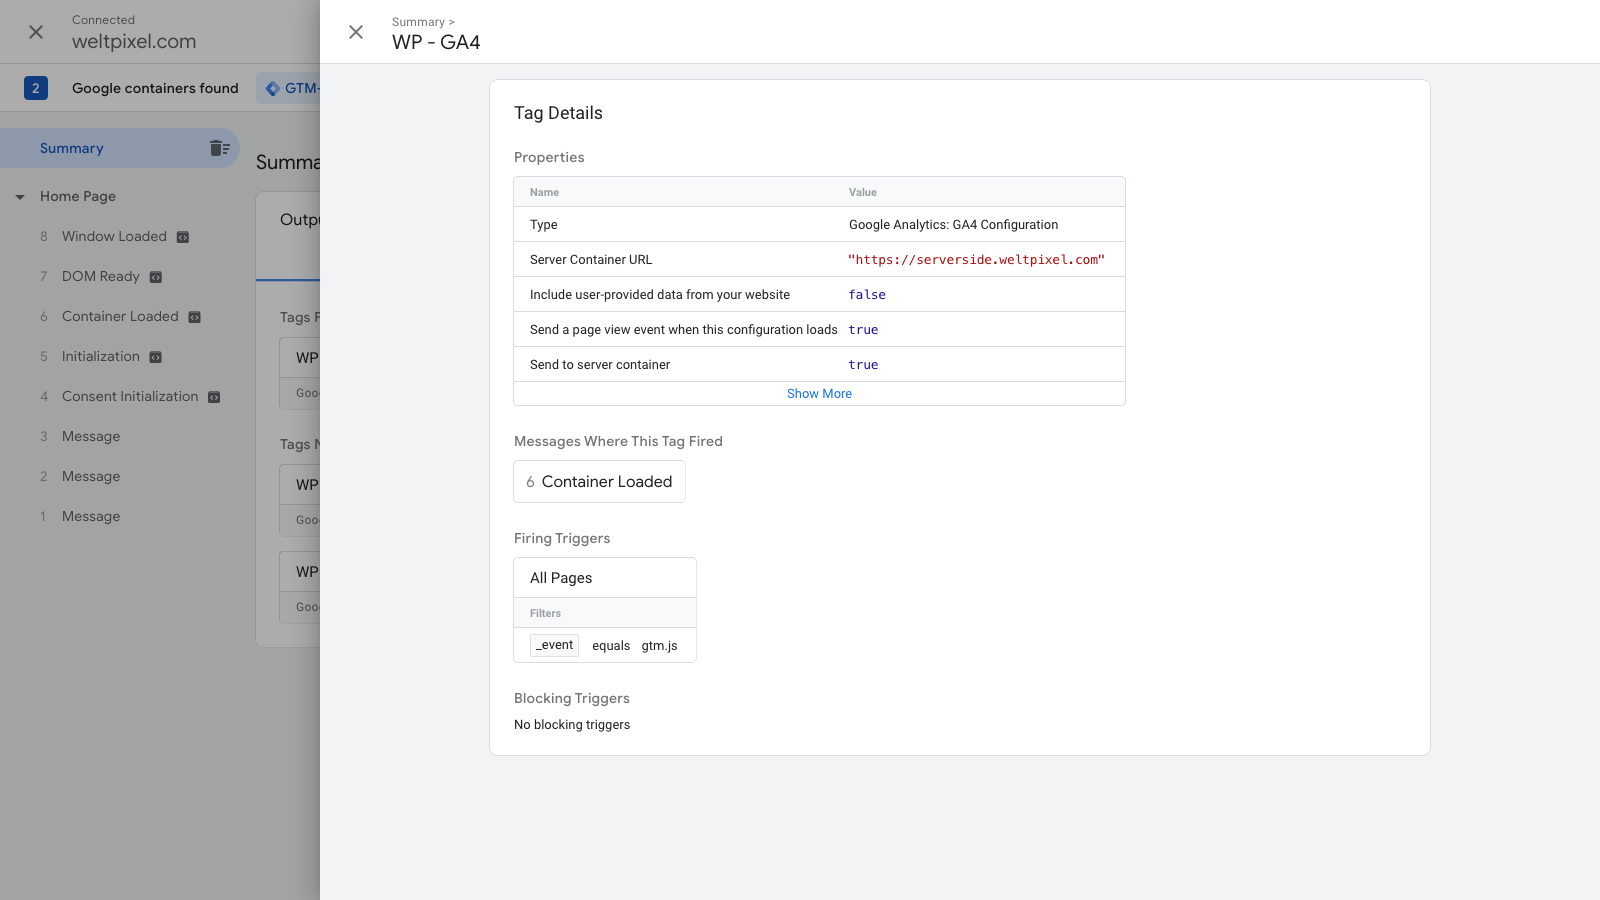
If you see the URL here, it means your client-side container is successfully sending the tag data across servers! The next step is to ensure the server-side container is receiving the requests.
Debugging the Server-Side Container using Google Tag Manager Preview Mode
Now that you've confirmed the client-side container is sending data, we can use the same process to confirm the server-side container is receiving data.
-
Switch to your server-side container in Google Tag Manager.
-
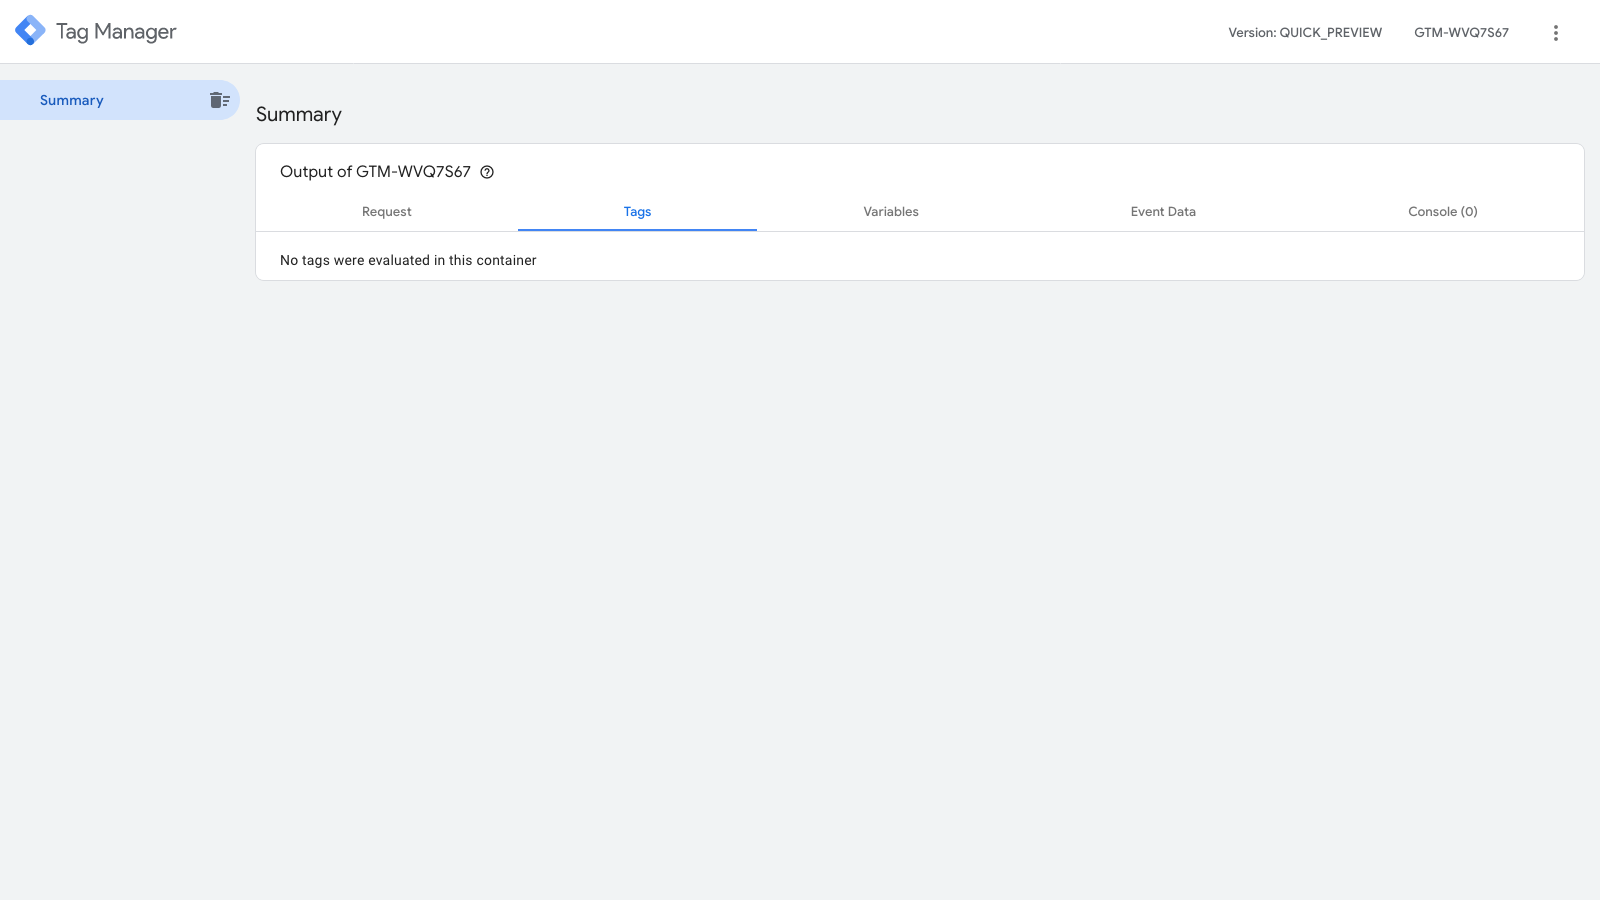
Click the Preview button again, which should open up another Tag Assistant. This time, you won't need to input the website URL. In the Summary section, you should see a message saying No tags were evaluated in this container.
-
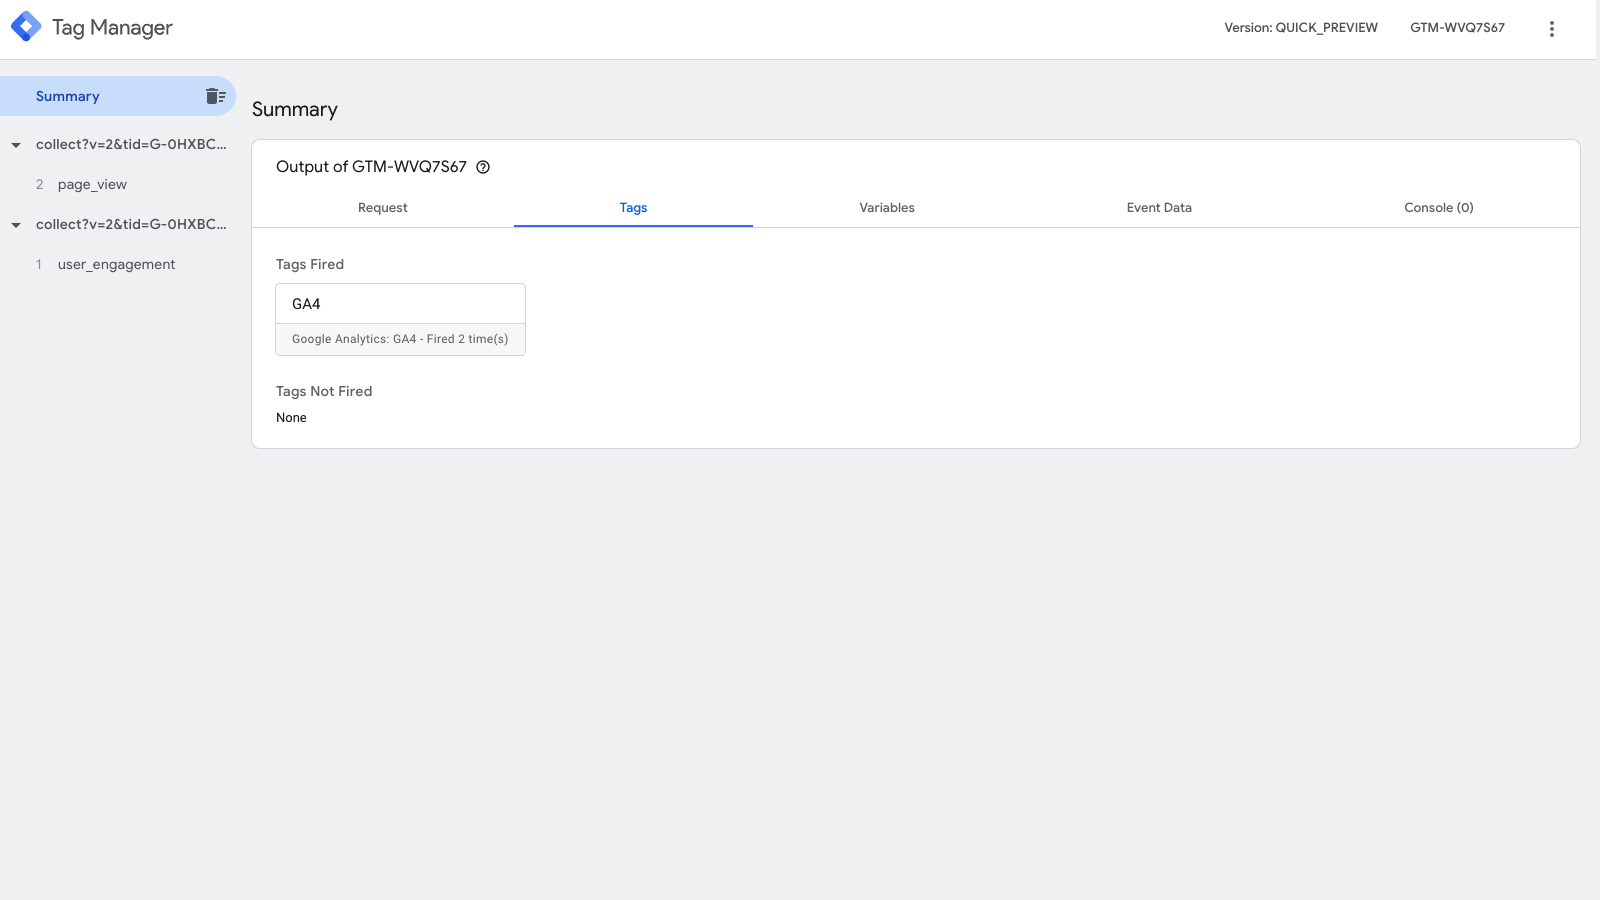
Head over to your website front-end (your Home Page) and refresh the browser tab. Switch back to the Tag Assistant window and you should see two events: page_view and user_engagement
-
Click on one of the events in the Summary section and head into the Request tab. You'll see the Client that was used to claim the request, which, in our example, is the Google Analytics 4 Client.
At a high level, a Client within a container is basically a detector, which determines what type of request it is and where to send the data further. There are multiple types of Clients that can be created.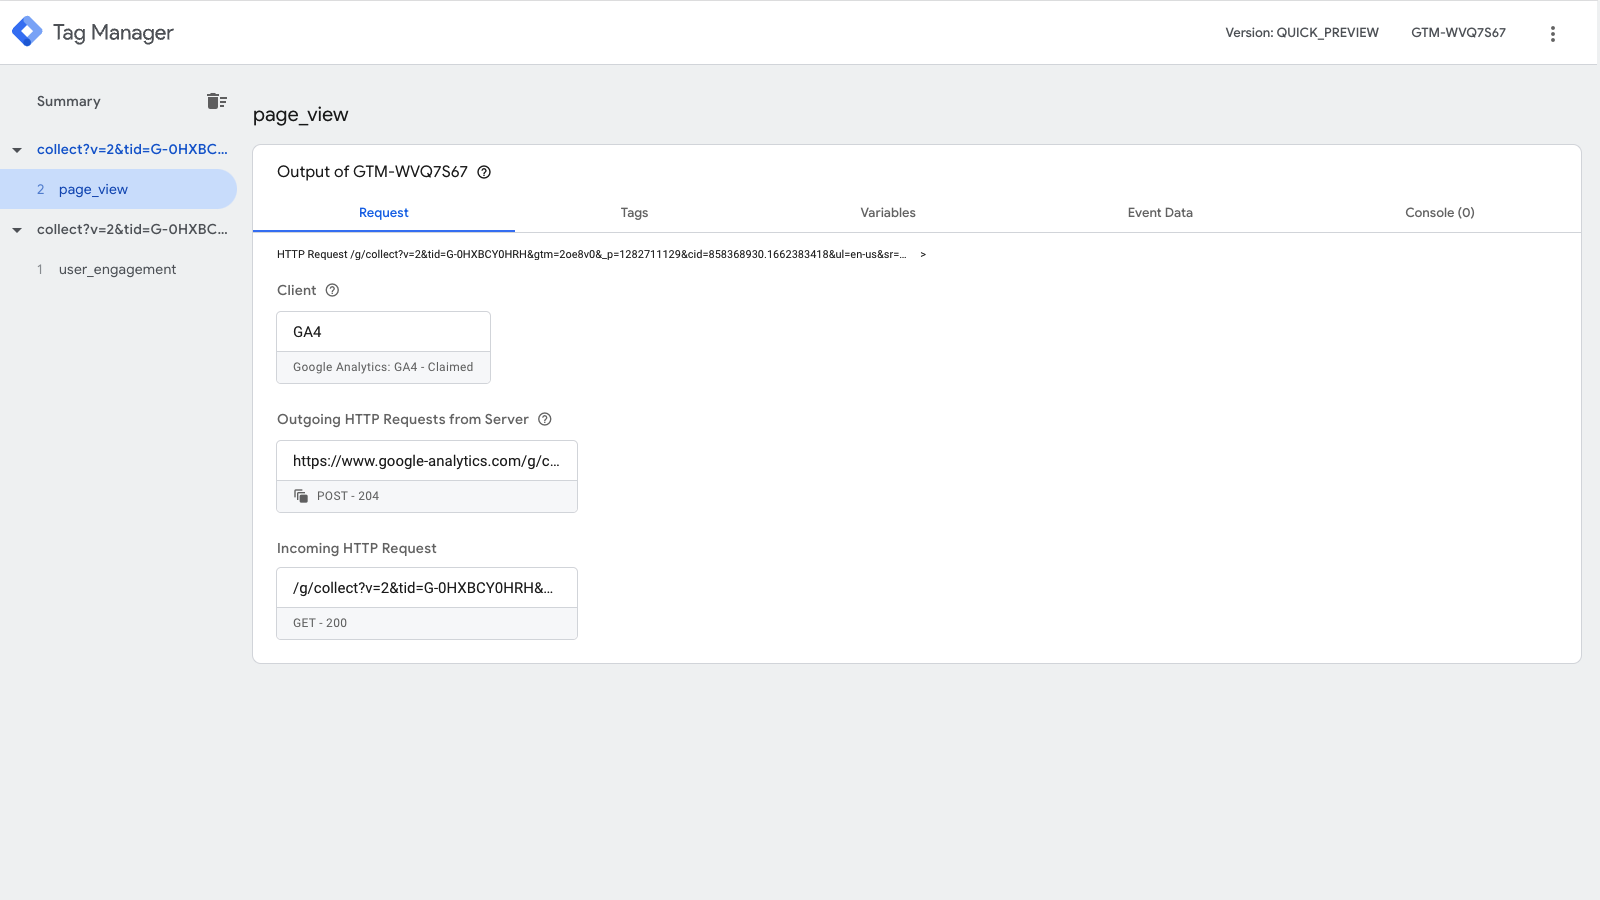
Once you've confirmed the events are being claimed by the correct Client, you should be done! The data from the Google Analytics (4) tag is now being sent over to the server-side container, which then sends it to Google Analytics (4) via a first-party cookie!
This allows your user tracking to function whether or not the client device has privacy settings or browsers that restrict 3rd party cookies, without requiring additional web development!
In the next step, we'll be taking a look at how to monitor data in the Google Analytics 4 dashboard in real time.
Check out all the steps in the guide here:
- Step 1: How to create a server-side GTM container
- Step 2: How to set up a custom domain for your GTM server-side container
- Step 3: How to send data to your GTM Server-Side Container
- Step 4: How to preview and debug the server-side container
- Step 5: How to monitor realtime server-side data in Google Analytics 4
- Step 6: How to move the Google Analytics 4 tagging server from testing mode into production mode